

Get ready to brighten your day with these incredibly flavorful and surprisingly healthy orange currant scones. Bursting with the vibrant zest of fresh oranges, generously studded with plump, sweet currants, and crowned with a luscious, tangy orange glaze, these scones are a delightful treat. They offer a perfect balance of comforting texture and invigorating citrus flavor, making them an ideal companion for your morning coffee, afternoon tea, or a special brunch.
What makes these particular scones stand out isn’t just their incredible taste, but also a clever addition that elevates their nutritional profile: wheat germ. This small but mighty ingredient subtly enhances the scones, transforming a classic indulgence into a “healthy-ish” delight you can feel good about enjoying. Prepare to fall in love with a scone that truly delivers on both flavor and wholesome goodness.
Deliciously Healthy Orange Currant Scones: A Zesty Treat for Any Time
The Enduring Appeal of Scones: More Than Just a Simple Biscuit
Scones hold a special place in the world of baked goods, often described as a delightful cross between a flaky biscuit and a tender cake. Their charm lies in their versatility and their comforting nature. Historically, scones have been a staple of British and Irish tea times, serving as a perfect vehicle for clotted cream and jam. However, their appeal extends far beyond these traditional pairings, adapting beautifully to various flavors and occasions.
Generally, scones come in two main categories: sweet and savory. Sweet scones, like the ones we’re making today, are typically enriched with fruits, citrus zests, chocolate chips, or nuts. They offer a gentle sweetness that complements hot beverages beautifully. Savory scones, on the other hand, might feature cheese, herbs, sun-dried tomatoes, or even bacon, making them wonderful alongside soups, stews, or as a flavorful accompaniment to a meal.
A common perception is that scones can be a bit dry. While it’s true that a well-made scone should have a slightly crumbly texture, they are absolutely designed to be enjoyed with a beverage. This is precisely why they pair so wonderfully with a warm cup of tea, a rich coffee, or even a refreshing glass of milk. For sweet scones, adding a generous drizzle of glaze isn’t just an option—it’s practically a requirement that transforms them into an even more decadent and moist experience. In my opinion, a perfectly glazed scone is nothing short of a culinary law!
Today, we’re taking a beloved classic and giving it a wholesome twist. These aren’t just any scones; they’re “healthy-ish” scones, thanks to the inclusion of a fantastic ingredient: wheat germ. This small addition makes a big difference, boosting their nutritional value without compromising on the delicious taste and tender texture you expect from a great scone.
Unlocking the Goodness: What Exactly is Wheat Germ?
You might have seen “wheat germ” on ingredient labels or in the baking aisle, but what exactly is it? Often overlooked, the “germ” is truly the heart of the wheat kernel. It’s the embryonic part of the grain, rich in nutrients, that would ordinarily sprout into a new wheat plant if left to germinate. During the modern milling process, which refines grains into white flour, the germ (along with the bran) is typically removed to extend shelf life and create a finer texture.
However, by removing the germ, we often miss out on a concentrated powerhouse of nutrition. Wheat germ is an incredible source of essential vitamins and minerals. It’s particularly renowned for its high content of Vitamin E, a potent antioxidant that supports immune function and skin health. Beyond that, it’s packed with B vitamins (like folate, thiamine, and niacin), which are crucial for energy metabolism and nervous system health. It also provides a significant amount of dietary fiber, aiding digestion and promoting satiety, and is a good source of essential fatty acids, vital for overall well-being.
Incorporating wheat germ into your diet is surprisingly easy and can be done in numerous delicious ways. Beyond enhancing our orange currant scones, it can be a fantastic addition to homemade pancakes, muffins, and bread recipes, lending a subtle nutty flavor and an extra layer of texture. For a quick nutritional boost, try stirring a spoonful into your morning oatmeal, blending it into your favorite protein shakes or smoothies, or sprinkling it generously over yogurt—a childhood favorite of many, including myself! Its versatility makes it a valuable pantry staple for anyone looking to add more wholesome goodness to their meals.

The Art of Baking Scones: A Step-by-Step Guide to Perfection
Gather Your Ingredients for Zesty Orange Currant Scones
Before diving into the mixing, ensure you have all your ingredients measured and ready. Precision is key in baking, especially when aiming for that perfect scone texture.
- For the Scones:
- 1¾ cups unbleached all-purpose flour
- ¼ cup wheat germ
- 3 tablespoons granulated sugar
- 1 tablespoon baking powder
- ½ teaspoon kosher salt
- ⅓ cup dried currants (or raisins, if preferred)
- Zest of 1 large, fresh orange
- 1¼ cups heavy cream
- 2 tablespoons unsalted butter, melted (for brushing)
- For the Orange Glaze:
- Juice of ½ fresh orange
- 2 tablespoons unsalted butter, melted
- 3½ tablespoons powdered sugar (confectioners’ sugar)
Preparation is Key: Setting Up for Scone Success
A little preparation goes a long way in ensuring your baking process is smooth and enjoyable, leading to wonderfully consistent results.
- Preheat Your Oven: Start by preheating your oven to 425°F (220°C). A hot oven is crucial for achieving that beautiful rise and golden-brown exterior on your scones.
- Prepare Your Baking Sheet: Line a large non-stick baking sheet with parchment paper. This step is a fantastic time-saver for cleanup and helps prevent sticking. If you’re out of parchment paper, simply use a reliable non-stick pan, though a little extra scrubbing might be in your future!
Mixing Your Masterpiece: From Dry to Wet Ingredients
The careful combination of ingredients is where the magic truly begins. Remember, gentle handling is often the secret to tender scones.

- Combine Dry Ingredients: In a large mixing bowl, measure and add the 1¾ cups of unbleached all-purpose flour, ¼ cup of wheat germ, 3 tablespoons of granulated sugar, 1 tablespoon of baking powder, and ½ teaspoon of kosher salt. Use a whisk to thoroughly combine these ingredients, ensuring the baking powder is evenly distributed for a consistent rise.
- Zest the Orange: Take your fresh orange and carefully zest the entire rind using a fine grater or microplane. Be sure to only remove the bright orange part and avoid the bitter white pith underneath. The zest provides intense citrus flavor and aroma.
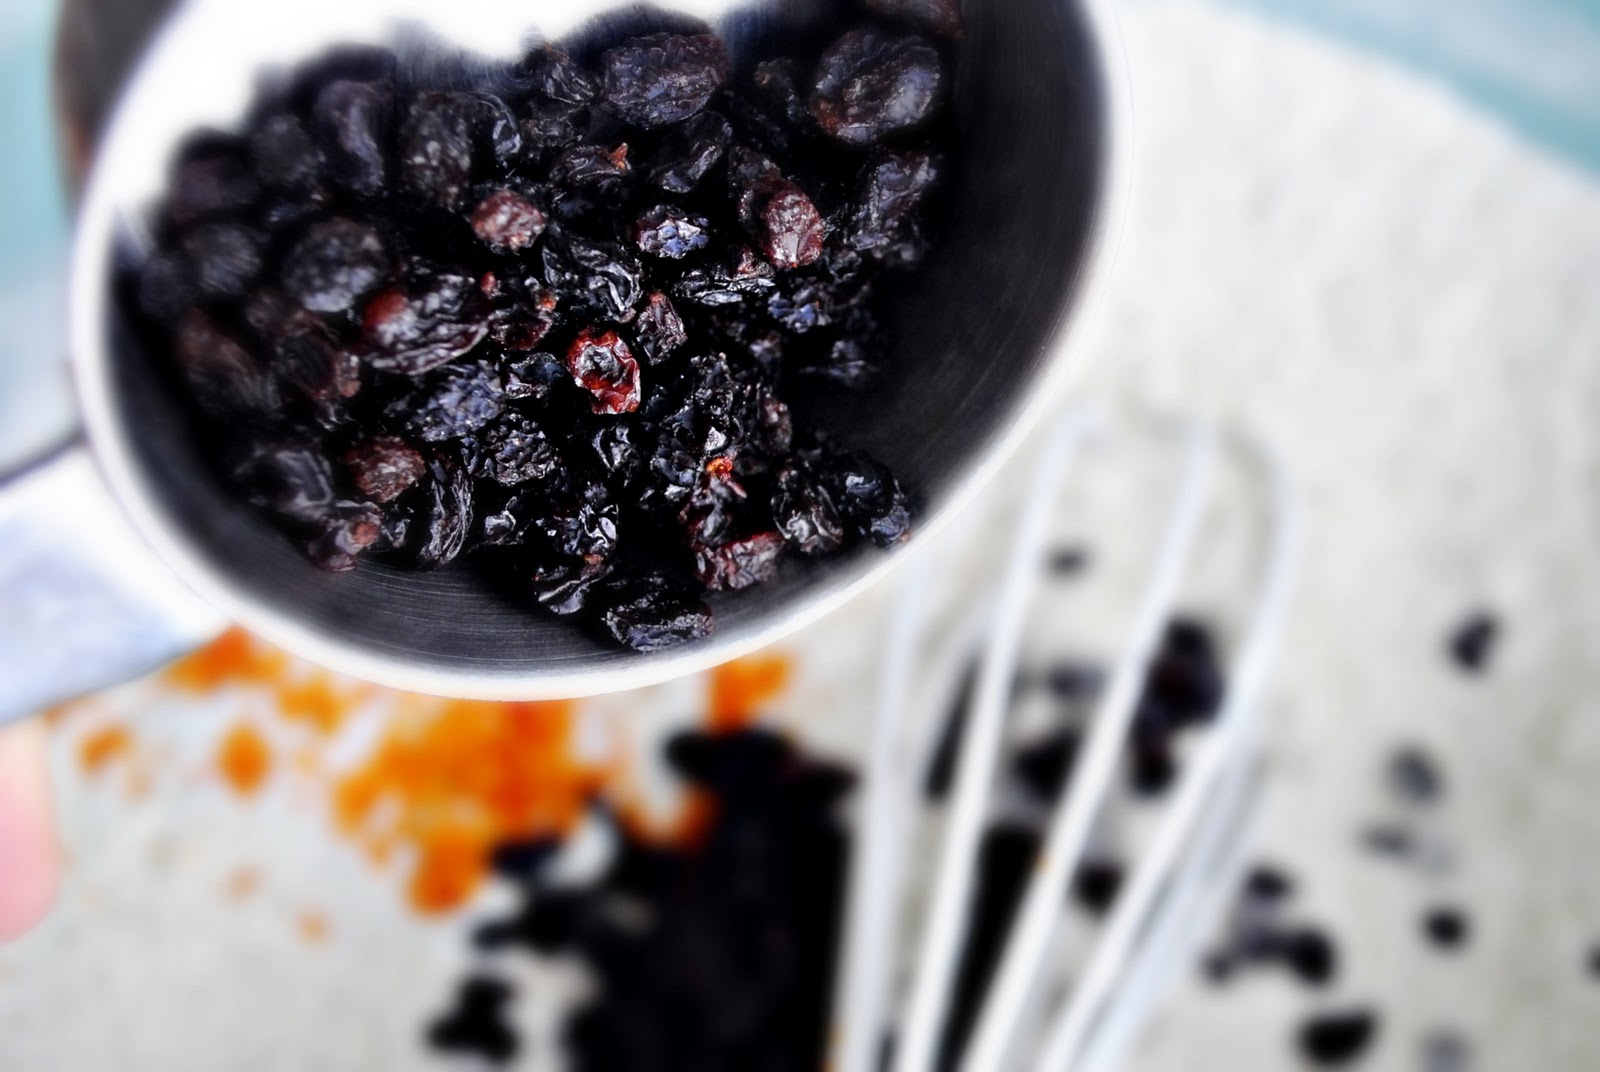
- Add Flavorful Accents: Add the freshly zested orange peel and the ⅓ cup of currants to your dry ingredient mixture. Whisk everything together again, making sure to break up any clumps of zest so that it’s evenly dispersed throughout the flour mixture. This ensures every bite of your scone is packed with flavor.
- Incorporate Wet Ingredients: Pour in the 1¼ cups of heavy cream. Using a sturdy rubber spatula or a wooden spoon, gently mix the ingredients together. Stir just until everything is combined and a soft, cohesive dough forms. It’s crucial not to overmix, as this can develop the gluten in the flour too much, leading to tough, rather than tender, scones. A slightly shaggy dough is perfectly fine.


Shaping and Cutting: The Perfect Scone Form
Once your dough is mixed, it’s time to transform it into the classic scone shape, ready for baking.

- Prepare Work Surface: Transfer the dough onto a clean surface that has been lightly dusted with a bit of extra flour. This prevents sticking and makes handling the dough much easier.
- Shape the Dough: Gently gather the dough and form it into a round ball. Use the warmth of your hands to coax it into shape without overworking it.
- Flatten and Cut: With the palm of your hand, gently flatten the dough into a large circle, approximately 8 inches in diameter and about ½ inch thick. Once flattened, use a sharp knife or a bench scraper to cut the circle into 8 equal wedges. For perfectly uniform scones, a bench scraper works wonders, but a good knife will do the trick just as well.


Baking to Golden Perfection and Glazing the Treat
The final steps involve baking your scones until golden and then adding that irresistible finishing touch: the orange glaze.

- Arrange and Brush: Carefully arrange the scone wedges on your prepared non-stick baking sheet, leaving a little space between each one. Take the 2 tablespoons of melted unsalted butter and lightly brush it over the tops and sides of each scone. This butter bath helps create a beautiful golden crust and adds to the rich flavor.
- Bake: Transfer the baking sheet to your preheated oven and bake for approximately 14-18 minutes. Keep a close eye on them, as oven temperatures can vary. The scones are ready when they are lightly golden brown on top and firm to the touch. It’s okay if they’re a tiny bit darker than expected; a little extra crispness never hurt anyone! (If they do get too dark on the bottom, a quick scrape can fix it, but you’ll still enjoy every bite!)
- Cool Slightly: Once baked, transfer the scones to a wire rack to cool slightly. While they’re still warm, they’re perfectly poised to absorb that delicious glaze.


The Grand Finale: Drizzling with a Zesty Orange Glaze
While the freshly baked aroma of the scones is undoubtedly tempting, they truly reach their pinnacle with a delightful glaze. A glaze adds a touch of sweetness, a burst of citrus, and that irresistible shine that makes them look as good as they taste.

- Prepare the Glaze: In a small bowl, combine the juice of half a fresh orange, 2 tablespoons of melted unsalted butter, and 3½ tablespoons of powdered sugar. Whisk these ingredients together until smooth and free of lumps. You should have a pourable, slightly thick consistency. If it’s too thick, add a tiny bit more orange juice; if too thin, add a touch more powdered sugar.
- Glaze the Scones: Drizzle the prepared orange glaze generously over the warm scones. As the glaze melts slightly and cascades down the sides, it creates a beautiful visual and an even more delicious flavor profile. Don’t worry if some spills onto the plate; those glaze-soaked crumbs are pure heaven and perfect for scooping up with your fingers! The intense orange flavor of the glaze perfectly complements the currants and the subtle nuttiness of the wheat germ in the scones.

With a steaming cup of coffee or tea nearby, you’ll be ready to savor every bite of these truly lovely treats. The combination of textures and flavors is simply amazing, making every mouthful a delightful experience.

Tips for Scone Perfection & Creative Variations
Ensuring Tender, Fluffy Scones Every Time
- Don’t Overmix: This is perhaps the most critical rule for tender scones. Overmixing develops the gluten, resulting in tough, chewy scones. Mix just until the ingredients are combined.
- Keep Ingredients Cool (Mostly): While this recipe uses melted butter for brushing, for the dough itself, colder heavy cream can help create a lighter texture.
- Accurate Measurements: Baking is a science. Use proper measuring cups and spoons, especially for flour, sugar, and leavening agents.
- Fresh Zest is Best: The flavor of fresh orange zest is incomparable. Avoid using dried zest, which lacks the essential oils for that bright citrus punch.
- Don’t Overbake: Watch your scones carefully. They should be lightly golden, not dark brown. Overbaking can dry them out.
Creative Variations to Try
While the orange currant combination is a classic, don’t hesitate to experiment with other flavors:
- Different Citrus: Lemon or grapefruit zest can be lovely substitutes for orange.
- Alternative Dried Fruits: Try cranberries, chopped apricots, dates, or even blueberries (fresh or frozen, but frozen works well in scones).
- Add Nuts: Toasted pecans, walnuts, or almonds can add a delightful crunch and nutty flavor.
- Spice It Up: A pinch of cinnamon, cardamom, or nutmeg can warm up the flavor profile.
- Savory Scones: Omit the sugar, and add cheese, chives, sun-dried tomatoes, or even a hint of black pepper for a savory twist.
- Chocolate Chips: A perennial favorite, mini chocolate chips pair wonderfully with orange zest.
A Delight for All Ages: Kids Love Them Too!
These orange currant scones aren’t just a sophisticated treat for adults; they’re also a massive hit with younger palates. As a testament to their universal appeal, my own girls absolutely adored them as an after-school snack! The bright citrus flavor, combined with the sweet currants and comforting texture, makes them an irresistible choice for any family gathering, breakfast, or an unexpected snack.
The beauty of homemade scones is that they can be enjoyed in so many ways. They are perfect for quiet mornings, bustling brunches, or simply as a comforting pick-me-up during a busy day. And with the added health benefits of wheat germ, you can serve them knowing you’re offering a treat that’s both delicious and a little bit good for you.
Enjoy! If you give this Orange Currant Scone recipe a try, I’d love to hear from you! Snap a photo and tag me on Twitter or Instagram!

Orange Currant Scones Recipe
Healthy orange currant scones are bright with orange zest, studded with currants and then drizzled with a delicious orange glaze.
Yield: 8 scones
Prep Time: 20 mins
Cook Time: 18 mins
Additional Time: 7 mins (for cooling/glazing)
Total Time: 45 mins
Ingredients
FOR THE SCONES:
- 1¾ cups unbleached all-purpose flour
- ¼ cup wheat germ
- 3 tablespoons sugar
- 1 tablespoon baking powder
- ½ teaspoon kosher salt
- ⅓ cup currants
- Zest of 1 orange
- 1¼ cups heavy cream
- 2 tablespoons unsalted butter, melted
FOR THE GLAZE:
- Juice of ½ orange
- 2 tablespoons unsalted butter, melted
- 3½ tablespoons powdered sugar
Instructions
For the Scones:
- Preheat oven to 425°F (220°C).
- In a large bowl, whisk together the flour, wheat germ, sugar, baking powder, and salt. Stir in the zest of one orange and the ⅓ cup of currants.
- Add the heavy cream, and stir gently with a spatula just until the ingredients are combined and a dough forms. Be careful not to overmix.
- Place the dough onto a lightly floured surface. Gently work the dough to form a round ball, then flatten it with the palms of your hand into an 8-inch circle, about ½ inch thick. Cut into 8 uniform wedges.
- Arrange the scone wedges on a non-stick baking sheet (or one lined with parchment paper). Brush the tops and sides of the scones evenly with the 2 tablespoons of melted butter.
- Bake for about 14-18 minutes, or until the scones are lightly golden brown on top and cooked through. Ovens vary, so monitor them closely.
- Transfer the baked scones to a wire rack and let them cool slightly while you prepare the glaze.
For the Glaze:
- In a small bowl, combine the juice of half an orange, 2 tablespoons of melted butter, and 3½ tablespoons of powdered sugar. Whisk thoroughly until smooth.
- Drizzle the orange glaze generously over the warm scones. Serve immediately and enjoy!
Nutritional Information (per scone, approximate)
Serving: 1 scone
- Calories: 344kcal
- Carbohydrates: 38g
- Protein: 5g
- Fat: 20g
- Saturated Fat: 12g
- Polyunsaturated Fat: 1g
- Monounsaturated Fat: 6g
- Trans Fat: 1g
- Cholesterol: 66mg
- Sodium: 321mg
- Potassium: 189mg
- Fiber: 2g
- Sugar: 12g
- Vitamin A: 782IU
- Vitamin C: 14mg
- Calcium: 135mg
- Iron: 2mg
Author: Laurie McNamara
Course: Breads & Baked Goods
Cuisine: British