
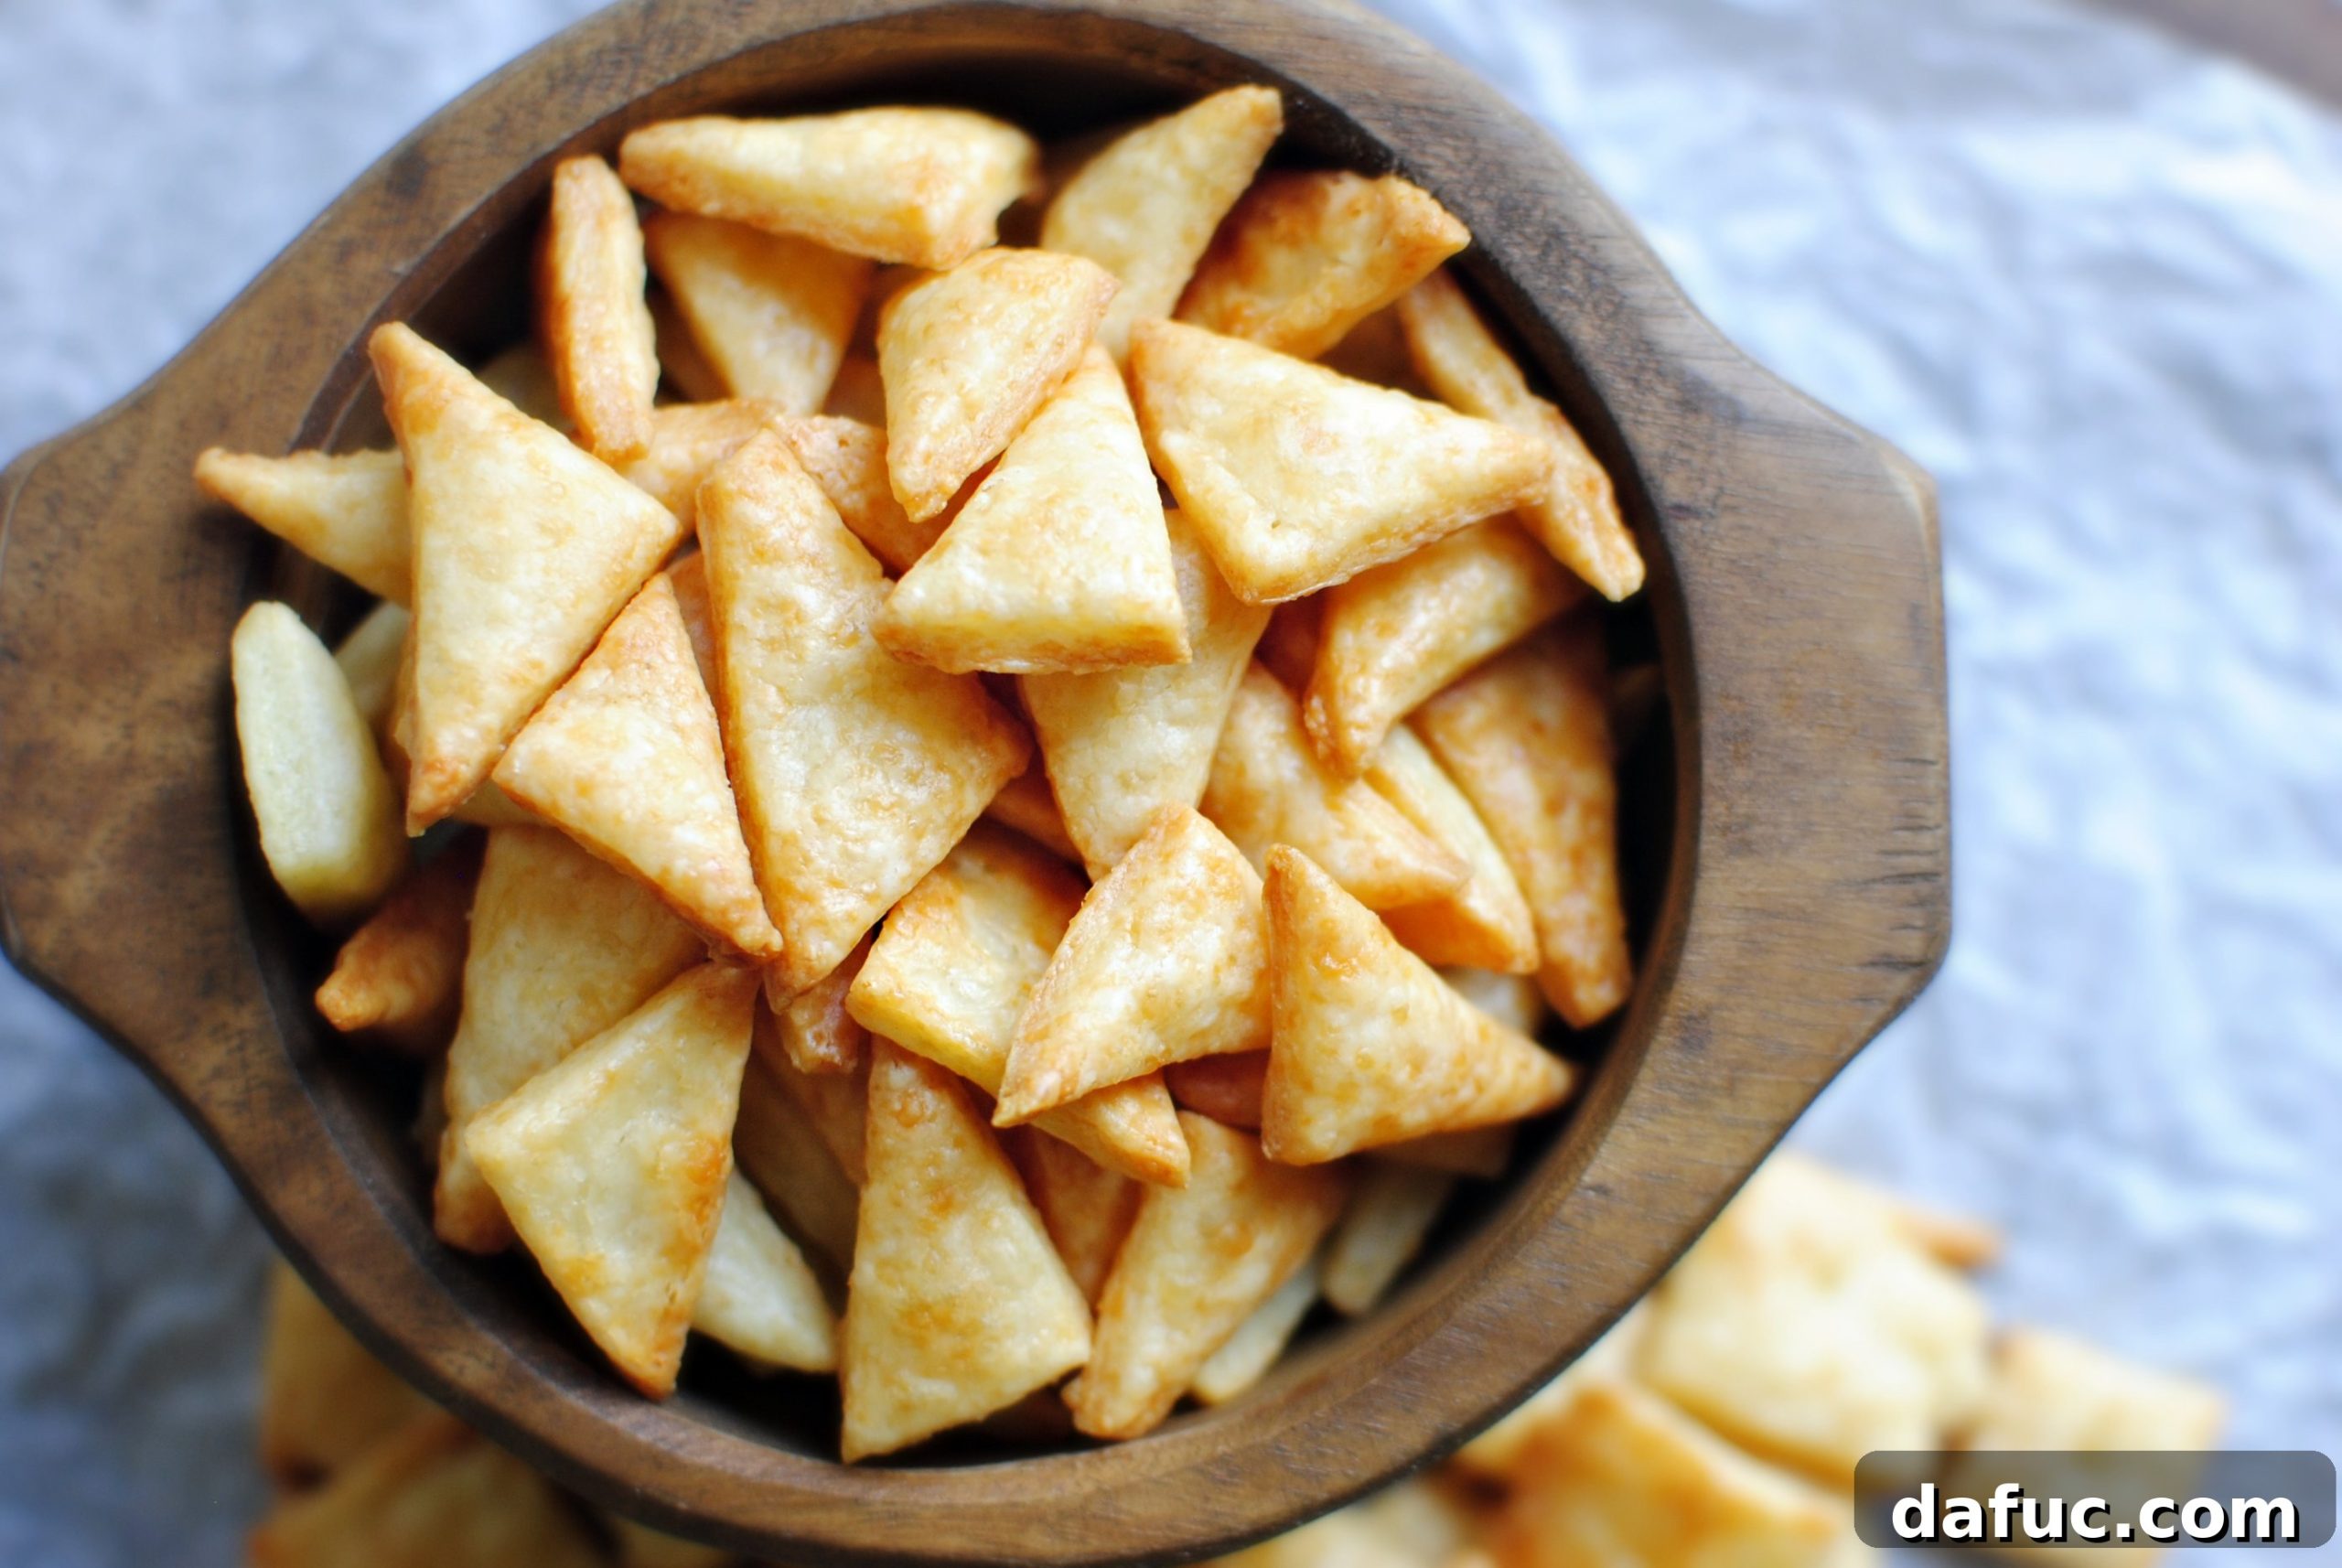
Homemade White Cheddar Parmesan Cheez-Its: Your Ultimate Cheesy Snack Guide
Imagine biting into a perfectly crisp, savory cracker, bursting with the sharp tang of white cheddar and the rich, nutty notes of Parmesan. These aren’t just any crackers; they’re your very own homemade White Cheddar Parmesan Cheez-Its, a delightful upgrade to a classic snack. Whether you enjoy them by the handful, sprinkle them over a warm bowl of soup for an irresistible crunch, or pair them with your favorite dips, these homemade cheesy bites are guaranteed to become a household favorite. Forget the store-bought versions; once you taste the fresh, wholesome flavor and superior texture of these crackers, there’s simply no going back to the mass-produced alternatives.
From Childhood Aversion to Lifesaving Snack: My Cheez-It Journey
Growing up, my world of crackers was quite limited, mostly confined to the humble Saltine and the ubiquitous Cheez-It. Back then, grocery store aisles weren’t the elaborate showcases of crisps, wafers, and artisanal crackers we see today. The options for inexpensive, readily available crackers were few and far between, or at least, that’s what I perceived. Despite the limited selection, Saltines always held a special place in my heart – and they still do! We’d enjoy them regularly; crumbling them into hearty chili, floating them atop comforting soups, or simply slathering them with butter for a quick, satisfying snack. My loyalty to Saltines remains unwavering, a testament to their simple charm and versatile nature.
However, my children, with their ever-evolving palates, developed a profound love for Cheez-Its. This was quite ironic, as I distinctly remember detesting them as a child. The smell seemed peculiar, almost artificial, and I was convinced they contributed to bad breath. The thought of deliberately eating something that might affect my breath was enough to keep me far away. “Did I mention I HATED them?!” I often recall thinking with a shake of my head, a touch of exasperation at my daughters’ unwavering adoration for the very snack I once scorned. It seemed like a cosmic joke that my own offspring would embrace the cheesy cracker I so vehemently rejected.
The Unexpected Epiphany: How a Vending Machine Saved My Culinary Perspective
My feelings about Cheez-Its took an unexpected, and frankly, life-saving turn one fateful Sunday. I was deep into a long and demanding shift at work, and as the hours wore on, I found myself approaching what felt like genuine starvation. My last desperate hope for sustenance lay in the hospital vending machine, which offered a rather meager selection: a pack of Double Mint gum and, to my dismay, a lonely bag of white cheddar Cheez-Its. With no other viable options, I reluctantly purchased them, bracing myself for a familiar wave of childhood disdain.
Yet, as I savored each cheesy, crunchy bite, something shifted. I found myself moaning in sheer delight, proclaiming aloud how “flippin’ fantastic” they were and “worth every stinking calorie.” It was in that very moment of unexpected pleasure – a moment born out of necessity – that a thought sparked with brilliant clarity: “I could absolutely make these things myself.” This culinary revelation wasn’t just about recreating a snack; it was about elevating it. I envisioned a homemade version that captured the nostalgic flavor but with a sophisticated, gourmet touch. The idea resonated with the comforting familiarity of homemade goldfish crackers, but with that distinctive, sharp white cheddar Cheez-It twist that had just rescued me from my hangry state. The prospect of crafting these cheesy delights from scratch, controlling every ingredient, and perfecting their texture became an exciting new project, promising a superior snack experience.
Why Homemade Cheez-Its Are Unquestionably Superior
Beyond the simple satisfaction of a successful DIY kitchen project, making your own White Cheddar Parmesan Cheez-Its offers a multitude of advantages that elevate them far above their store-bought counterparts. The most significant benefit is the ability to choose high-quality, fresh ingredients. This ensures a superior flavor profile and an undeniable freshness that mass-produced crackers simply cannot replicate. You gain complete control over what goes into your body – no artificial flavors, no questionable preservatives, and no unwanted additives. Just pure, unadulterated cheesy goodness, crafted with care.
Furthermore, the sensory experience of homemade crackers is unmatched. The aroma of these savory delights baking in your oven is an experience in itself, filling your home with an inviting, comforting scent that is far more appealing and authentic than any artificial cheese powder could ever hope to evoke. This alone makes the baking process incredibly rewarding.
Customization is another major draw. This recipe serves as a fantastic base for culinary creativity. Want a little more kick? Add a pinch of cayenne pepper or smoked paprika. Prefer a different cheese blend? Experiment with sharp yellow cheddar, a nutty Gruyere, a creamy fontina, or even a robust smoked Gouda. The possibilities are truly endless, allowing you to tailor this snack perfectly to your unique taste preferences. This recipe isn’t just about replicating a classic; it’s about transforming it into a uniquely personal, artisanal snack, made with love and precision.
The Essential Ingredients for Your Cheesy Masterpiece
Crafting these delectable White Cheddar Parmesan Cheez-Its requires only a handful of common kitchen staples, making it an accessible and enjoyable baking project. The beauty of this recipe lies in its elegant simplicity, proving that extraordinary flavor doesn’t always demand an extensive or exotic ingredient list. Here’s a detailed look at what you’ll need to gather to embark on your cheesy cracker adventure:
- Premium Cheese: You’ll need a combination of extra sharp white cheddar for that unmistakable, bold tang and a generous portion of freshly grated Parmesan cheese for its rich, umami depth and finely textured contribution to the dough. Using good quality cheese is paramount to the final flavor.
- Unsalted Butter: For a tender crumb and rich, buttery flavor, unsalted butter is the preferred choice. It allows you to precisely control the overall saltiness of your crackers. Ensure it’s cold and cut into cubes for optimal mixing.
- All-Purpose Flour: The foundational structure of our crispy crackers, unbleached all-purpose flour provides the necessary gluten for shaping while ensuring a delicate, crisp texture when baked.
- Cold Water: Absolutely essential for bringing the dough together without overworking it. Ice-cold water helps maintain the butter’s firm consistency, which is crucial for achieving that desired flaky texture in the finished crackers.
- Kosher Salt: Used in the dough to enhance all the savory notes of the cheese, and a light sprinkling of kosher salt after baking provides the perfect finishing touch and a subtle textural contrast.
- A Dash of Love: The intangible, yet undeniably present, secret ingredient that makes everything taste infinitely better! ❤️ Your enthusiasm and care will shine through in every bite.
Step-by-Step Guide to Crafting Your Homemade Cheez-Its
Creating these irresistible cheese crackers is a rewarding culinary process, and with these clear, detailed instructions, you’ll be enjoying your homemade batch in no time. Precision in preparation will lead to the most delicious and perfectly textured results, so follow along closely and embrace the joy of baking from scratch.
Step 1: The Initial Blend of Dry Ingredients and Butter
Begin by adding your grated cheeses – 6 ounces of sharp white cheddar and 2 ounces of finely grated Parmesan – along with 1 cup of unbleached all-purpose flour and 4 tablespoons (which is half a stick or 1/4 cup) of cold, unsalted butter (cut into small cubes) into the bowl of your food processor. If you don’t have a food processor, a stand mixer fitted with a paddle attachment will also work wonderfully; just be mindful of overmixing. Pulse these ingredients vigorously until they are thoroughly combined and resemble small, coarse pebbles or crumbs. This crucial step ensures that the cold butter is evenly distributed and coated with the flour and cheese, preventing a greasy dough and promoting the tender, flaky texture we desire in a perfectly crisp cracker.
Step 2: Incorporating Liquid for Dough Formation
Once the dry ingredients and butter have formed pebbles, with the food processor still running (or the mixer on low speed), slowly drizzle in 2 tablespoons of ice-cold water. Add the water gradually, observing the dough’s consistency closely. The cold water is absolutely crucial here, as it helps maintain the butter’s firm integrity, which is directly responsible for the delicate flakiness of the finished crackers. Continue processing just until the mixture comes together into larger clumps, almost forming a cohesive ball but still appearing slightly crumbly. It’s vital not to overmix at this stage; overworking the dough can develop too much gluten, resulting in tough, rather than crisp, crackers.
Step 3: Chilling the Dough for Optimal Texture
Once the dough has formed into those desirable large clumps, carefully transfer it onto a sheet of plastic wrap. Using your hands, gently press and flatten the dough into a thin, uniform disk. Wrap it tightly in the plastic wrap, ensuring no air pockets. Refrigerate the dough for at least one hour, or for best results, ideally overnight. Chilling is a vital, non-negotiable step in this recipe. It allows the gluten in the flour to relax, preventing shrinkage during baking, and more importantly, it firms up the butter. This makes the dough significantly easier to roll out thinly without sticking, and it ensures the crackers hold their intricate shape and become delightfully crisp rather than chewy. While the recipe suggests a few hours, even one hour makes a significant difference. Patience truly is a virtue here, though I confess, I often struggle with waiting when delicious snacks are involved!
Step 4: Rolling and Cutting the Dough to Shape
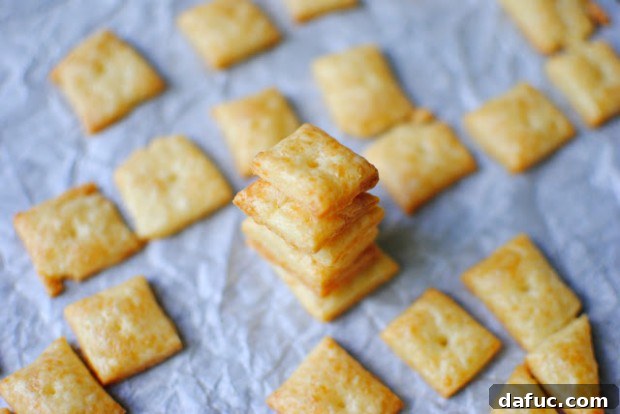
Once your dough is thoroughly chilled, preheat your oven to 375°F (190°C) and prepare a large baking sheet by lining it with parchment paper or a silicone baking mat (such as a Silpat). Divide the chilled dough in half; return one half to the fridge to keep it cold while you work with the other. On a lightly floured surface (or between two sheets of parchment paper to prevent sticking), roll out the dough thinly, aiming for approximately 1/8 inch thickness. Don’t worry if it’s not perfectly even on your first try; practice makes perfect! For classic Cheez-It squares, use a ruler and a pastry wheel or a sharp knife to create uniform 1-inch squares. If you’re feeling a bit rebellious or adventurous, cut them diagonally into triangles for a unique touch. For that authentic, iconic look, use the tip of a chopstick or a wooden skewer to make a small, distinct dot in the center of each cracker.
Step 5: Arranging and Precision Baking
Carefully transfer your meticulously cut crackers to the prepared baking sheet. It’s perfectly fine to place them relatively close together as they tend to puff up vertically rather than spreading out horizontally. This means you can fit quite a few on a single pan! If the dough has warmed up significantly during the rolling and cutting process, it’s a good idea to pop the entire baking sheet back into the fridge for an additional 5-10 minutes before baking. This re-chilling step can significantly help maintain their sharp edges and contribute to maximum crispness.
Slide the baking sheet into your preheated 375°F (190°C) oven and bake for 15-17 minutes. This stage requires your undivided attention, as oven temperatures can vary, and these delicate snacks can transition from perfectly golden to slightly burnt very quickly. Keep a close eye on them, especially towards the end of the baking time, looking for that beautiful golden-brown hue. Once removed from the oven, immediately sprinkle them with a tiny pinch of extra kosher salt. Be mindful not to over-salt them, as the cheese itself already provides ample savory flavor. The residual heat from the crackers will help the salt adhere beautifully.
Achieving Your Preferred Crispness: A Baking Experiment
During my initial batches of these homemade cheese crackers, I embarked on a small, yet delicious, experiment to determine the optimal level of crispness. While the recommended 15-17 minutes yielded a beautifully golden, delightfully soft, and flaky cracker, I felt compelled to push the boundaries a little further. I decided to bake subsequent batches for slightly longer periods, adding an extra minute or two to each. I personally gravitate towards a darker, exceptionally crispy cracker – perhaps it’s my odd but undeniable penchant for burnt toast and slightly blackened grilled cheese sandwiches! You might call me a “freak,” but those darker crackers truly delivered a more satisfying, traditional cracker crispness with an intensified flavor. This demonstrates the beauty of home baking: you are the chef! Feel free to adjust the baking time based on your preference; just remember to watch them like a hawk to avoid turning them from perfectly crisp to irrevocably burnt.
Serving Suggestions and Storage Tips for Your Cheesy Delights
These homemade White Cheddar Parmesan Cheez-Its are truly best enjoyed fresh, ideally straight from the oven after they’ve had a few minutes to cool down enough to handle. The warm, comforting cheesy aroma and the perfect crispy texture are simply divine, offering an unparalleled snacking experience. They are utterly perfect on their own, but their robust flavor and satisfying crunch also make them incredibly versatile when paired with various accompaniments.
- Soups and Chili: Their sharp flavor and delightful crunch make them an excellent, flavorful addition to creamy tomato soup, a hearty bowl of chili, or any comforting stew you might be enjoying.
- Dips: Serve them alongside your favorite creamy dips such as spinach and artichoke dip, a classic homemade French onion dip, or a simple, vibrant hummus. Their sturdy texture holds up well to dipping.
- Cheese Boards: Elevate your next charcuterie or cheese board with these impressive homemade delights. They offer a unique, artisanal touch that guests will adore.
- Salad Toppers: For an unexpected burst of flavor and texture, crumble these crispy crackers over a fresh green salad or even a hearty grain bowl.
For optimal storage, allow the crackers to cool completely to room temperature before transferring them to an airtight container. This prevents them from becoming soggy. Stored properly, they will remain fresh and delightfully delicious for several days. Keep in mind that the crackers baked for a shorter time might soften slightly over time, but they’ll still be absolutely perfect for dunking into soups or topping on chili. The darker, crispier ones, on the other hand, will generally hold their crunch longer. Regardless of your preferred level of doneness, these homemade Cheez-Its are a versatile, incredibly satisfying, and utterly irresistible snack that will undoubtedly disappear quickly!
Enjoy your delicious homemade creations! If you give this White Cheddar Parmesan Cheez-Its recipe a try, I’d absolutely love to hear about your experience. Please share a photo of your masterpiece and tag me on Twitter or Instagram!
Recipe: White Cheddar Parmesan Cheez-It Crackers

These White Cheddar Parmesan Cheez-It Crackers make for a perfect homemade snack, offering a superior flavor and crunch!
Print Recipe
Pin Recipe
Key Details
- Yield: Approximately 8 servings
- Prep Time: 1 hour 10 minutes (includes initial chilling)
- Cook Time: 15-17 minutes
- Additional Time (Chilling): 33 minutes (or more, up to overnight for best results)
- Total Time: Approximately 2 hours (minimum active time, not including optional overnight chill)
- Author: Laurie McNamara
- Course: Appetizers & Snacks
- Cuisine: American
Ingredients
- 6 ounces extra sharp white cheddar cheese, freshly grated
- 2 ounces Parmesan cheese, freshly grated
- 1/4 cup (4 tablespoons) unsalted butter, cold and cubed
- 1 teaspoon kosher salt, plus additional for sprinkling after baking
- 1 cup unbleached all-purpose flour
- 2 tablespoons cold water (ice water is ideal)
Instructions
- Prepare the Dough Base: In the bowl of a food processor (or a stand mixer fitted with a paddle attachment), combine the grated white cheddar cheese, grated Parmesan cheese, cold unsalted butter cubes, unbleached all-purpose flour, and 1 teaspoon of kosher salt. Pulse the ingredients until the mixture forms small, pebble-like crumbles. Ensure the butter is fully incorporated and coated.
- Form the Dough: With the food processor still running (or mixer on low speed), slowly drizzle in the 2 tablespoons of cold water. Continue processing just until the mixture comes together and forms larger clumps of dough. Be careful not to overmix, as this can lead to tough crackers.
- Chill the Dough: Transfer the dough onto a sheet of plastic wrap. Gently press and form the dough into a thin, flat disk. Wrap it tightly in the plastic wrap and refrigerate for at least one hour. For the best texture and ease of rolling, chilling the dough overnight is highly recommended.
- Preheat Oven & Prepare Baking Sheet: While the dough chills, preheat your oven to 375°F (190°C). Line a large baking sheet with parchment paper or a silicone baking mat.
- Roll and Cut Crackers: Remove the chilled dough from the refrigerator and divide it in half. Return one half to the fridge to keep it cold. On a lightly floured surface (or between two sheets of parchment paper), roll out the working half of the dough to an even thickness of approximately 1/8 inch. Use a ruler and a pastry wheel or a sharp knife to cut the dough into 1-inch squares. For a traditional Cheez-It appearance, gently press the tip of a chopstick or a wooden skewer into the center of each cracker to create a small dot. Alternatively, cut the squares diagonally to form triangular crackers.
- Arrange on Baking Sheet: Carefully transfer the cut cracker shapes to the prepared baking sheet, leaving a small amount of space between each. They will puff up slightly but will not spread significantly. If at any point the dough becomes too warm and sticky, place the baking sheet with the cut crackers back into the refrigerator for 5-10 minutes to re-chill before baking.
- Bake to Perfection: Slide the baking sheet into your preheated oven and bake for 15-17 minutes. It is crucial to watch them very carefully during this time, as oven temperatures can vary, and these thin crackers can burn quickly. Bake until they are beautifully golden brown and appear crisp. For an extra crispy cracker, you may extend the baking time by a minute or two, monitoring constantly to prevent burning.
- Season and Cool: Immediately upon removing the hot crackers from the oven, lightly sprinkle them with a tiny bit of additional kosher salt. Transfer them promptly to a wire cooling rack to allow them to crisp up completely as they cool.
- Serve & Store: Serve your homemade White Cheddar Parmesan Cheez-Its warm or at room temperature. Store any leftover crackers in an airtight container for up to 3-5 days to maintain their freshness and crispness. Enjoy!
Nutrition Information (Approximate per serving)
(Based on 8 servings per recipe)
- Serving Size: 1 cup
- Calories: 221 kcal
- Carbohydrates: 12g
- Protein: 10g
- Fat: 15g
- Saturated Fat: 9g
- Polyunsaturated Fat: 1g
- Monounsaturated Fat: 4g
- Trans Fat: 1g
- Cholesterol: 42mg
- Sodium: 538mg
- Potassium: 46mg
- Fiber: 1g
- Sugar: 1g
- Vitamin A: 446 IU
- Calcium: 242mg
- Iron: 1mg
Please note: Nutritional information is an estimate and may vary based on specific ingredients and preparation methods.