
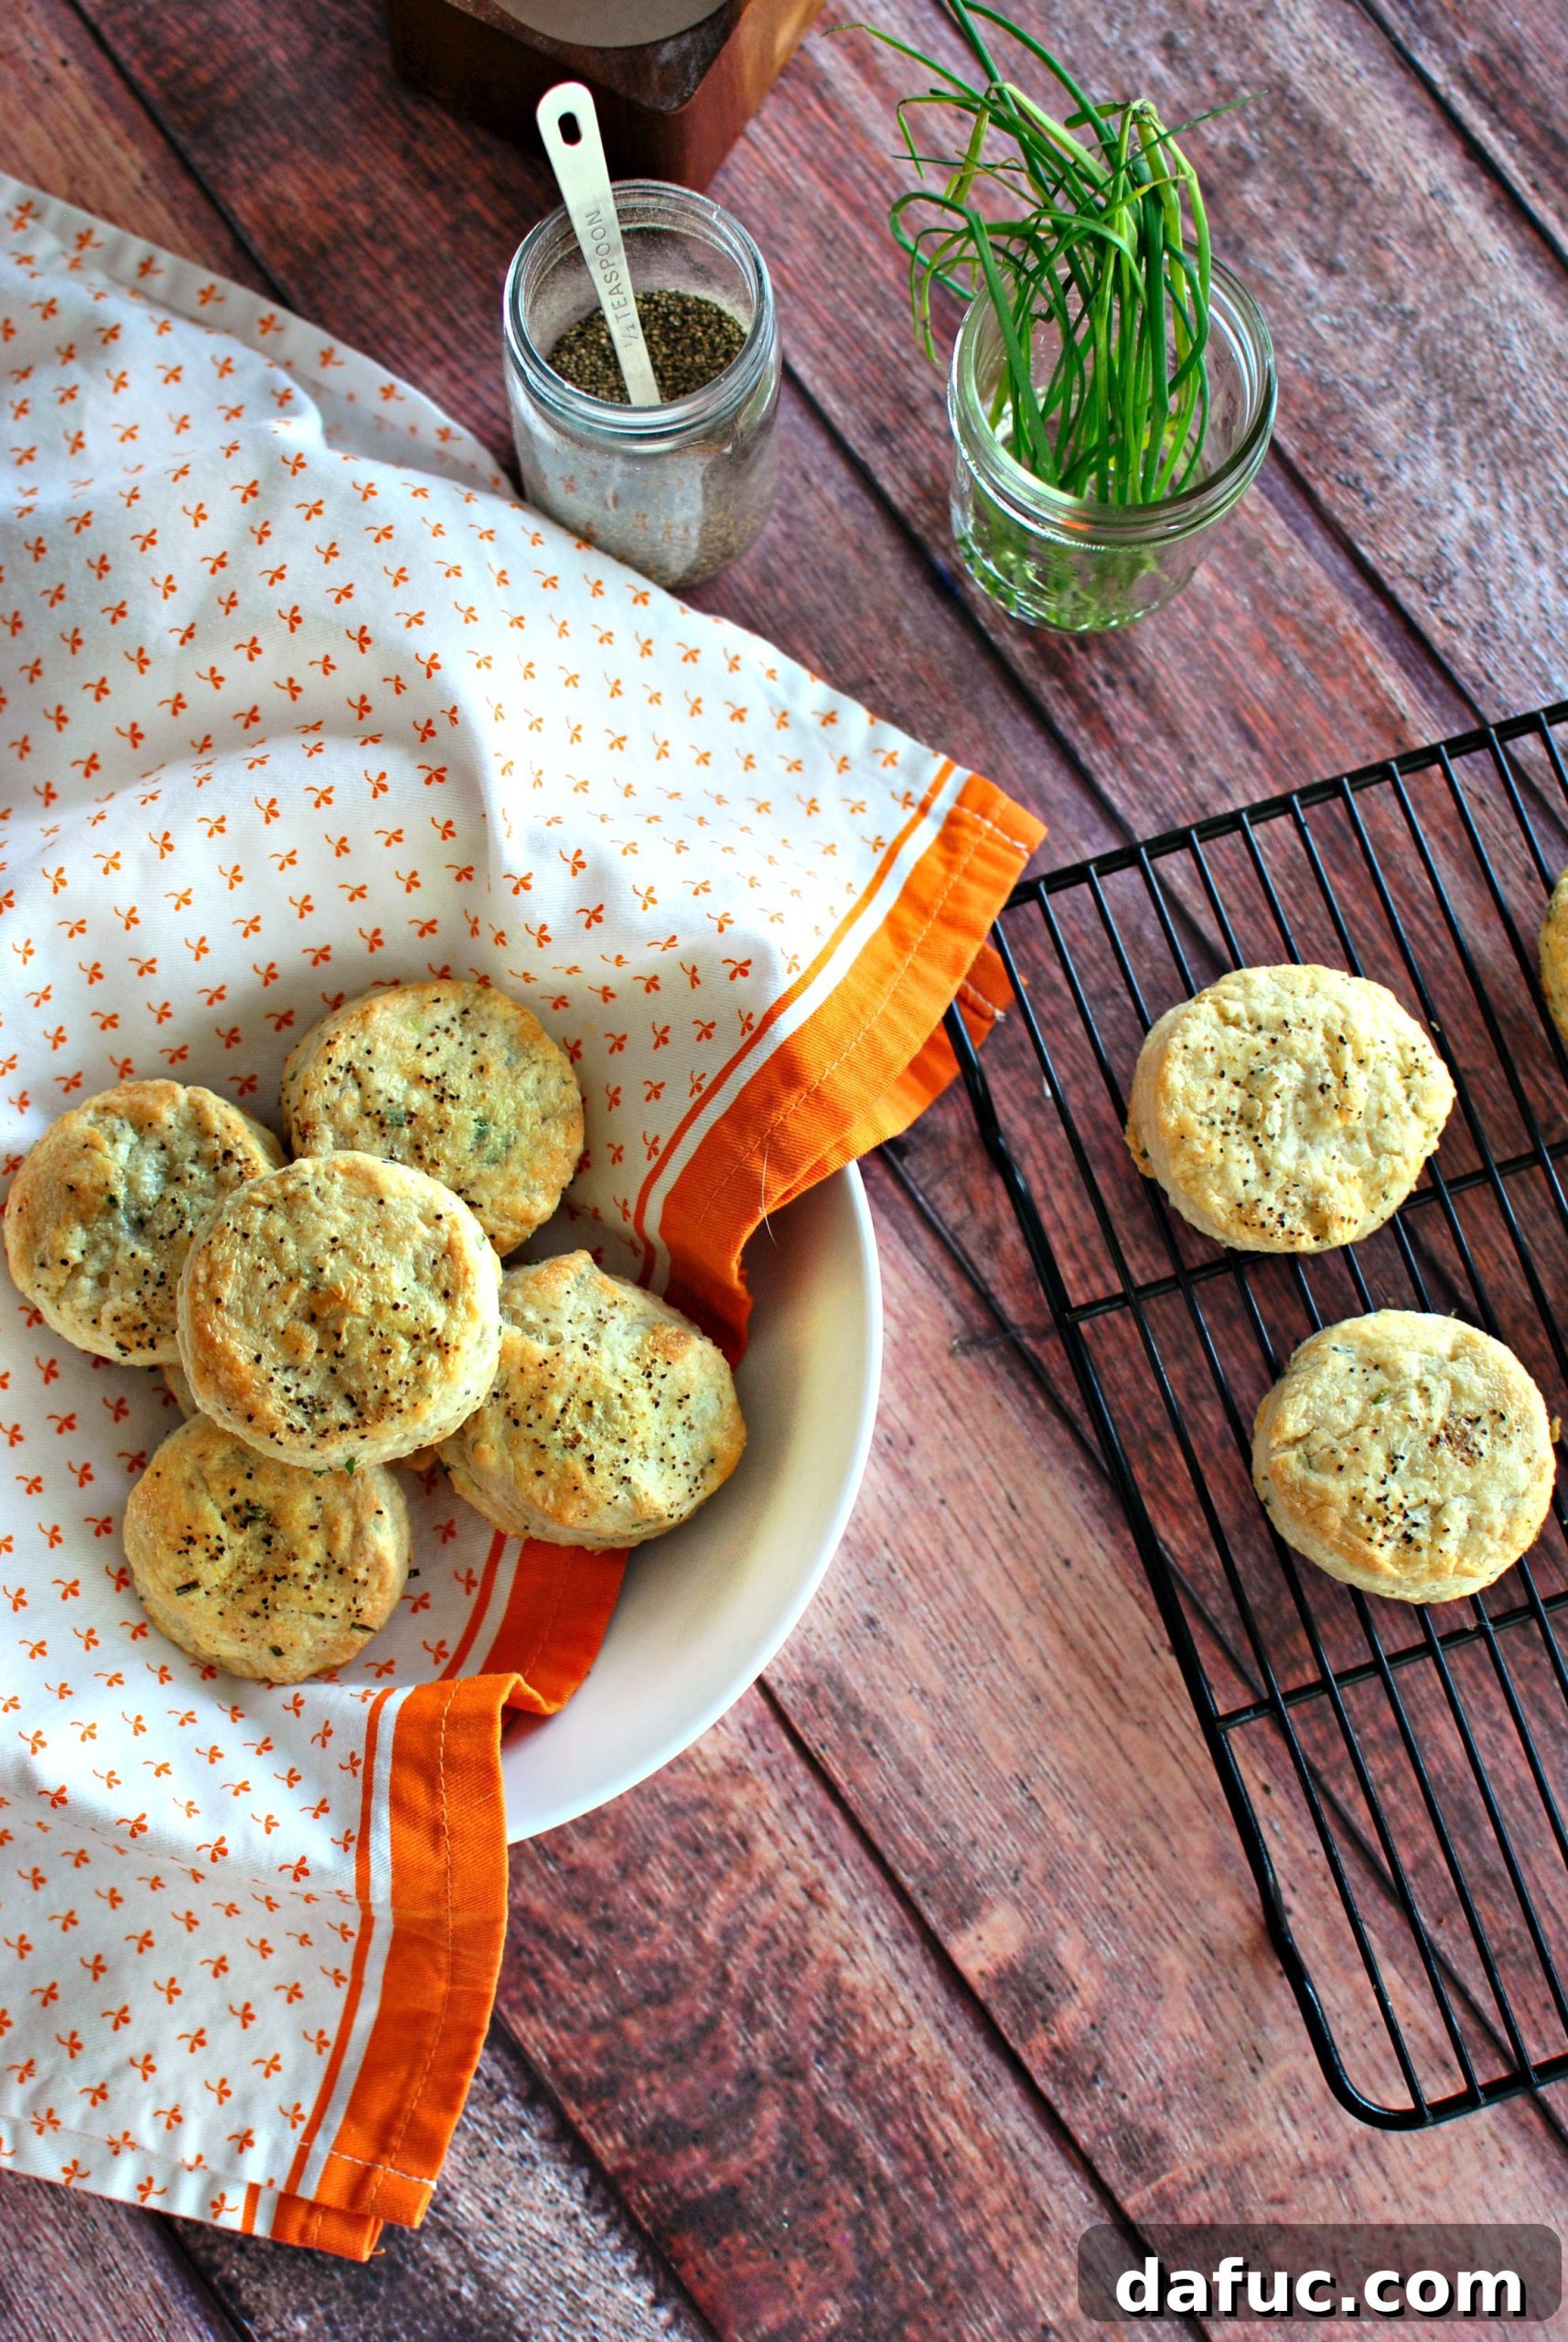
Flaky Black Pepper Chive Buttermilk Biscuits: Your Ultimate Savory Side
There’s nothing quite like a warm, freshly baked biscuit, especially when it boasts a delightful blend of savory flavors. These Black Pepper Chive Buttermilk Biscuits are a testament to simple, delicious baking, offering bright, fresh notes from snipped chives, a pleasant tang from buttermilk, and a subtle warmth from freshly ground black pepper. This recipe yields 12 wonderfully flaky biscuits, perfect for any occasion.
The Irresistible Allure of Homemade Biscuits with Soup
In many homes, including ours, a hearty bowl of soup or stew simply isn’t complete without a delicious carb to crumble in or dunk into the rich broth. This tradition, originally an excuse to enjoy more delectable carbohydrates, has evolved into an absolute necessity for truly savoring any soup. While a classic pie crust topper for a pot pie soup might seem like the obvious and equally perfect choice, sometimes a lighter, yet equally satisfying, option is in order. That’s precisely where these exquisite black pepper chive buttermilk biscuits truly shine.
They offer a delightful contrast to the richness of a savory meal, acting as the perfect sponge for delicious liquids without being overly heavy. Their fluffy interior and crisp exterior provide a textural harmony that elevates any soup experience, turning a simple meal into a comforting feast. These biscuits prove that a truly satisfying carb doesn’t always have to be complex.
Beyond the Bowl: Versatile Serving Ideas
Beyond being the ideal companion to your favorite soups and stews, these biscuits stand proudly on their own as a fantastic snack, a unique breakfast item, or a versatile side dish. Imagine them served warm, split open, with a generous pat of butter melting into their tender crumb. They make an excellent base for mini breakfast sandwiches, perhaps with a fried egg and a slice of cheese, or a savory complement to a plate of scrambled eggs. Their versatility is truly boundless, bringing a touch of homemade comfort to any table.
For a fun and cozy presentation, consider serving your soup in mugs and using a warm biscuit as a creative, edible lid. This ingenious idea is perfect for a relaxed meal on the couch, in bed, or wherever comfort calls. It’s these thoughtful little touches that often transform a simple meal into a memorable experience. While the idea might come “after the fact,” the joy of discovering new ways to enjoy these biscuits is always a win.
Crafting the Perfect Flavor: Chives, Buttermilk, and Bold Black Pepper
When developing a biscuit recipe to complement a robust and flavorful dish like a turkey pot pie soup, careful attention to the flavor profile is paramount. Our goal was to create a biscuit that was both refreshing and robust, capable of holding its own without overpowering the main course. Fresh chives were the natural choice for their delicate oniony freshness, which beautifully cuts through richness and adds vibrant green flecks, making each biscuit visually appealing and bursting with flavor.
The secret weapon for their incredible tenderness and unique taste is tangy buttermilk. Its acidity reacts with the leavening agents, resulting in an exceptionally tender crumb and a subtle, pleasant sour note that elevates the biscuit’s overall profile. And for that irresistible kick? Coarsely ground black pepper delivers a warming, back-of-the-throat spice that lingers just right, making each bite an exciting experience.
What makes these biscuits truly special and accessible is their remarkably foolproof nature. Even if you consider yourself a novice baker, you’ll find this recipe incredibly forgiving and rewarding. The steps are straightforward and designed for success, consistently leading to beautifully flaky, tender, and buttery biscuits. So, rest assured, if I can achieve these delightful, flaky-butter-babies, you absolutely can too! Confidence in the kitchen starts with simple, reliable recipes like this one.
The Art of Perfect Biscuit Making: Essential Tips for Flaky Success
Baking biscuits might seem intimidating to some, but with a few key techniques and a focus on quality ingredients, you can easily achieve bakery-worthy results right in your own kitchen. The cornerstone of exceptionally flaky biscuits lies primarily in the butter and how it’s incorporated into the dry ingredients. Keeping your butter very cold is paramount. As these tiny, cold pockets of butter melt in the hot oven, they release steam, which creates distinct layers and pockets of air, resulting in that coveted, delicate flaky texture we all adore.
Another crucial tip for biscuit perfection is to avoid overworking the dough. Overmixing develops the gluten in the flour too much, leading to tough, dense biscuits rather than light and tender ones. Handle the dough gently, mixing it just enough to bring the ingredients together. This light touch ensures a delicate, melt-in-your-mouth crumb that is the hallmark of a truly great biscuit.
Don’t be afraid to be generous with the black pepper. While finely ground pepper can work, a coarsely ground variety provides a more pronounced flavor and a delightful textural contrast. The visual cue of black pepper speckled on top not only hints at the savory flavors within but also adds an appealing rustic touch to your homemade creations. The sprinkling of pepper on top is a subtle yet effective way to announce the biscuit’s unique character before the first bite.
Gather Your Ingredients: What You’ll Need
Preparation is key in baking. Gathering all your ingredients ahead of time, a culinary practice known as “mise en place,” makes the entire baking process smooth, efficient, and enjoyable. Always ensure your butter and buttermilk are thoroughly chilled, as their cold temperature is absolutely crucial for achieving the desired flaky texture in your biscuits.
To begin, take a spacious mixing bowl and combine two cups of unbleached all-purpose flour (the foundation of our biscuits), 1-1/2 teaspoons of baking powder (essential for lift and rise), 1/2 teaspoon of granulated sugar (to subtly balance flavors and aid in achieving a beautiful golden-brown crust), 1/4 teaspoon of baking soda (which reacts with the buttermilk for an extra boost of tenderness), and 3/4 teaspoon of kosher salt (to enhance all the flavors and provide a necessary savory contrast). Finally, add 1/2 teaspoon of coarsely ground black pepper to the dry mixture, ensuring an even distribution of its pungent warmth throughout the dough.
Next, introduce three generous tablespoons of freshly snipped chives to the dry ingredients. The fresher the chives, the more vibrant and aromatic their flavor will be, imparting a delicate oniony note that is absolutely essential to these biscuits.
With all the dry components meticulously measured and placed in the bowl, use a whisk to gently stir and fluff them together. This crucial step aerates the flour, prevents clumps, and evenly distributes the leavening agents and seasonings, setting the perfect stage for wonderfully risen and flavorful biscuits.
Now, for the glorious butter! Retrieve one stick (which is equivalent to 1/2 cup) of super-cold unsalted butter directly from your refrigerator. Slice it into small, even pieces – about 1/2-inch cubes – and then drop them into the bowl with your dry ingredients. Remember, the colder the butter, the better and flakier your biscuits will be.
Switch to a pastry blender (or if you don’t have one, use two knives or your fingertips, working quickly to keep the butter cold) and cut the butter into the dry ingredients. Continue this process until the mixture resembles coarse crumbles, with some pea-sized pieces of butter still visible. These pockets of butter are what ultimately create those signature flaky layers as they melt and release steam during baking.
Now, create a small well in the very center of your butter-flour mixture. Into this well, pour 3/4 cup of cold buttermilk. The acidity of the buttermilk is crucial as it reacts with the baking soda and baking powder, providing the essential leavening that gives these biscuits their wonderful rise and irresistibly tender crumb.
Using a rubber spatula or a sturdy spoon, gradually mix the buttermilk into the dry ingredients. Stir just until the dough comes together and no dry pockets of flour remain. It’s imperative not to overmix at this stage, as light handling is the key to maintaining a tender texture.
Once the biscuit dough is roughly combined, transfer it onto a lightly floured, clean surface. Gently knead the dough a few times – no more than 5-6 short, light presses – just enough to fully bring it together into a cohesive, shaggy mass. Avoid over-kneading at all costs, as this will develop the gluten too much and result in tough biscuits.
Using your hands or a rolling pin, pat the dough out evenly into an approximate 8×11-inch rectangle. Aim for a thickness of about 1/2 inch. Precision isn’t overly crucial here; the main goal is to achieve a relatively uniform thickness that allows for efficient and consistent cutting of the biscuits. There’s no need to reach for a ruler; a good visual estimate is perfectly fine.
Before cutting, lightly flour a two-inch biscuit cutter. This simple step is vital as it prevents the dough from sticking to the cutter, ensuring that you achieve clean, crisp edges on each biscuit, which in turn contributes to a better rise during baking.
Now, press the floured biscuit cutter straight down into the dough. It’s crucial not to twist the cutter when pressing down! Twisting can seal the edges of the biscuit, which can inhibit proper layering and rise. Stamp out approximately 8 biscuit rounds from the initial dough rectangle.
Gently pull the dough scraps together from around your cut biscuits. Lightly press them into a smaller, cohesive rectangle once more. From this re-formed dough, stamp out an additional 4 biscuits, aiming for a total of 12 delicious biscuits. While biscuits made from scraps might not rise quite as high as the first batch, they will still be incredibly tasty!
Carefully transfer the biscuit rounds onto a rimmed baking sheet that has been lined with a Silpat mat or parchment paper. Ensure you leave a little space between each biscuit, allowing for even heat circulation and consistent golden-brown baking.
Using your thumb or the back of a spoon, gently make a slight depression in the very center of each biscuit round. This clever little trick helps the biscuits to rise more evenly in the oven and prevents them from doming too much in the middle, ensuring a beautiful, uniform shape.
Pour a small amount of heavy cream or whole milk into a small bowl. This dairy wash will serve as an excellent alternative to an egg wash, helping to give your biscuits a gorgeous, rich golden crust as they bake.
Using a pastry brush, lightly and evenly coat the tops of each biscuit round with the heavy cream. This cream wash not only promotes a lovely golden-brown exterior but also helps any additional toppings, like more black pepper, to adhere beautifully to the surface.
Finally, sprinkle a little more coarse black pepper generously over the cream-brushed tops of the biscuits. This not only enhances the flavor with an extra kick but also serves as an inviting visual cue, letting everyone know about the delightful peppery warmth nestled within these savory delights.
Baking and Savoring Your Buttermilk Biscuits
Preheat your oven to 375 degrees Fahrenheit (approximately 190 degrees Celsius). A properly preheated oven is absolutely vital for the biscuits to rise quickly and achieve their signature flaky, layered texture. Place your prepared baking sheet with the biscuit rounds into the hot oven and bake for 18-20 minutes, or until the biscuits are gloriously puffed up, golden brown on top, and cooked through to perfection.
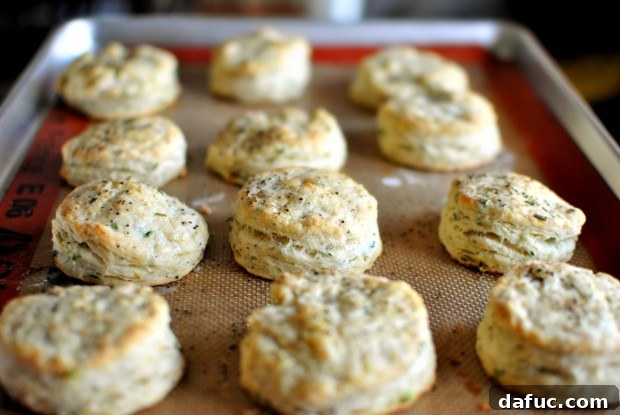
The intoxicating aroma that fills your kitchen while these biscuits bake is truly irresistible. Once they emerge from the oven, transfer them to a wire rack to cool slightly. While delicious at any temperature, they are arguably at their absolute best when enjoyed warm, straight from the oven, allowing their buttery, flaky layers to truly shine.
Oh, the sheer joy of a freshly baked biscuit! It takes immense willpower not to settle onto the couch and devour all of these Black Pepper Chive Buttermilk Biscuits like popcorn, risking a glorious carb coma. Their tender crumb, savory burst of chive, and subtle peppery warmth make them truly addictive and deeply satisfying.
Whether you’re pairing them with a comforting soup, serving them alongside a hearty dinner, or simply enjoying them as a delightful treat with a cup of coffee, these homemade biscuits are guaranteed to bring a smile to your face. So go ahead, make the soup, make these incredible biscuits, and make yourself wonderfully happy!
To all the carb lovers out there: unite and indulge in these homemade delights!
Enjoy! And if you give this Black Pepper Chive Buttermilk Biscuits recipe a try, we’d absolutely love to know! Snap a photo of your delicious creations and tag us on Twitter or Instagram! We can’t wait to see your culinary triumphs!
Print Recipe
Pin Recipe
Leave a Review »
Black Pepper and Chive Buttermilk Biscuits
Ingredients
- 2 cups unbleached all-purpose flour, plus more for dusting
- 3 tablespoons chives, snipped
- 1½ teaspoons baking powder
- 3/4 teaspoon kosher salt
- 1/2 teaspoon coarse black pepper, plus more for sprinkling
- 1/2 teaspoon sugar
- 1/4 teaspoon baking soda
- 1/2 cup cold butter, cut into pieces
- 3/4 cup cold buttermilk
- 2 tablespoons heavy cream
Instructions
-
Preheat your oven to 375°F (190°C).
-
In a large bowl, combine the flour, snipped chives, baking powder, kosher salt, coarse black pepper, sugar, and baking soda. Whisk these dry ingredients together thoroughly to ensure they are well combined and aerated.
-
Add the stick of very cold butter, cut into small pieces, to the dry mixture. Use a pastry blender or your fingertips (working quickly) to cut the butter into the dry ingredients until the mixture resembles coarse crumbles with some pea-sized pieces of butter remaining.
-
Create a well in the center of the butter-flour mixture and pour in the cold buttermilk. With a spatula or spoon, slowly stir the dry ingredients into the wet until the biscuit dough just comes together. Be careful not to overmix.
-
Transfer the dough to a lightly floured surface. Gently knead the dough a few times, just enough to form a cohesive mass. Pat the dough out into an approximate 8×11-inch rectangle, about 1/2 inch thick.
-
Lightly dust a 2-inch biscuit cutter with flour. Press the cutter straight down into the dough (without twisting) to stamp out 8 biscuit rounds. Gather the dough scraps, gently press them together, and pat them into a smaller rectangle. Stamp out 4 more rounds, aiming for a total of 12 biscuits.
-
Place the biscuit rounds onto a baking sheet lined with a Silpat mat or parchment paper. Using your first two fingers, press a slight indentation into the center of each biscuit. Brush the tops with heavy cream and sprinkle with additional coarse black pepper.
-
Bake the biscuits in your preheated oven for 18-20 minutes, or until they are puffed up and golden brown. Serve warm and enjoy!
Calories: 160kcal,
Carbohydrates: 17g,
Protein: 3g,
Fat: 9g,
Saturated Fat: 6g,
Polyunsaturated Fat: 1g,
Monounsaturated Fat: 2g,
Trans Fat: 1g,
Cholesterol: 24mg,
Sodium: 306mg,
Potassium: 53mg,
Fiber: 1g,
Sugar: 1g,
Vitamin A: 314IU,
Vitamin C: 1mg,
Calcium: 55mg,
Iron: 1mg
[This post may contain affiliate links.]