
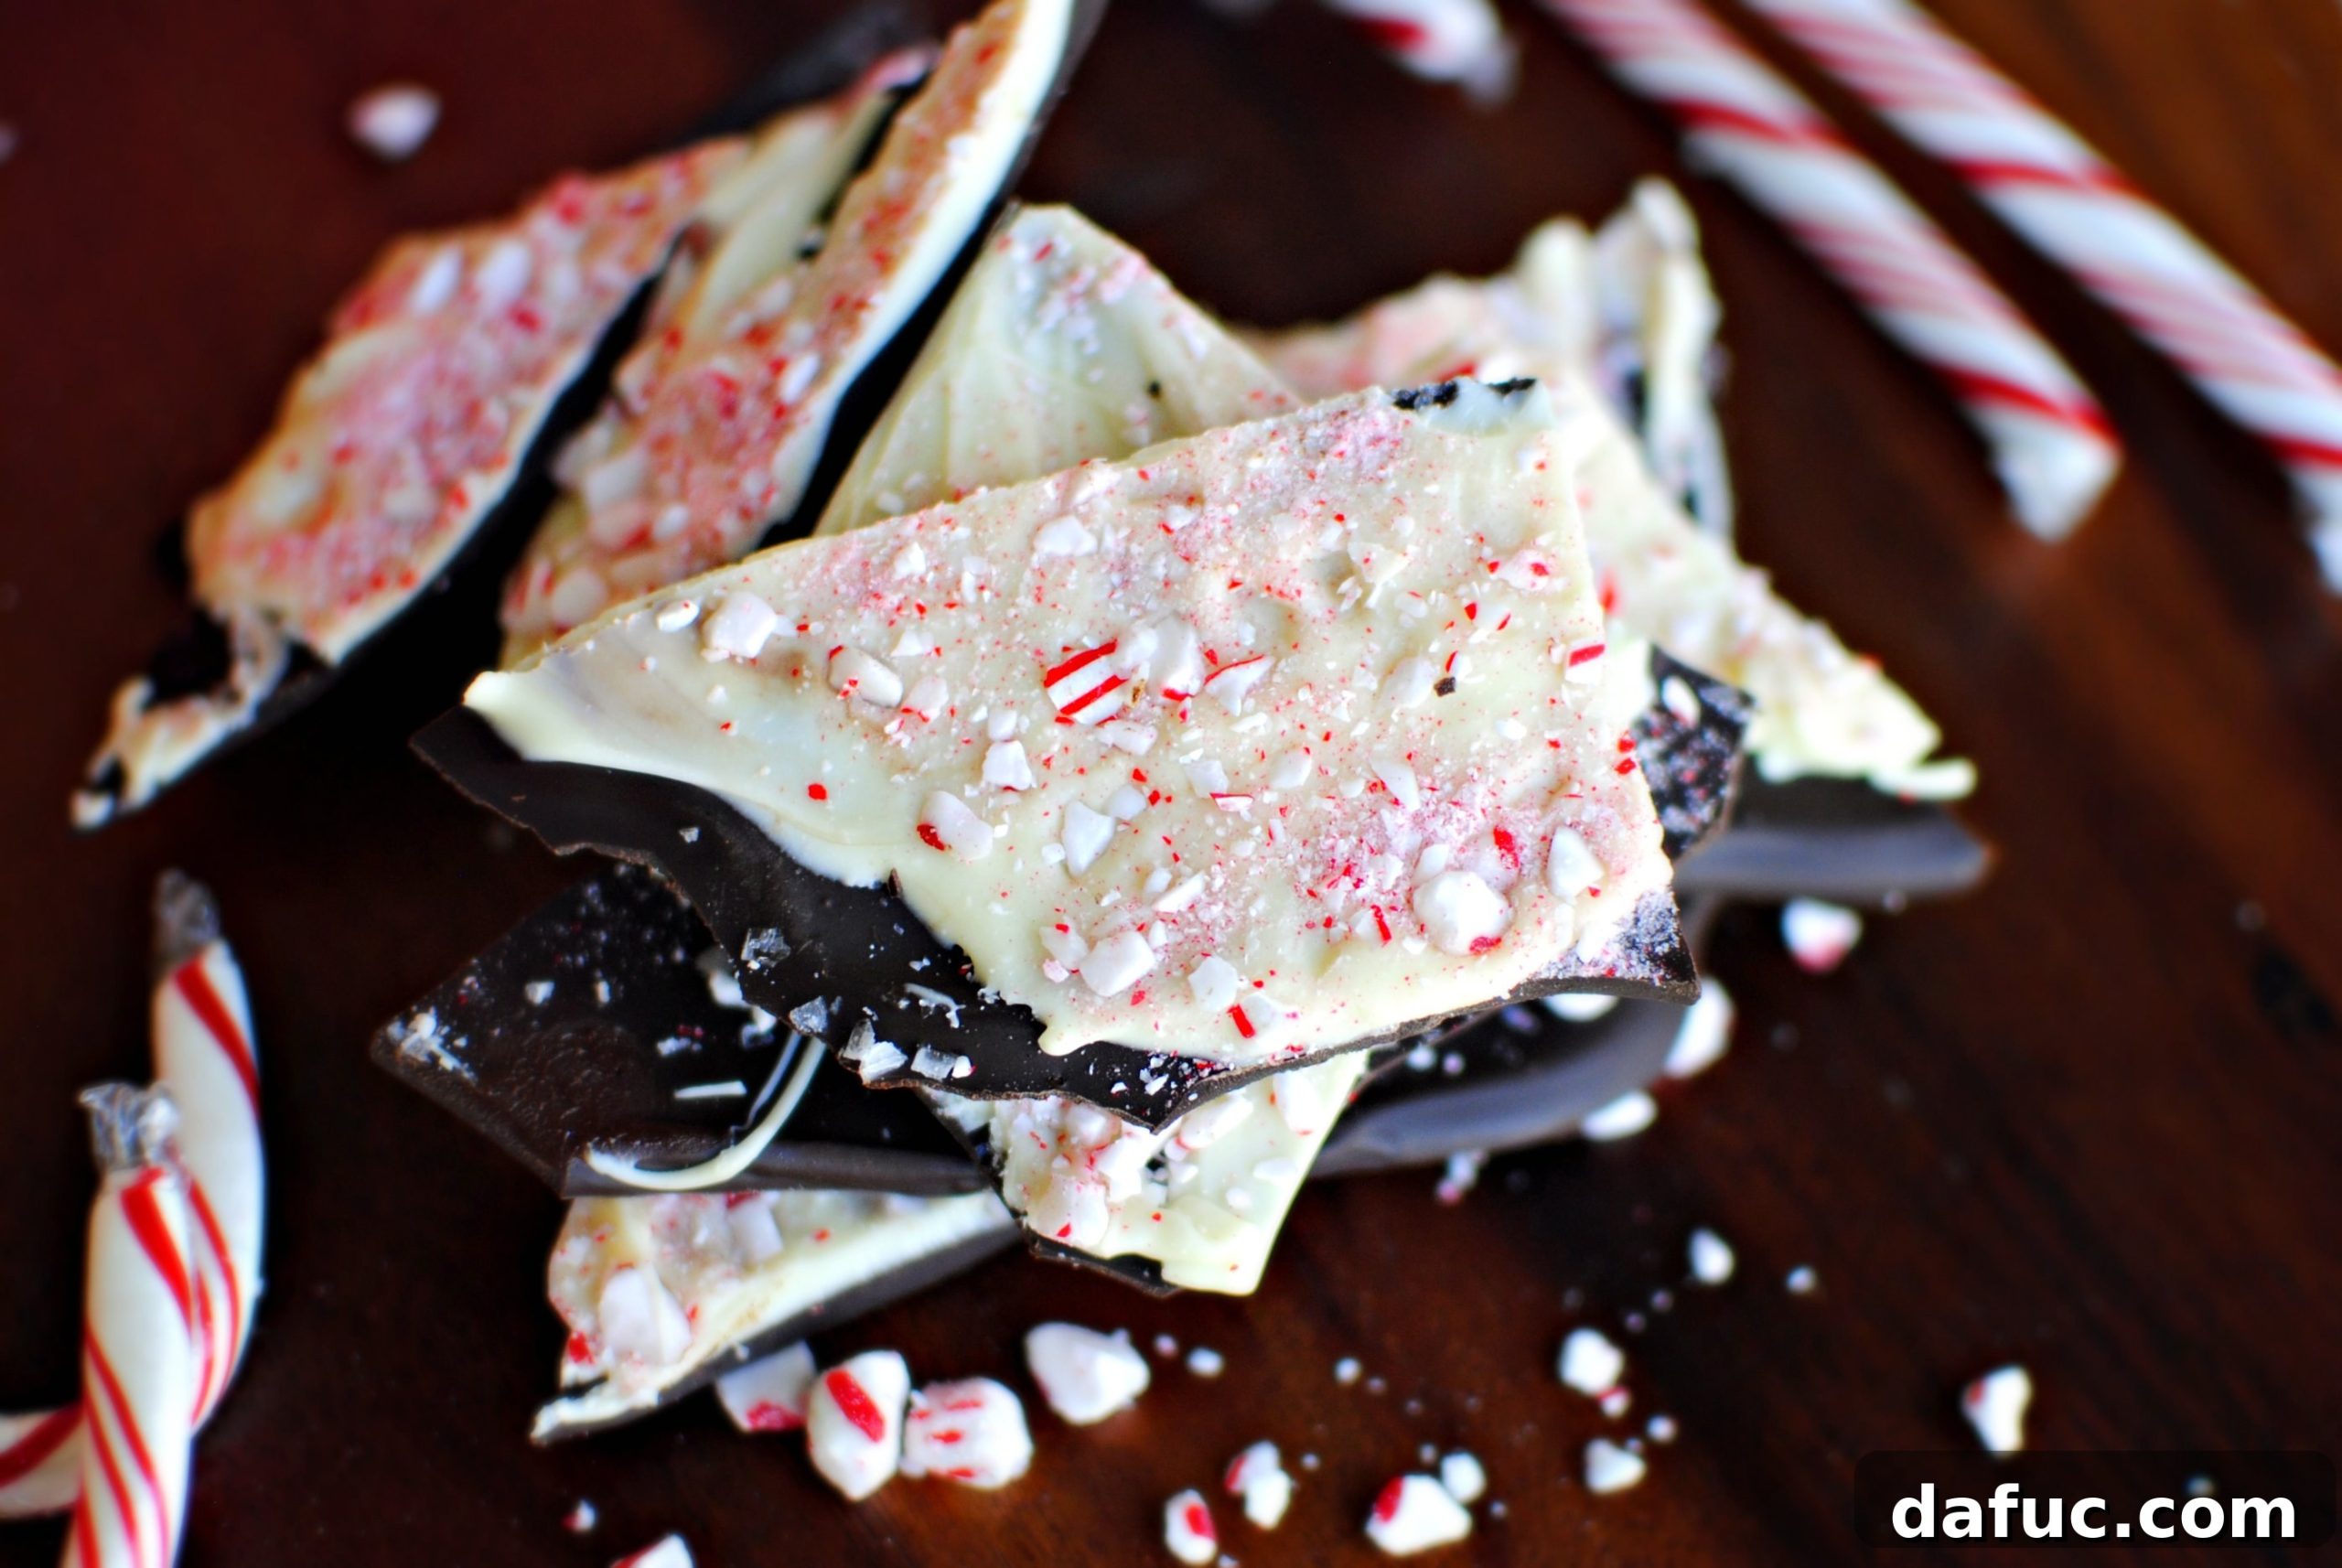
Salted Chocolate Peppermint Bark: Your Ultimate Holiday Indulgence
There’s a reason why peppermint bark becomes a holiday staple in so many homes each year. It’s the quintessential Christmas candy, a delightful blend of rich chocolate and refreshing mint that instantly evokes festive cheer. But what if we told you there’s a way to elevate this classic to an entirely new level of deliciousness? Enter the Salted Chocolate Peppermint Bark – a sophisticated twist that introduces a delightful salty crunch to the familiar sweet and minty symphony.
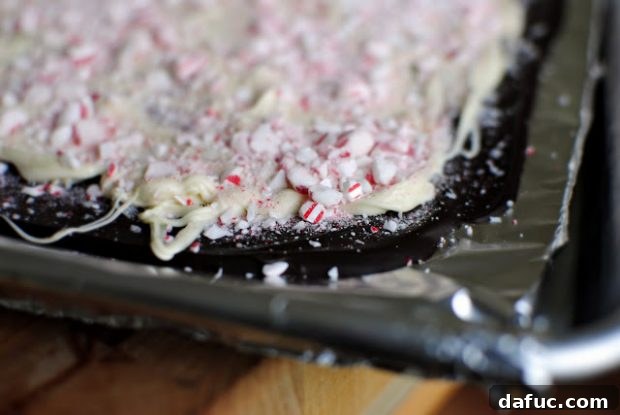
This recipe isn’t just about making another batch of candy; it’s about creating an unforgettable experience for your taste buds. Imagine a deep, robust dark chocolate base, elegantly contrasted by a smooth, creamy layer of white chocolate. Then, picture a generous scattering of vibrant crushed peppermint candies, delivering that signature festive zing. But the real game-changer? A sprinkle of flaky sea salt that cuts through the sweetness, enhancing every single flavor and adding an irresistible textural element. If you’re a fan of that glorious sweet-and-salty combination, prepare to fall head over heels for this easy-to-make, utterly decadent bark.
Why Salted Chocolate Peppermint Bark is a Holiday Essential
The holidays are a time for traditions, and for many, that means indulging in seasonal treats. While there are countless festive desserts to choose from, this Salted Chocolate Peppermint Bark stands out for several compelling reasons:
- Irresistible Flavor Profile: It’s the perfect harmony of rich dark chocolate, creamy white chocolate, refreshing peppermint, and a savory hint of sea salt. Each bite offers a complex explosion of taste that keeps you coming back for more.
- Remarkably Easy to Make: Don’t let its gourmet appearance fool you; this recipe is surprisingly simple. With just a few ingredients and straightforward steps, even novice bakers can achieve professional-looking results.
- Quick Preparation Time: Unlike many holiday recipes that demand hours in the kitchen, this peppermint bark comes together in a flash, making it ideal for last-minute gifts or sudden cravings.
- Perfect for Gifting: Beautifully packaged in a festive tin or cellophane bag, homemade peppermint bark makes a thoughtful and impressive gift for teachers, co-workers, neighbors, or anyone who deserves a sweet treat.
- Customizable Fun: While the classic combination is stellar, this recipe offers plenty of room for creative variations, allowing you to tailor it to your preferences or experiment with new flavors.
- Crowd-Pleaser: From holiday parties to cozy family gatherings, this bark is guaranteed to be a hit with everyone, appealing to both chocolate lovers and mint enthusiasts alike.
The Magic Behind the Flavor: Sea Salt and Peppermint
What makes this particular peppermint bark recipe truly exceptional is the strategic inclusion of flaky sea salt. While peppermint and chocolate are a classic pairing, the salt takes the experience from delicious to extraordinary. Here’s why this duo creates such a captivating flavor:
The Power of Flaky Sea Salt: A dash of salt in sweet dishes isn’t new, but using a high-quality flaky sea salt like Maldon provides a unique advantage. Unlike fine table salt that disappears into the chocolate, flaky sea salt offers sporadic bursts of briny crunch. These small pockets of salt act as a flavor enhancer, amplifying the inherent bitterness of the dark chocolate and balancing the sweetness of both chocolates and the peppermint. It creates a more complex and nuanced taste experience, preventing the bark from being overly saccharine and leaving a pleasant, lingering finish on your palate.
The Refreshing Zing of Peppermint: Peppermint is synonymous with the holidays. Its cool, crisp, and aromatic notes provide a vibrant contrast to the richness of the chocolate. When crushed into pieces, peppermint candies not only contribute their iconic flavor but also add a delightful crunch that complements the smooth texture of the chocolate layers. It’s a refreshing cleanse for the palate after the deep, luxurious chocolate, making each bite invigorating.
Together, the salt and peppermint create a dynamic interplay with the chocolate, elevating a simple candy into a sophisticated holiday confection that’s both comforting and exciting.
Essential Ingredients for Your Peppermint Bark Masterpiece
Crafting perfect Salted Chocolate Peppermint Bark begins with selecting quality ingredients. While the list is short, each component plays a crucial role in the final flavor and texture. Here’s what you’ll need:
- 12 ounces dark chocolate
- 12 ounces white chocolate
- ¾ tablespoon flaked sea salt
- 8 peppermint candy canes (or equivalent peppermint candies)
Choosing the Right Chocolate
The foundation of any great bark is, of course, the chocolate. Opt for high-quality chocolate bars or couverture discs rather than chocolate chips, which often contain stabilizers that prevent them from melting as smoothly. While chocolate chips can work in a pinch, bars will give you a superior, glossy finish and a richer flavor.
- Dark Chocolate: For the base layer, a good quality dark chocolate with a cacao percentage between 60-75% is ideal. This range offers a deep, intense chocolate flavor without being overly bitter, providing a robust counterpoint to the sweet white chocolate and mint.
- White Chocolate: For the top layer, ensure you use true white chocolate made with cocoa butter, not “white candy melts” or “confectionery coating.” Real white chocolate will melt more smoothly, have a creamier texture, and offer a superior flavor. Look for brands that list cocoa butter as a primary ingredient.
The Peppermint Factor
Crushed peppermint candies are the hallmark of peppermint bark. You can use traditional candy canes or individual round peppermint candies. Ensure they are fresh and have a strong mint flavor. For crushing, a food processor is your best friend, allowing you to achieve uniform pieces with minimal effort. Don’t pulverize them into a fine powder; aim for small, irregular pieces that provide both visual appeal and a satisfying crunch.
The Star of the Show: Flaked Sea Salt
This is where the “salted” magic happens. Do not substitute fine table salt or kosher salt for flaked sea salt. Flaked sea salt, such as Maldon, has a delicate, irregular crystal structure that provides an exceptional textural contrast and a clean, briny flavor burst. It adheres beautifully to the chocolate and delivers that sought-after sweet-and-salty balance in every bite. It’s truly a non-negotiable ingredient for achieving the intended sophisticated flavor profile of this bark.
Step-by-Step Guide to Crafting Perfect Peppermint Bark
Making this delightful Salted Chocolate Peppermint Bark is a straightforward process that yields impressive results. Follow these detailed steps to create your own batch of holiday magic.
Equipment You’ll Need:
- Large baking sheet
- Foil or parchment paper
- Small saucepan (for double boiler)
- Heatproof glass bowls (2)
- Rubber spatula or offset spatula
- Mini food processor or zip-top bag and rolling pin
The Process:
-
Prepare Your Workstation: Line a large baking sheet with foil or parchment paper, ensuring the smooth, shiny side of the foil is facing up (if using foil). This will make it easier to peel off the bark once hardened.
-
Crush the Peppermint: Place your peppermint candy canes or candies into a mini food processor. Pulse 5-10 times, or until they are broken into small, irregular pieces. You want a mix of fine dust and larger chunks for the best texture and visual appeal. Alternatively, place candies in a sturdy zip-top bag, seal it, and crush them with a rolling pin or the bottom of a heavy pan. Set the crushed peppermint aside.
-
Melt the Dark Chocolate (Double Boiler Method): Fill a small saucepan halfway with water and bring it to a boil. Reduce the heat to a simmer. Place a heatproof glass bowl over the saucepan, ensuring the bottom of the bowl does not touch the simmering water. Add the 12 ounces of dark chocolate to the bowl. Stir constantly with a rubber spatula as the chocolate melts, allowing the gentle steam to create a smooth, luscious consistency. Once about 80% of the chocolate is melted, remove the bowl from the heat. Continue stirring until the residual heat melts the remaining chocolate and it is completely smooth and free of lumps. This method helps prevent the chocolate from seizing or burning.
-
Spread the Dark Chocolate: Pour the melted dark chocolate onto the prepared baking sheet. Using an offset spatula or the back of a spoon, spread it evenly across the foil or parchment paper to your desired thickness (typically about ¼-inch). Try to make the layer as uniform as possible for consistent bark pieces.
-
Salt the Dark Chocolate Layer: Immediately and evenly sprinkle the ¾ tablespoon of flaky sea salt over the still-wet dark chocolate layer. The salt will adhere as the chocolate sets. Place the baking sheet into the refrigerator for at least 20 minutes, or until the dark chocolate is completely firm and set.
-
Melt the White Chocolate: While the dark chocolate chills, clean your glass bowl or use a second one. Repeat the double boiler process (steps 3-4) for the white chocolate. Bring the same pot of water to a simmer and melt the 12 ounces of white chocolate in the bowl, stirring constantly. Again, remove it from the heat when mostly melted and stir until completely smooth.
-
Cool the White Chocolate Slightly: This step is crucial. Allow the melted white chocolate to cool slightly for about 5-10 minutes. If the white chocolate is too warm when poured over the chilled dark chocolate, it can cause the dark chocolate to melt and smear, resulting in a less defined two-layer appearance. It should still be pourable but not piping hot.
-
Layer and Top: Remove the hardened dark chocolate from the fridge. Carefully pour the slightly cooled white chocolate over the dark chocolate layer. Gently spread it evenly with a spatula. Don’t worry if there’s a slight swirl or mix of colors; the crushed peppermint will cover any imperfections. Immediately and generously sprinkle the reserved crushed peppermint candy over the white chocolate. Gently press the peppermint pieces into the chocolate with your hand or the back of a spatula to ensure they adhere well.
-
Harden and Break: Place the baking sheet back into the refrigerator for another 20-30 minutes, or until both chocolate layers are completely firm. Once fully hardened, carefully peel the foil or parchment paper from the back of the bark. Break the bark into irregular pieces by hand or use a sharp knife for more uniform shapes. Serve immediately or store for later enjoyment.
Pro Tips for Flawless Salted Chocolate Peppermint Bark
While this recipe is simple, a few expert tips can help you achieve truly perfect peppermint bark every time:
- Use Quality Chocolate: As mentioned, the type of chocolate significantly impacts the final taste and texture. Invest in good quality baking chocolate for the best results.
- Patience with Melting: Chocolate can be finicky. Always use a double boiler or melt in short bursts in the microwave (stirring frequently) to avoid burning or seizing. Overheated chocolate becomes thick and clumpy.
- Avoid Water Contact: Even a single drop of water can cause chocolate to seize, turning it into a grainy, unusable mess. Ensure your bowls and spatulas are completely dry before melting chocolate.
- Cool White Chocolate Slightly: Giving the white chocolate a few minutes to cool down after melting prevents it from melting the dark chocolate layer beneath and keeps your layers distinct.
- Don’t Over-Crush Peppermint: A variety of textures from fine dust to small chunks makes the bark more interesting. If it’s too fine, it can get lost in the chocolate; too large, and it might not stick well.
- Even Spreading is Key: Aim for a consistent thickness across your baking sheet for both layers. This ensures the bark sets evenly and breaks into uniform, appealing pieces.
- Refrigeration is Your Friend: Don’t rush the chilling process. Ensure each layer is completely set before adding the next, and allow the final bark to harden fully for easy breaking.
Creative Variations to Explore
Once you’ve mastered the classic Salted Chocolate Peppermint Bark, feel free to experiment with these delicious variations:
- Triple Chocolate Threat: Add a layer of milk chocolate between the dark and white chocolate for even more complexity.
- Nutty Crunch: Sprinkle chopped toasted nuts (like pecans or almonds) over the dark chocolate layer before it sets for an added dimension of flavor and texture.
- Different Mints: Try using chocolate-covered mints, or even substitute spearmint candies for a slightly different minty flavor.
- Swirled Bark: Instead of distinct layers, drizzle both melted dark and white chocolate onto the baking sheet and swirl them together with a skewer or knife for a marbled effect.
- Peppermint Extract Boost: For an extra intense mint flavor, stir a few drops of pure peppermint extract into the white chocolate before spreading it.
- Festive Sprinkles: Add holiday-themed sprinkles along with the crushed peppermint for extra color and fun, especially if making for kids.
Storage and Gifting Your Homemade Bark
One of the best things about homemade peppermint bark is its excellent shelf life, making it perfect for preparing in advance or for gifting.
Storage: Once completely hardened, break the bark into pieces and store it in an airtight container at room temperature for up to 2 weeks. If your home is particularly warm, or for longer storage, you can keep it in the refrigerator for up to 3-4 weeks. Layer pieces between sheets of parchment paper to prevent them from sticking together. Avoid extreme temperature fluctuations, which can cause the chocolate to bloom (a white, chalky film that forms due to cocoa butter separating, though it’s still safe to eat).
Gifting: Salted Chocolate Peppermint Bark makes a truly wonderful homemade gift. Here are some ideas for presentation:
- Festive Tins: Layer the bark in holiday-themed tins with parchment paper between layers.
- Cellophane Bags: Fill clear cellophane bags with bark pieces, tie them with a festive ribbon, and add a small personalized tag.
- Mason Jars: Stack bark pieces neatly in decorative mason jars for a charming, rustic look.
- Gift Boxes: Use small cardboard gift boxes, perhaps with a window, and line them with tissue paper or foil before adding the bark.
No matter how you present it, a homemade gift shows care and effort, and this delicious bark is sure to be appreciated by anyone lucky enough to receive it.
Frequently Asked Questions (FAQ) About Peppermint Bark
Got questions about making this irresistible holiday treat? Here are some common queries and their answers:
- Can I use a microwave to melt chocolate?
Yes, you can! Place chocolate in a microwave-safe bowl and heat on high for 30-second intervals, stirring thoroughly after each interval. Continue until the chocolate is mostly melted, then stir until smooth from residual heat. Be very careful not to overheat it. - Why did my chocolate seize?
Chocolate seizes when even a tiny amount of water comes into contact with it during melting. Ensure all your equipment is perfectly dry. Overheating can also cause seizing, as can drastic temperature changes. - How long does homemade peppermint bark last?
When stored properly in an airtight container, it can last for up to 2 weeks at room temperature or 3-4 weeks in the refrigerator. - Can I make this ahead of time?
Absolutely! Peppermint bark is an excellent make-ahead holiday treat. Prepare it a week or two in advance and store it as recommended. - What if my white chocolate melts the dark chocolate?
This usually happens if the white chocolate is too warm. To minimize smearing, let the melted white chocolate cool for about 5-10 minutes before pouring it over the chilled dark chocolate. If some smearing occurs, don’t worry, the crushed peppermint will largely cover it!

Print Recipe
Pin Recipe
12 servings
Salted Chocolate Peppermint Bark
25 mins
25 mins
Ingredients
- 12 ounces dark chocolate
- 12 ounces white chocolate
- ¾ tablespoon flaked sea salt
- 8 peppermint candy canes
Instructions
-
Place foil or parchment paper on a large sheet pan (smooth side up if using foil).
-
Place broken pieces of the candy canes into a mini food processor and pulse 5-10 times or until broken into tiny pieces, then set aside.
-
Bring a pot filled halfway with water to a boil.
-
Reduce to a simmer and place a glass bowl on top, ensuring the water isn’t touching the bottom of the bowl.
-
Place the twelve ounces of dark chocolate into the bowl and stir constantly until most of the chocolate is melted.
-
Remove from heat and continue stirring until the chocolate is completely smooth. Pour onto the foil-lined sheet pan and spread out evenly.
-
Sprinkle with the flaked sea salt and then place into the fridge for 20 minutes or until set.
-
Bring the same pot of water back to a boil, reduce to simmer, and place the white chocolate pieces into a glass bowl set on top of the pot. Stir constantly until the white chocolate is almost completely melted. Remove and finish stirring until smooth.
-
Let the white chocolate cool slightly for 5-10 minutes. Remove dark chocolate from the fridge. Pour cooled white chocolate over top. Smooth out with a spatula (dark chocolate might smear a little if the white chocolate is too warm). Sprinkle with the crushed candy cane pieces, and gently press the pieces into the chocolate so they stick. Place the sheet pan back into the fridge to harden, about 20 minutes. Break apart and serve.
Serving: 2ounces
,
Calories: 336kcal
,
Carbohydrates: 33g
,
Protein: 4g
,
Fat: 21g
,
Saturated Fat: 12g
,
Polyunsaturated Fat: 1g
,
Monounsaturated Fat: 6g
,
Trans Fat: 1g
,
Cholesterol: 7mg
,
Sodium: 467mg
,
Potassium: 284mg
,
Fiber: 3g
,
Sugar: 26g
,
Vitamin A: 20IU
,
Vitamin C: 1mg
,
Calcium: 77mg
,
Iron: 3mg
Share Your Salted Chocolate Peppermint Bark Creation!
This Salted Chocolate Peppermint Bark is undeniably one of my top holiday sweets. Whether you choose to give it as heartfelt gifts or keep it all to yourself (no judgment here!), just make sure to whip up a batch as soon as possible!
If you decide to try this irresistible recipe, please let me know! I’d love to see your creations. Snap a photo and tag me on Twitter or Instagram!