
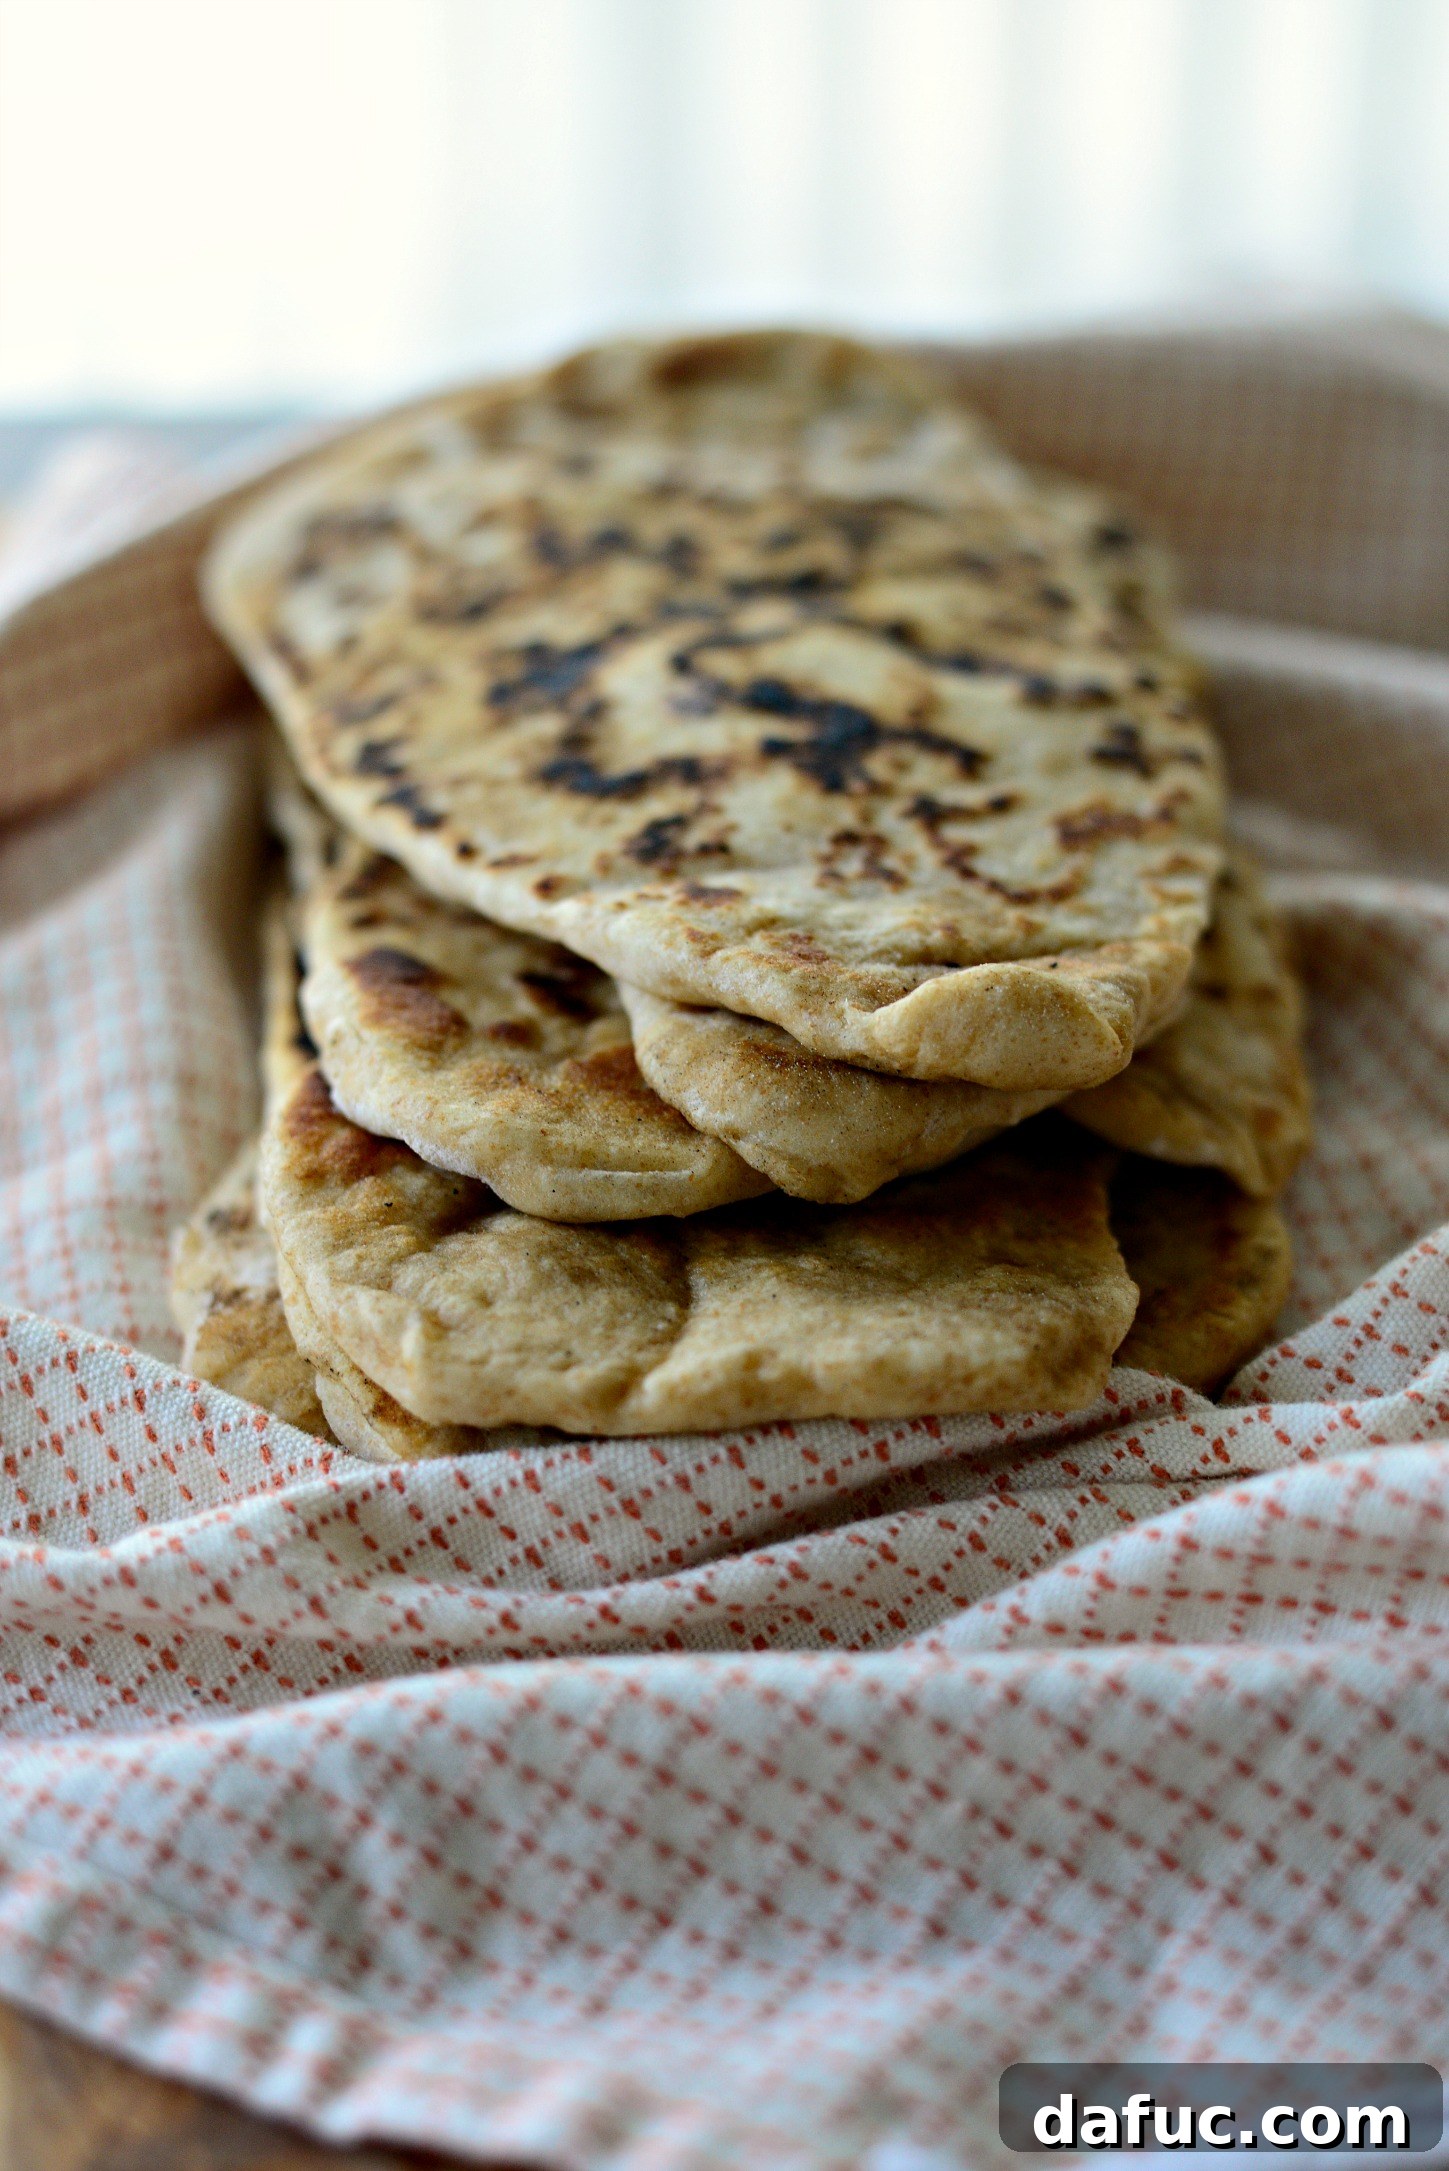
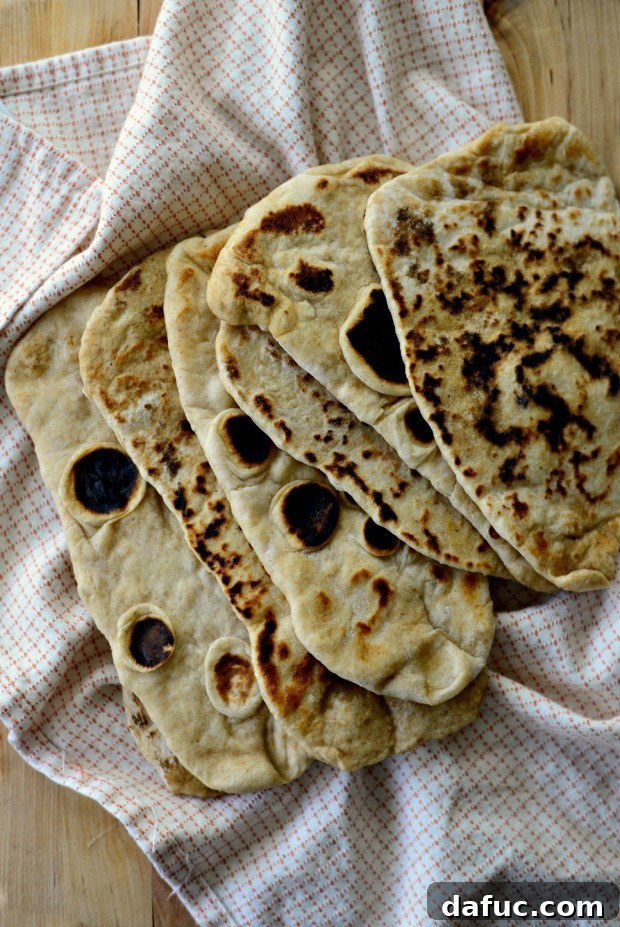
Homemade naan bread is arguably one of the most satisfying and incredibly easy breads you can bake from scratch. Forget bland store-bought versions; once you experience the warm, pillowy texture and authentic flavor of freshly made naan, there’s no turning back. Its versatility knows no bounds – whether you’re dipping it into your favorite rich curry, toasting it into crispy chips for a quick snack, or using it as a delectable wrap for gourmet sandwiches, naan bread elevates any meal.

Unleash Your Inner Baker: Why Homemade Naan is a Game-Changer
Making homemade naan is not just about creating a delicious side dish; it’s an experience that transforms your kitchen into a haven of aromatic bliss. For me, naan is more than just bread; it’s a culinary hero that has rescued many a dinner, turning simple ingredients into an extraordinary feast. Imagine wrapping succulent slices of grilled meat, caramelized onions, and vibrant peppers in a soft, chewy naan for a sandwich that truly wows, or tearing off generous chunks to scoop up hearty soups and stews. It’s my ultimate comfort food, serving as the perfect base for quick pesto and tomato personal pizzas, or simply enjoyed on its own, brushed with a generous layer of melted butter.
The best part? Crafting this leavened bread from scratch is surprisingly straightforward and incredibly fun. Many people might be intimidated by homemade bread, but if you can handle pizza dough, you can master naan. And even if you’re a novice bread maker, this recipe is so forgiving that you’ll still achieve fantastic results. The secret to its unique texture isn’t an oven bake, but a quick cook in a hot, buttered cast-iron skillet. This method imparts a beautiful char and characteristic chewiness that’s hard to replicate. Just remember to take a few precautions: open a window, crack a door, and consider turning on your kitchen fan. The process can get a little smoky, but trust me, it’s a small price to pay for the unparalleled taste.
The Unforgettable Taste of Freshly Made Naan
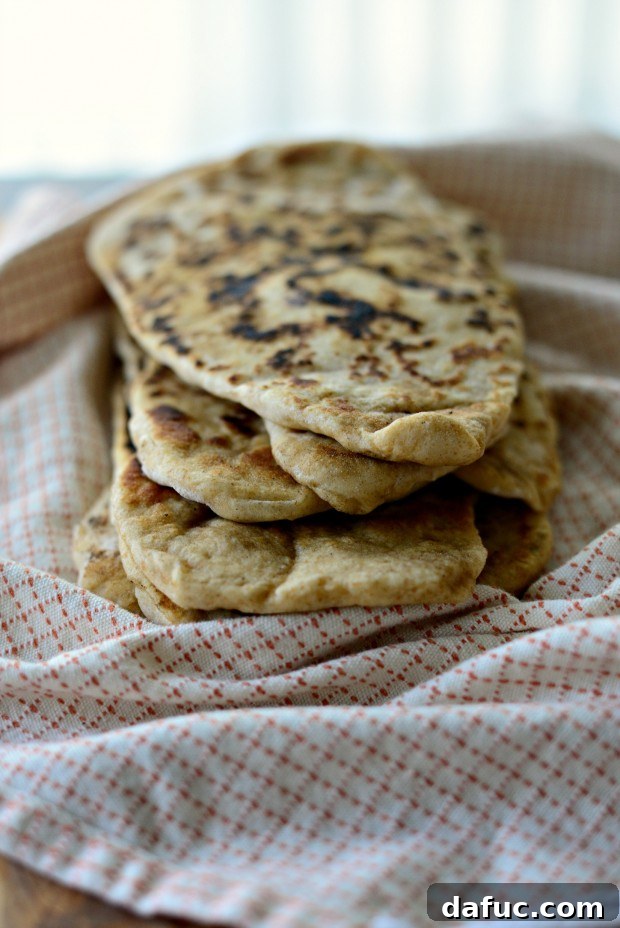
There’s nothing quite like the moment your lips meet a warm, fluffy piece of naan, still slightly smoky from the skillet, especially when it’s just been dunked into a pool of melted butter. Any fleeting wisp of kitchen smoke is instantly forgotten as the rich, tender bread melts in your mouth. It’s a moment of pure culinary bliss, a testament to the simple joys of homemade cooking. The distinct flavor, the soft chewiness, and the slight crisp from the skillet edges create a harmony of textures and tastes that elevate any meal.
Understanding Naan: A Brief Culinary History
Naan, meaning “bread” in Persian, has a rich history spanning thousands of years, primarily in South Asia, Central Asia, and the Middle East. It’s a leavened flatbread typically baked in a tandoor (a clay oven), which gives it its characteristic smoky flavor and bubbly texture. Historically, naan was a staple in royal courts and has evolved into a beloved accompaniment to countless dishes worldwide. Our cast-iron skillet method cleverly mimics the intense heat of a tandoor, allowing home cooks to achieve remarkably similar results without specialized equipment. The addition of yogurt is a key differentiator for naan, providing tenderness, a subtle tang, and contributing to its unique soft texture, unlike other flatbreads.
Essential Ingredients for Your Perfect Naan
Creating delicious naan starts with understanding the role of each ingredient. Here’s a breakdown of what you’ll need and why:
- Sugar: Not just for sweetness, sugar acts as food for the yeast, helping it activate and produce carbon dioxide, which gives the bread its airy structure.
- Whole Milk & Water: The liquid base for the dough. Heating it to the correct temperature (110-115°F) is crucial for activating the yeast without killing it.
- Active Dry Yeast: The primary leavening agent. When activated, it ferments the sugars in the dough, producing gas that makes the bread rise.
- Full-Fat Plain Yogurt: A cornerstone of traditional naan, yogurt adds incredible tenderness, a slight tangy flavor, and moisture to the dough, contributing to its signature soft texture.
- Unbleached All-Purpose Flour & Whole Wheat Flour: The combination provides a good balance of structure and flavor. All-purpose flour gives elasticity, while whole wheat adds a touch of nutty flavor and fiber.
- Baking Powder & Baking Soda: These chemical leavening agents work in conjunction with the yeast, providing an extra lift and contributing to the airy, bubbly texture, especially during the quick cooking process in a hot skillet.
- Ghee (or Melted Butter): Used for brushing the skillet and the cooked naan. Ghee (clarified butter) adds a rich, nutty flavor and helps prevent sticking, ensuring a beautiful golden-brown finish.
Step-by-Step: Crafting Your Own Naan Masterpiece
Step 1: Activating the Yeast – The Foundation of Fluffiness
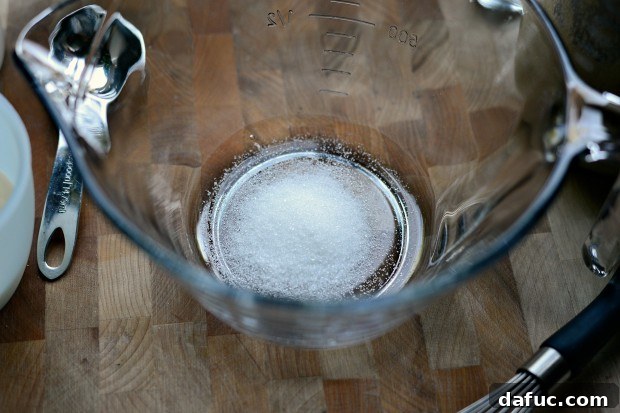
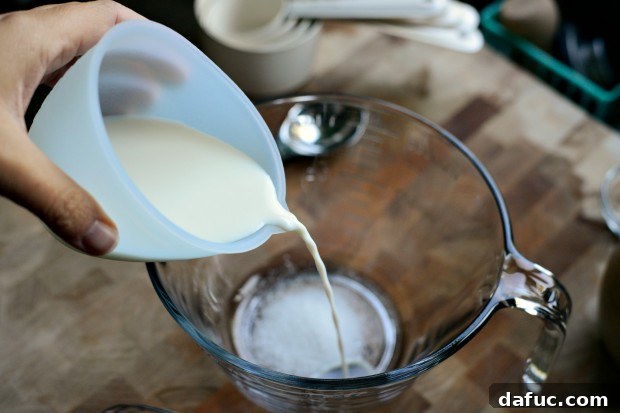
Begin by placing 1-1/2 teaspoons of sugar into a medium-sized bowl. In a small saucepan, gently heat 6 tablespoons of whole milk and 2 tablespoons of water until the mixture reaches a temperature between 110-115 degrees Fahrenheit (43-46°C). An instant-read thermometer is your best friend here, ensuring you hit that perfect temperature range – too cold and the yeast won’t activate; too hot and you risk killing it. Pour the warmed milk and water over the sugar and stir gently until the sugar dissolves. Immediately sprinkle 1/2 teaspoon of active dry yeast evenly over the surface of the liquid. Let this mixture sit undisturbed for 10 minutes. During this time, the yeast should “bloom,” forming a foamy layer on top, which indicates it’s active and ready to work its magic.
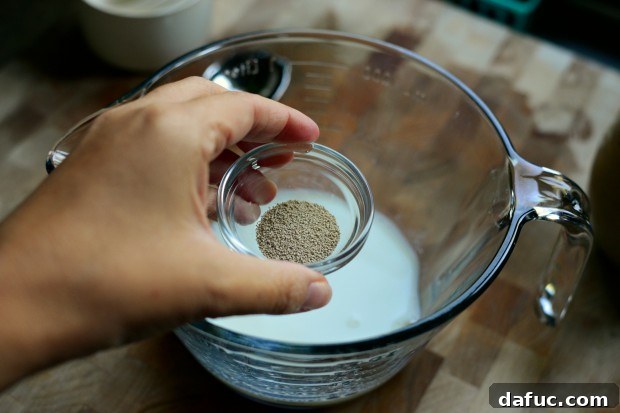
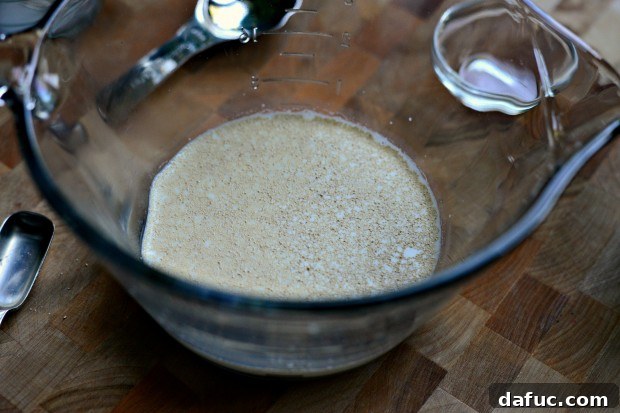
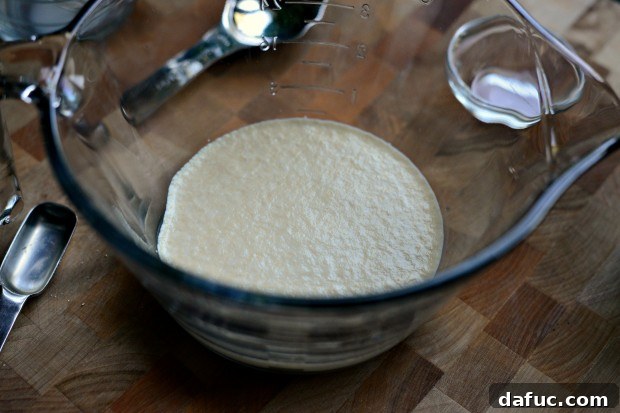
Step 2: Incorporating Yogurt for Ultimate Tenderness
Once your yeast is nicely foamy, it’s time to add the secret ingredient for naan’s characteristic tenderness: plain, full-fat yogurt. Measure out a half cup of yogurt and add it directly into the bowl with the activated yeast mixture. Whisk everything together until thoroughly combined. The yogurt will blend seamlessly, adding moisture and that subtle tang that makes naan so irresistible.
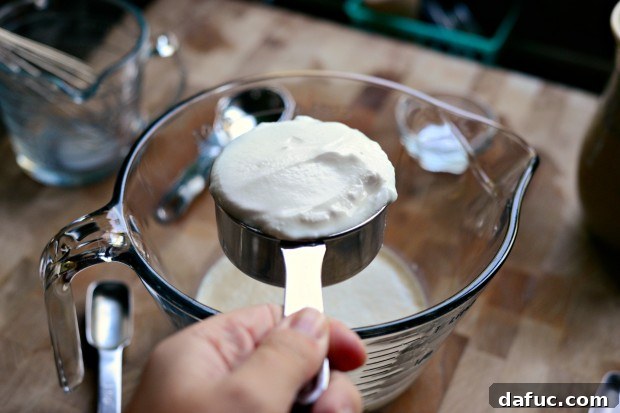
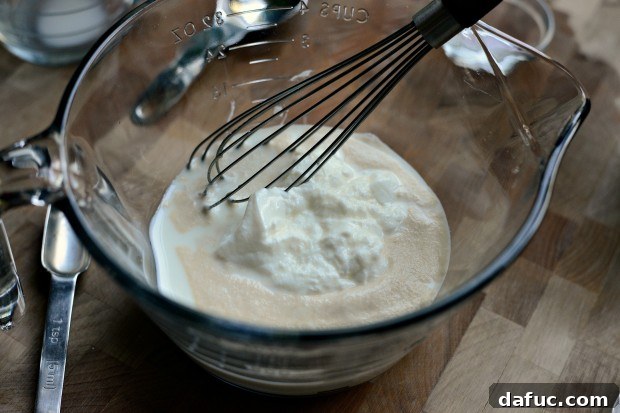
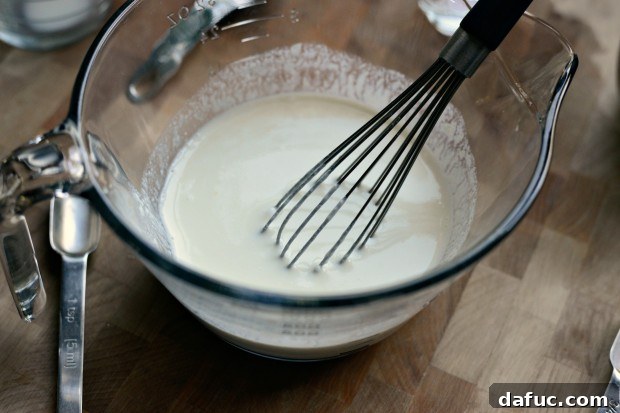
Step 3: Preparing the Dry Blend
While your yeast is blooming and you’re preparing the wet ingredients, turn your attention to the dry components. In a separate large bowl, measure out 1-1/2 cups of unbleached all-purpose flour and 1/2 cup of whole wheat flour. To this, add 3/4 teaspoon of baking powder and 1/2 teaspoon of baking soda. Use a spoon to thoroughly stir these dry ingredients together, ensuring they are well combined. Once mixed, create a noticeable well in the center of the flour mixture, ready to receive the wet ingredients.
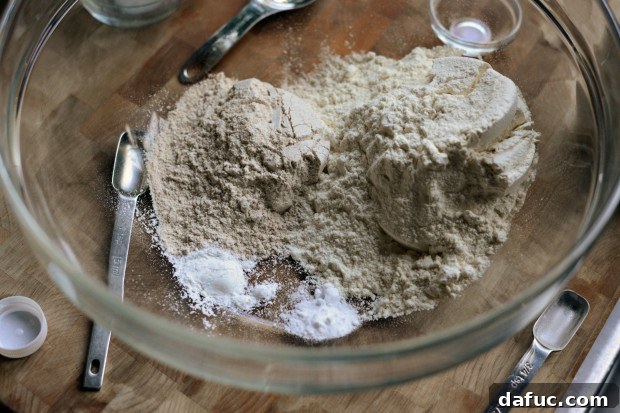
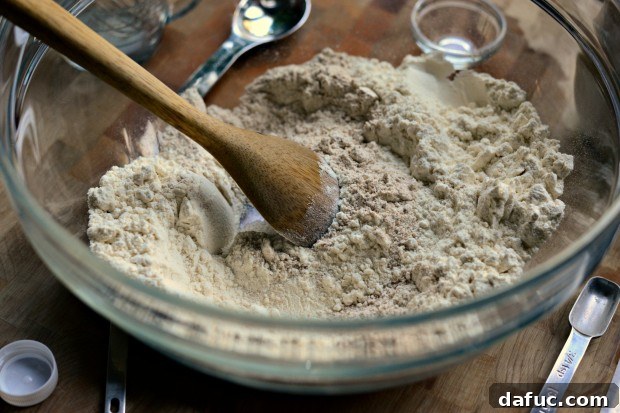
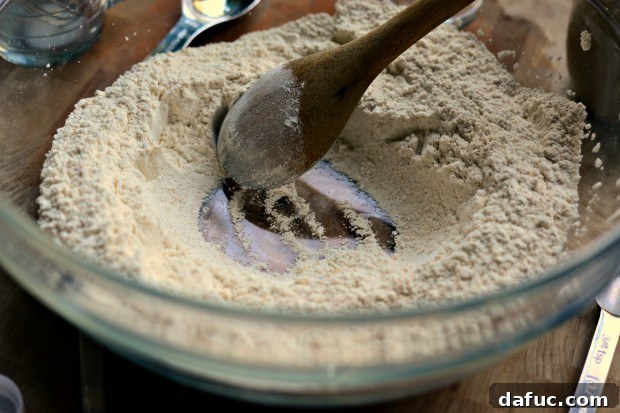
Step 4: Bringing the Dough Together
Carefully pour the combined yogurt and yeast liquids into the well you created in the dry ingredients. With a spoon, slowly begin to stir the dry ingredients from the edges of the well into the wet mixture. Continue stirring just until the wet and dry ingredients are incorporated and the dough barely comes together into a shaggy mass. Avoid overmixing at this stage; we want to develop gluten through kneading, not excessive stirring.
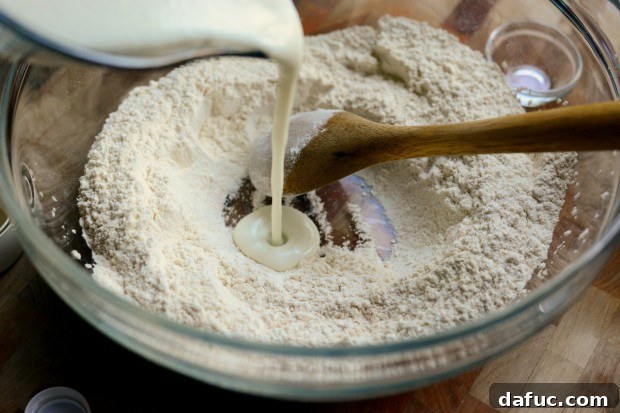
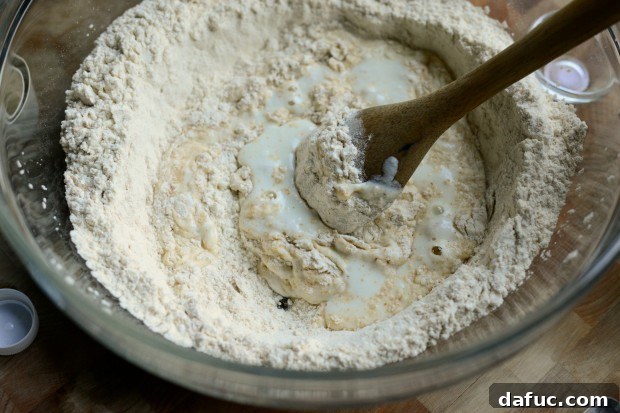
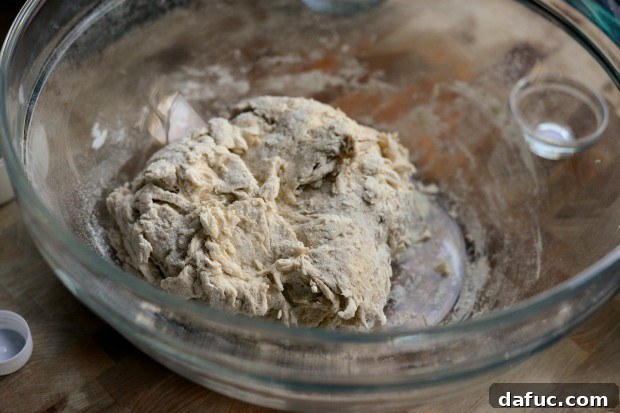
Step 5: Kneading to Perfection
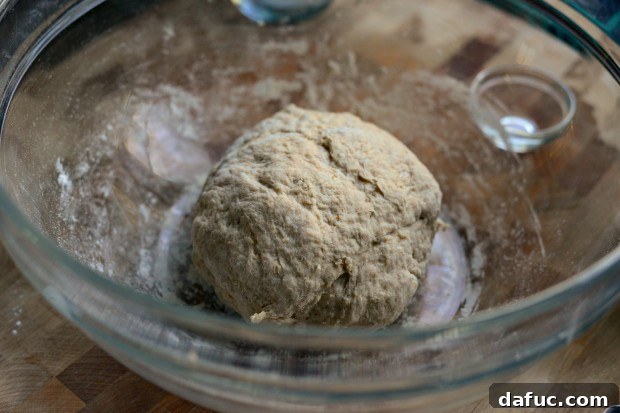
Once the dough has formed a rough ball, turn it out onto a lightly floured surface. Now, it’s time for some hands-on work! Knead the dough by hand for about 5-7 minutes until it becomes smooth, elastic, and no longer sticky. Kneading is essential as it develops the gluten in the flour, which gives naan its signature chewiness and structure. If the dough feels too sticky, add a very small amount of flour, a teaspoon at a time, until it’s manageable. Form the well-kneaded dough into a neat ball.
Step 6: The First Rise – Proofing for Volume
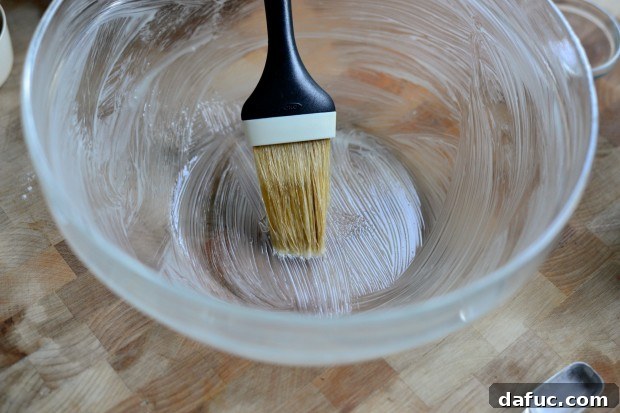
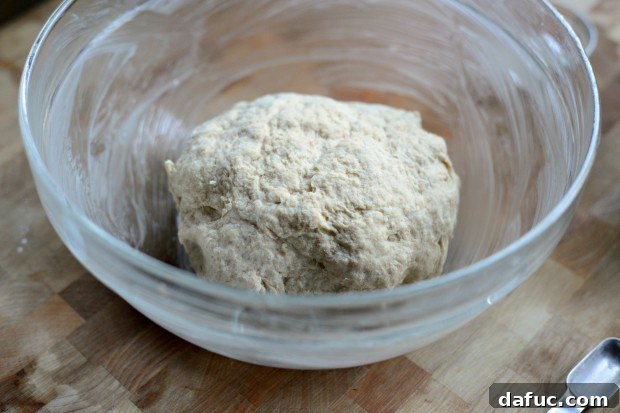
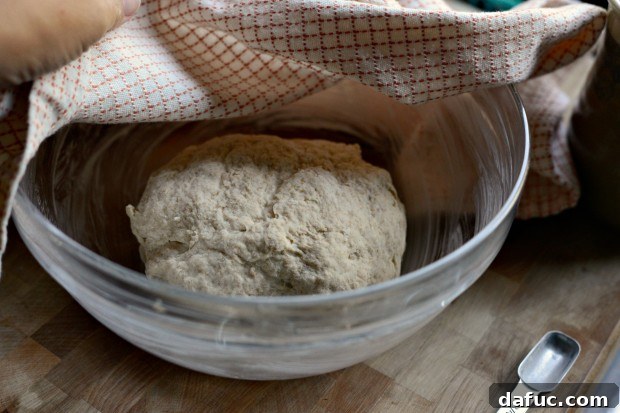
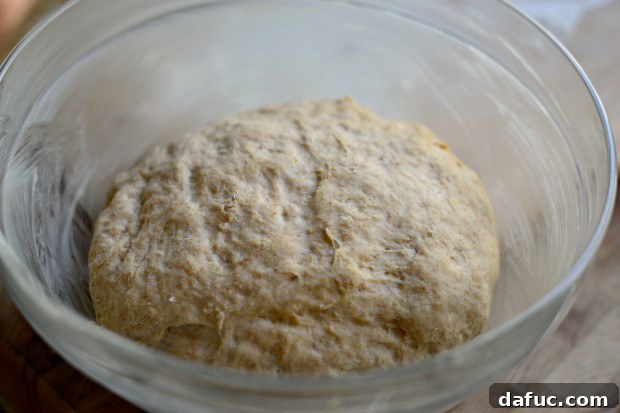
Lightly brush the inside of a medium-sized bowl with melted butter or ghee. Place the ball of kneaded dough into the buttered bowl, turning it once to ensure it’s lightly coated on all sides. This prevents the dough from sticking and helps keep it moist. Cover the bowl with a clean kitchen towel and place it in a warm, draft-free spot to rise for 1 hour. A warm environment is crucial for yeast activity. If your house is cool, try placing the bowl on top of a running dryer, near a warm oven (but not directly on it), or in a sunny spot. The dough should double in size, indicating a successful rise.
Step 7: Shaping Your Naan
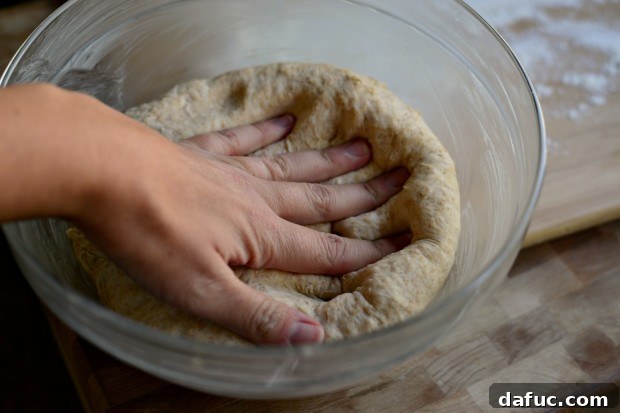
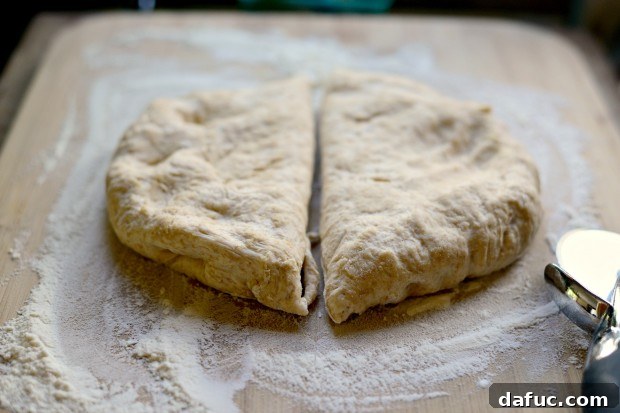
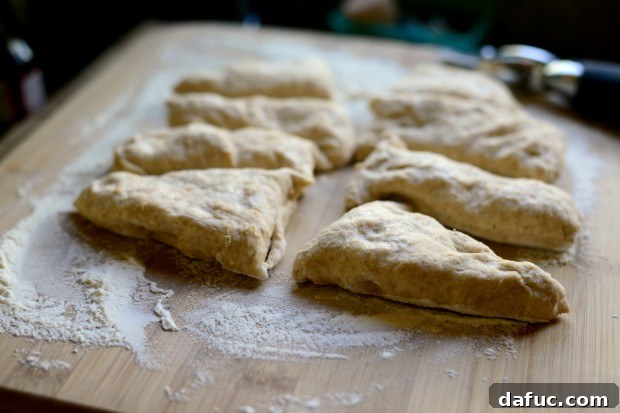
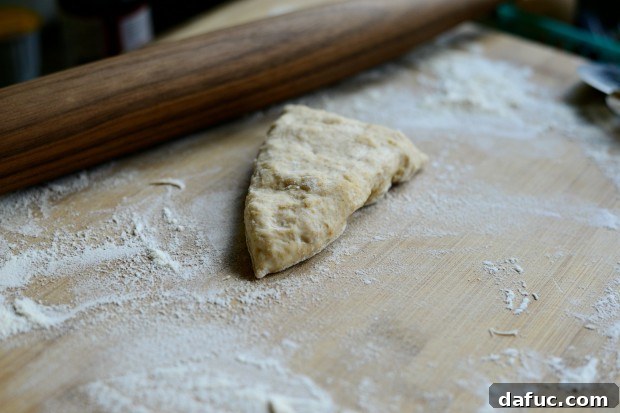
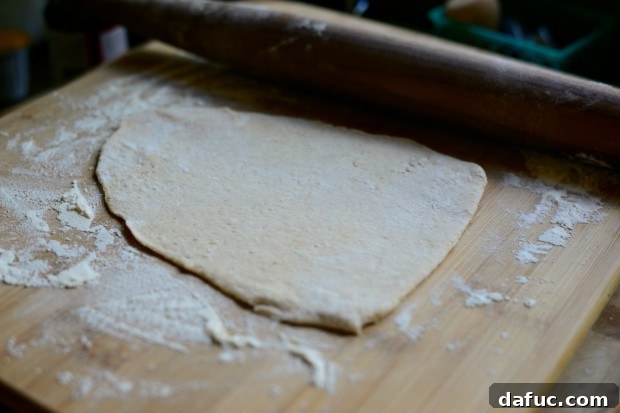
After an hour, your dough should have beautifully risen and doubled in size. Gently use your hands to “punch it down,” expelling all the trapped air. Turn the dough out onto a generously floured surface. Use a sharp knife or a pizza cutter to divide the dough in half, then cut each half into four roughly triangular or oblong pieces, resulting in a total of eight pieces of naan dough. Working with one piece at a time, use a floured rolling pin to roll each dough triangle out thinly, aiming for about 1/8 of an inch thick. This thinness is key to achieving that perfectly chewy yet tender naan. As you roll them out, stack the shaped naan pieces between clean dish towels to prevent them from drying out.
Step 8: Skillet Sizzle – Cooking Your Naan
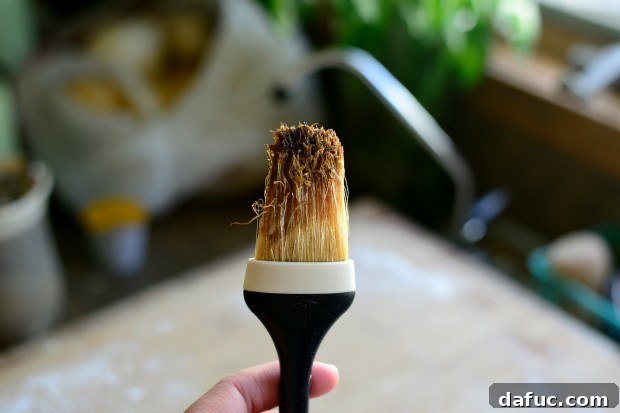
Before you start cooking, ensure your kitchen is well-ventilated; open windows and turn on a ceiling or exhaust fan. Place a 12-inch cast-iron skillet over medium-high heat and let it get scorching hot. This intense heat is crucial for achieving the characteristic bubbles and quick cook time of naan. Once the skillet is hot, quickly brush the surface with melted butter or ghee. Be mindful of your brush – natural fibers can singe and ruin your favorite pastry brush in a hot pan (a lesson learned the hard way!).
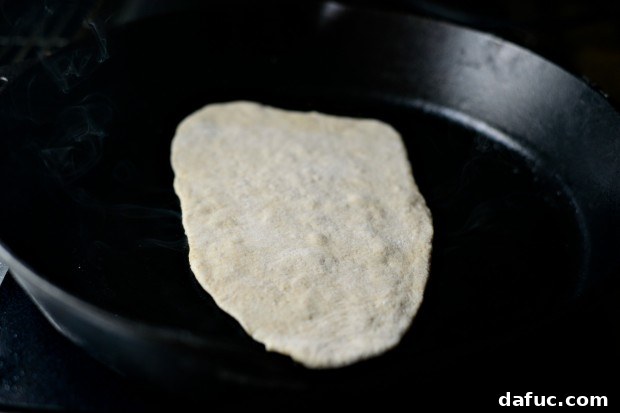
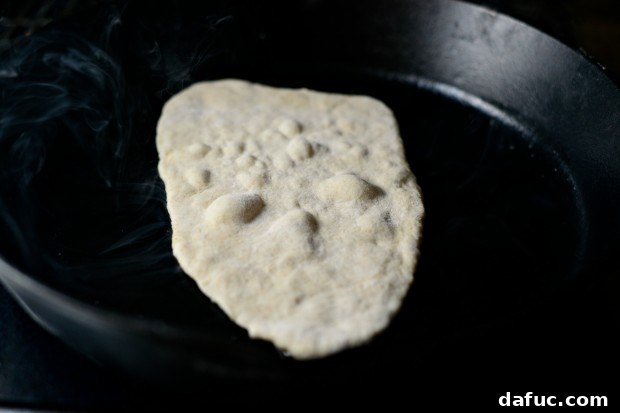
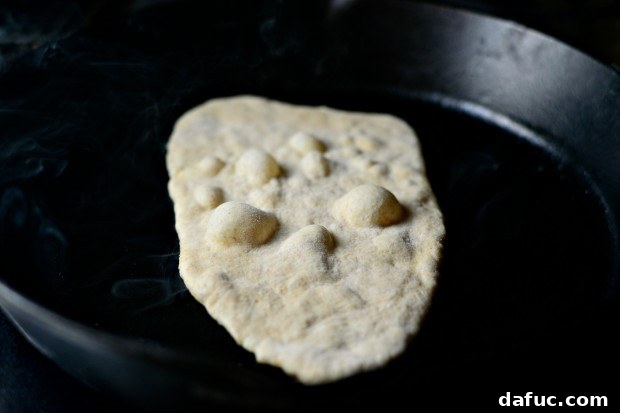
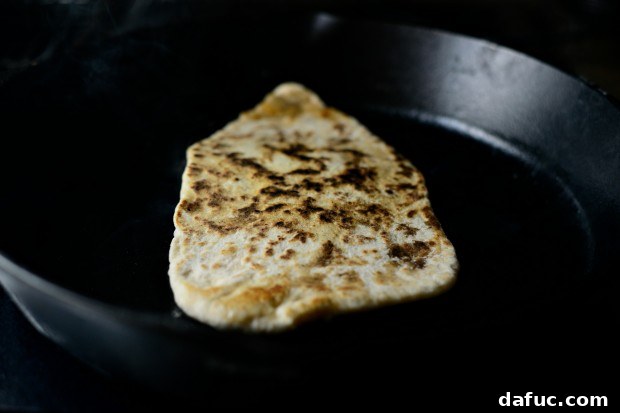
Carefully lay one rolled-out piece of dough into the buttered, hot skillet. As the dough cooks, you’ll literally see magical bubbles form and puff up right before your eyes – a sign of perfectly leavened naan. Cook for about 30 seconds to one minute, or until the bottom of the naan is golden brown with some beautifully charred spots. Use tongs to flip the naan and cook the second side for no more than 30 seconds. Keep an eye on the heat and adjust it as needed to prevent burning. Repeat this process with the remaining dough, brushing the skillet with butter before each new piece. The entire cooking process for all eight pieces is incredibly fast, often taking only about 10-15 minutes total.
Beyond the Basics: Tips for Naan Success
- Yeast Activation is Key: Don’t rush the proofing step for the yeast. The foamy top is a visual cue that your yeast is alive and well, guaranteeing a good rise.
- Dough Consistency: The dough should be soft and pliable, not overly sticky or too stiff. Adjust with a tiny bit more flour or water if needed during kneading.
- Hot Skillet, Quick Cook: The cast iron skillet must be very hot to achieve the rapid puffing and browning that is characteristic of naan. Don’t let the skillet cool down between pieces.
- Don’t Overcrowd: Cook one piece of naan at a time to maintain high heat and ensure even cooking.
- Ventilation: Seriously, open those windows and turn on the fan! The smoke is normal but can quickly fill your kitchen.
- Serve Immediately: Naan is best enjoyed fresh off the skillet when it’s warm, soft, and at its most delicious.
Serving Suggestions: Endless Possibilities
The beauty of homemade naan lies in its incredible versatility. Here are just a few ideas to get you started:
- Traditional Pairings: Serve alongside rich Indian or Middle Eastern curries, lentil dals, or creamy hummus.
- Wraps and Sandwiches: Use as a soft, flavorful wrap for grilled chicken, kebabs, falafel, or even simple roasted vegetables.
- Mini Pizzas: As mentioned, naan makes an excellent base for quick personal pizzas. Simply add your favorite sauce, cheese, and toppings, then bake or pan-fry until the cheese is melted and bubbly.
- Garlic Naan: After cooking, brush with melted garlic butter and sprinkle with fresh cilantro for an irresistible twist.
- Naan Chips: Cut leftover naan into wedges, brush with olive oil and spices, then bake until crispy for homemade chips perfect for dipping.
- With Dips: A simple spread of butter, a sprinkle of sea salt, or a dip in olive oil, balsamic vinegar, or tzatziki.
Storage and Reheating
While best fresh, leftover naan can be stored in an airtight container at room temperature for up to 2 days, or in the refrigerator for up to 4 days. For longer storage, freeze individual pieces for up to 2 months. To reheat, sprinkle lightly with water and warm in a hot skillet, microwave briefly, or wrap in foil and heat in a moderate oven until soft again.
A Culinary Journey from Scratch
Once you take the plunge and try your hand at making homemade naan bread, you’ll likely find yourself leaving store-bought options behind forever. It truly is one of my favorite breads to make, right up there with homemade pita bread. There’s a profound sense of satisfaction that comes with baking bread from scratch, and naan is no exception. The feeling of creating something so delicious and versatile with your own hands is truly exciting. So go ahead, give this recipe a try and embark on your own homemade naan adventure!
Enjoy! If you give this Homemade Naan recipe a try, let me know! Snap a photo and tag me on Twitter or Instagram!

My cookbook Simply Scratch : 120 Wholesome Homemade Recipes Made Easy is now available! CLICK HERE for details and THANK YOU in advance!

Print Recipe
Pin Recipe
Leave a Review »
8
naan
Homemade Naan
1 hour
20 minutes
13 minutes
12 minutes
1 hour
45 minutes
Ingredients
- 1½ teaspoon sugar
- 6 tablespoons whole milk
- 2 tablespoons water
- 1/2 teaspoon active dry yeast
- 1/2 cup full fat yogurt
- 1½ cups unbleached all-purpose flour
- 1/2 cup whole wheat flour
- 3/4 teaspoon baking powder
- 1/2 teaspoon baking soda
- ghee
Equipment
-
Lodge 12 Inch Cast Iron Skillet. Pre-Seasoned Cast Iron Skillet with Red Silicone Hot Handle Holder.
Instructions
-
Add sugar to a medium bowl. Heat milk and water in a small saucepan or use a small dish in a microwave until thermometer reaches 110-115 degrees F (43-46°C). Stir water into sugar to dissolve, immediately sprinkle the yeast over top and set aside for 10 minutes to proof. Once the yeast has foamed, stir in the yogurt.
-
In a large bowl combine the flours, baking soda and baking powder, stir with a wooden spoon and make a well in the center.
-
Pour the yeast/yogurt mixture into the center of the well and stir, gradually incorporating the flour. Once the dough comes together, knead by hand until smooth, adding more flour if necessary.
-
Lightly butter the inside of a medium bowl and place dough in the center. Cover with a clean kitchen towel and place the bowl in a warm place to rise for 1 hour.
-
Punch the dough down to expel the air. Turn dough out on a generously floured surface and cut in half. Cut each half in half again, creating 8 pieces, and use a floured rolling pin to roll into thin oblong ovals, about 1/8 inch thick. Layer the shaped pieces between clean dish towels.
-
Heat a cast iron skillet over medium-high heat. Once hot, brush with melted butter or ghee (avoid natural fiber brushes). Place one dough oval in the center of the skillet. Cook for 30 seconds to 1 minute, or until the bread bubbles and the underneath is browned with char marks. Use tongs to flip, cooking for an additional 30 seconds or so. Adjust heat as needed to prevent burning. Brush the skillet each time before repeating with remaining rounds of dough.
-
Serve warm and enjoy!
Notes
Serving:
1
loaf
,
Calories:
133
kcal
,
Carbohydrates:
26
g
,
Protein:
5
g
,
Fat:
1
g
,
Saturated Fat:
1
g
,
Polyunsaturated Fat:
1
g
,
Monounsaturated Fat:
1
g
,
Cholesterol:
3
mg
,
Sodium:
121
mg
,
Potassium:
98
mg
,
Fiber:
2
g
,
Sugar:
2
g
,
Vitamin A:
35
IU
,
Vitamin C:
1
mg
,
Calcium:
60
mg
,
Iron:
1
mg
Laurie McNamara
bread
Middle Eastern