
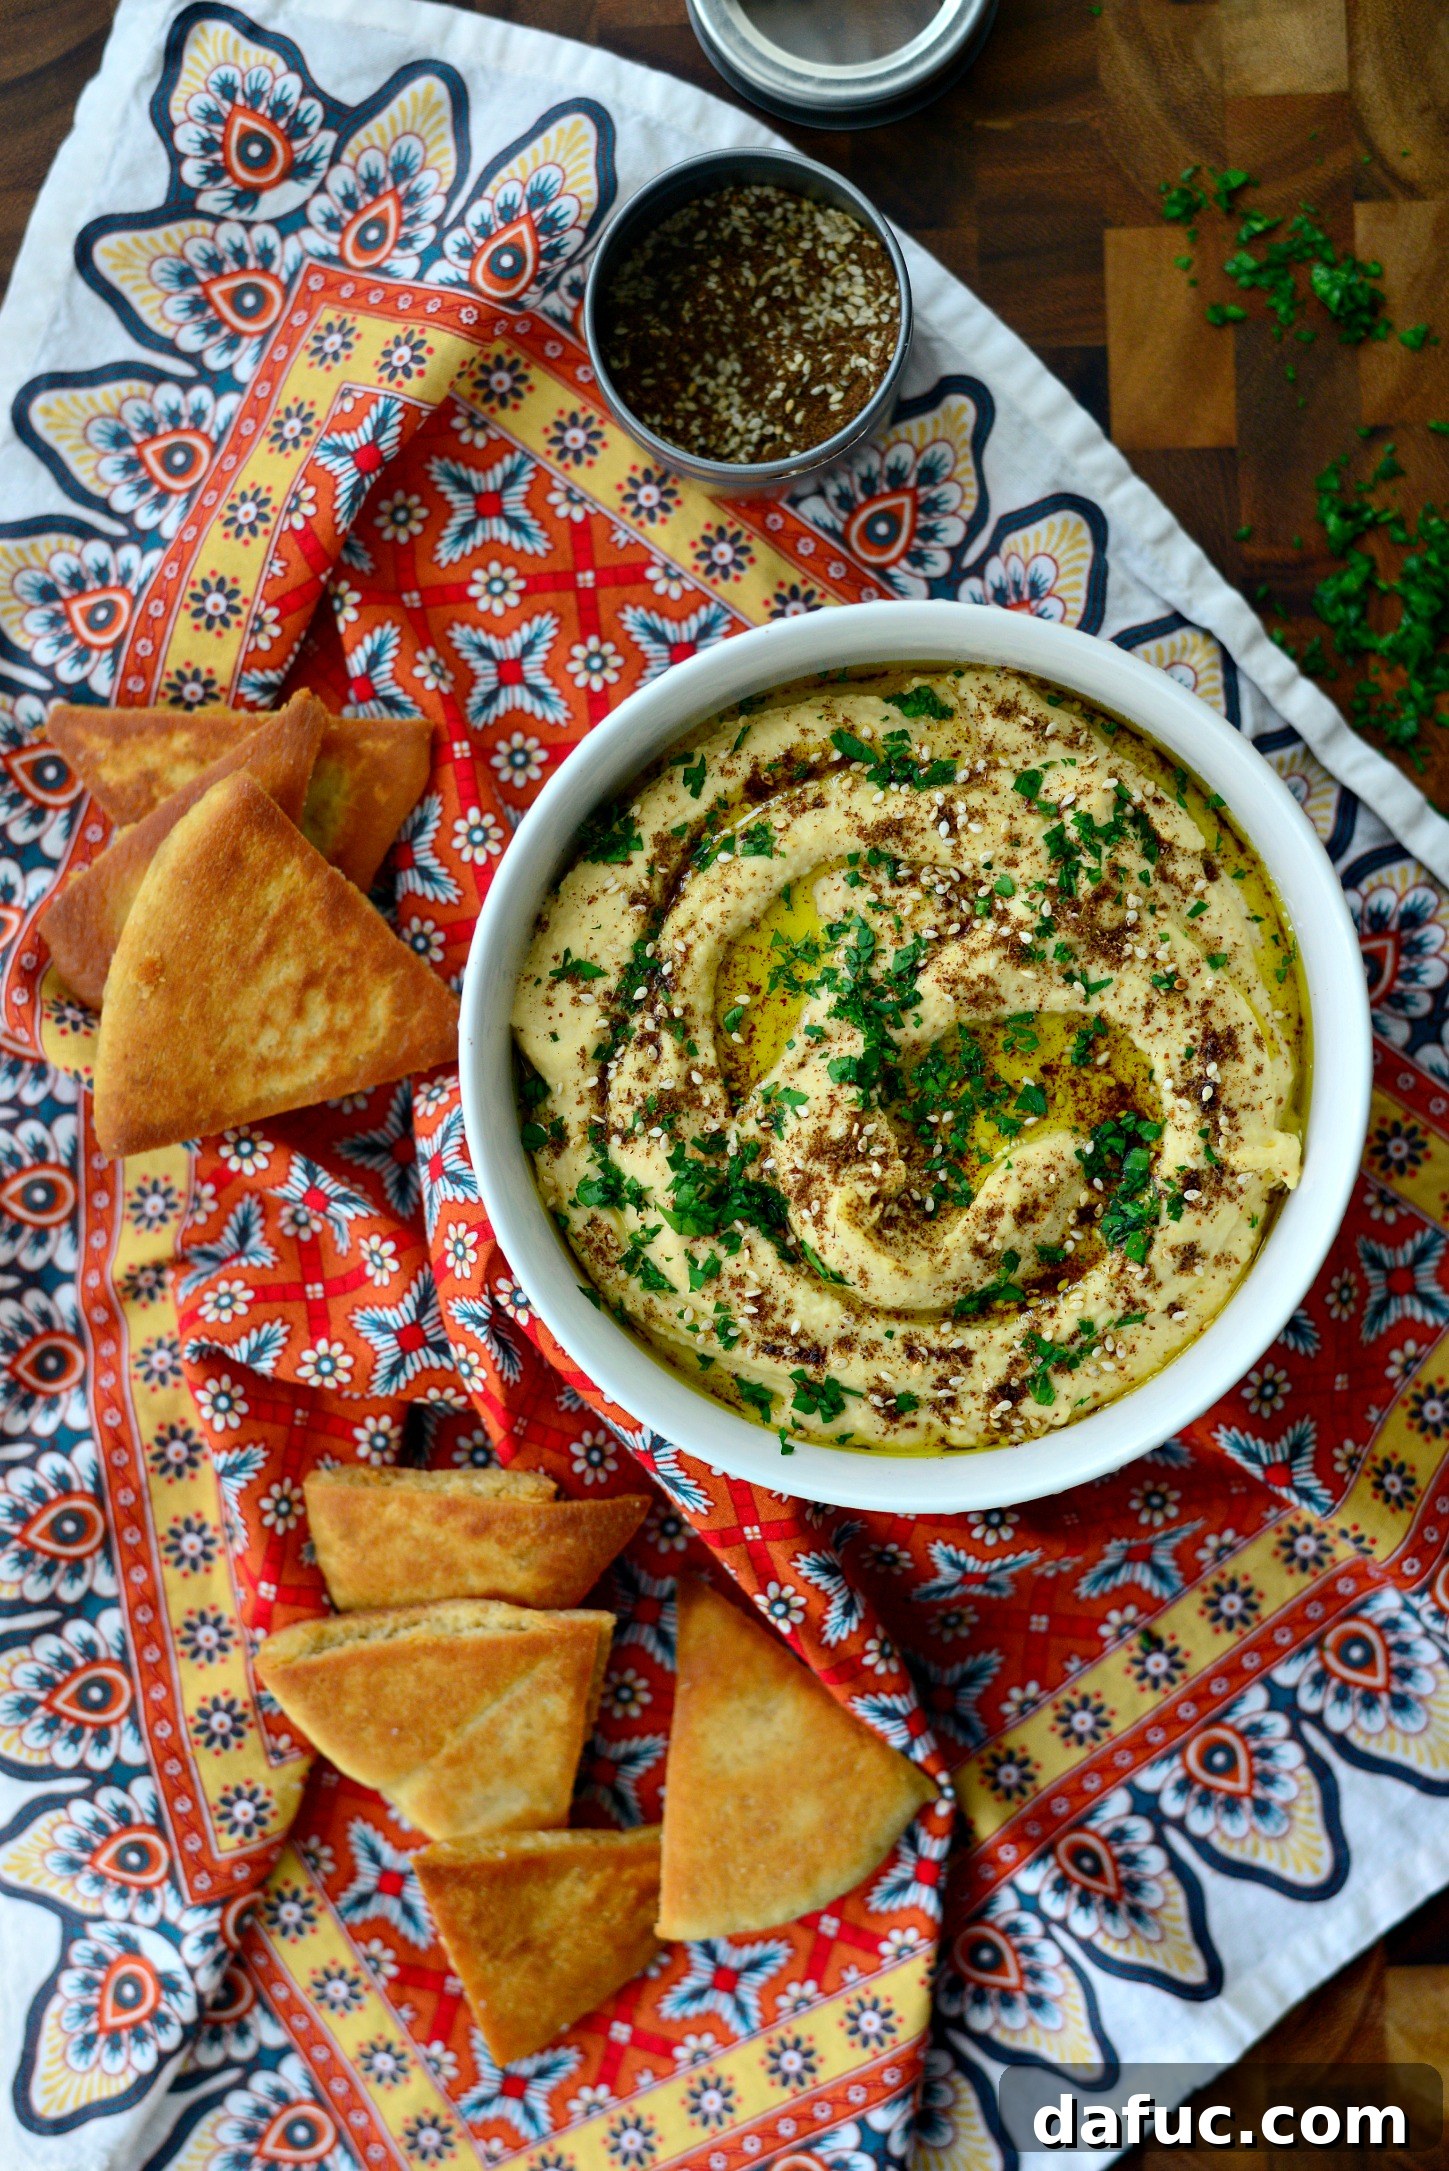
Prepare your palate for an extraordinary culinary experience! This Za’atar Roasted Garlic Hummus is not just a dip; it’s a revelation of flavors, combining the mellow sweetness of roasted garlic with the earthy, aromatic punch of Middle Eastern za’atar. Forget store-bought varieties; once you taste this homemade masterpiece, freshly blended to perfection, you’ll understand why it’s worth every minute. Grab your favorite pita chips and crisp vegetables, because you’re about to embark on a dipping adventure like no other.
The Ultimate Za’atar Roasted Garlic Hummus: A Flavorful Homemade Dip
Hummus holds a special place in my heart, often serving as a satisfying meal rather than just a snack. There’s something inherently comforting and versatile about this creamy chickpea dip. While classic hummus is always a delight, I find immense joy in experimenting with flavors that elevate it from simple to sublime. My latest culinary obsession combines two incredibly distinct yet harmonious elements: the rich, caramelized notes of roasted garlic and the complex, fragrant spice blend known as za’atar. This duo transforms an already beloved dip into an unforgettable, aromatic spread that’s impossible to resist.
Why This Za’atar Roasted Garlic Hummus is a Culinary Game-Changer
The beauty of this particular hummus recipe lies in its profound depth of flavor, achieved with surprisingly minimal effort. Unlike raw garlic, which can be sharp and overpowering, roasting mellows its intensity, transforming it into a sweet, almost nutty ingredient. This sweet garlic perfectly complements the robust and tangy profile of za’atar, a spice blend that brings an authentic Middle Eastern essence to every spoonful. The result is a hummus that is incredibly creamy, wonderfully aromatic, and utterly addictive. It’s an ideal choice for anyone looking to add a gourmet touch to their snacking or appetizer repertoire.
The Magic of Roasted Garlic: Sweetness Unveiled
Roasted garlic is a true culinary gem. The process of slow-roasting garlic cloves in the oven brings out their natural sugars, caramelizing them to create a soft, spreadable texture and a significantly sweeter, milder flavor. This transformation is crucial for our hummus. Instead of the pungent kick of raw garlic, you get a subtle, buttery depth that enhances the overall creaminess of the dip without overwhelming other ingredients. It’s a fundamental step that contributes immensely to the sophisticated taste of this Za’atar Roasted Garlic Hummus.
Understanding Za’atar: A Taste of Middle Eastern Tradition
Za’atar is more than just a spice blend; it’s a staple of Middle Eastern cuisine, steeped in history and flavor. Typically, it’s a fragrant mix of dried thyme, oregano, marjoram, toasted sesame seeds, and sumac. The thyme and oregano provide an herbal base, the sesame seeds add a delightful crunch and nutty flavor, and the sumac contributes a distinct tangy, lemony note. This combination is what gives za’atar its unique, complex aroma and taste, making it an indispensable ingredient for elevating everything from flatbreads to grilled meats. In this hummus, za’atar introduces an exotic, earthy dimension that truly sets it apart.
Crafting Your Own Homemade Hummus: A Simple Pleasure
While convenience often leads us to store-bought options, making hummus from scratch is a surprisingly simple and incredibly rewarding endeavor. The freshness of homemade hummus is unparalleled; you control the quality of ingredients, adjust flavors to your preference, and avoid unnecessary preservatives. Plus, the process itself is quite therapeutic, transforming humble chickpeas into a luscious, smooth dip. And let’s be honest, homemade hummus deserves to be paired with homemade accompaniments, like crispy pita chips, for the ultimate snacking experience. It’s a small extra step that makes all the difference.
Step-by-Step Guide to Perfect Za’atar Roasted Garlic Hummus
Follow these detailed steps to create a batch of Za’atar Roasted Garlic Hummus that will impress even the most discerning palates. Precision in preparation, especially with the garlic, ensures the best flavor outcome.
1. Prepare the Roasted Garlic
Begin by preheating your oven to a moderate 400°F (200°C). Take 4 to 6 large cloves of garlic and place them on a sturdy piece of heavy-duty aluminum foil. Drizzle them generously with about a teaspoon of oil. While the original recipe suggests safflower oil, good quality olive oil works just as wonderfully and imparts a delicious flavor. Carefully fold the sides of the foil inward, crimping them tightly to form a sealed purse or packet. This traps the moisture and helps the garlic steam and soften beautifully. Place this garlic pouch into the preheated oven and let it roast for a good 30 to 35 minutes. You’ll know it’s done when the cloves are incredibly soft and have a beautiful, light golden hue. Once roasted, remove the pouch from the oven and allow the garlic to cool completely. Handling hot garlic can be tricky, so ensure it’s cool enough before attempting to peel off the papery skins. The softened cloves should slip out easily, ready to contribute their sweet essence to your hummus.
2. Prepare the Chickpeas
While the garlic is roasting, turn your attention to the chickpeas. Open two (15-ounce) cans of garbanzo beans. Place a mesh strainer over a bowl and pour the chickpeas into the strainer, allowing the liquid to drain into the bowl below. This reserved liquid, often called aquafaba, is vital for achieving the ultra-creamy consistency of your hummus. Do not discard it! My local store often doesn’t carry dried chickpeas, but if you prefer to use them, remember to soak and cook them according to package directions before proceeding with the recipe. The goal is to have perfectly cooked and tender chickpeas. Once drained, set the chickpeas aside and ensure you’ve collected at least a cup of the aquafaba.
3. Combine and Blend the Ingredients
Once your roasted garlic has cooled and been peeled, it’s time to assemble the hummus. Transfer the drained chickpeas to the bowl of a powerful blender or food processor. Add the soft, sweet roasted garlic cloves. Next, measure in 1/4 cup of tahini, which provides that distinctive nutty flavor and velvety texture essential to good hummus. Pour in 1/4 cup of good quality olive oil. Squeeze in the fresh juice of half a lemon; for those who love a brighter, more zesty flavor, feel free to use a whole lemon. Add 1½ teaspoons of kosher salt to taste. Now for the secret ingredient for silkiness: add about one ladle of the reserved chickpea liquid. This is typically about 1/2 to 3/4 cup, but the exact amount can vary. Start with this amount, and you can always add more later to adjust the consistency. With all ingredients in the blender or food processor, secure the lid and prepare to blend!
4. Achieve Perfect Consistency
Now, it’s time to blend! Process the ingredients until they are incredibly smooth and creamy. You might need to stop the machine a few times to scrape down the sides of the bowl, ensuring that all the chickpea bits are fully incorporated. The key to truly dreamy hummus is patience during this step. If the hummus appears too thick, or if you prefer a looser consistency, gradually add a little more of the reserved chickpea liquid, one tablespoon at a time, blending well after each addition. I usually find that about 1 to 1 1/2 ladles (around 3/4 cup-ish) of liquid gives me the perfect, silken texture. Keep blending until it’s as smooth as you desire, tasting and adjusting seasoning if needed.
5. Garnish and Serve
Once you’ve achieved your desired consistency, spoon the Za’atar Roasted Garlic Hummus into your favorite serving bowl. For an elegant presentation and an extra burst of flavor, drizzle the top with a good swirl of olive oil. Then, generously sprinkle with your homemade za’atar and a scattering of finely minced fresh parsley. The vibrant green of the parsley contrasts beautifully with the earthy tones of the za’atar and the creamy hummus. I admit, I’m a self-proclaimed za’atar addict, and often find myself adding more to each individual dip of pita chip into the bowl. This hummus is simply too good to resist. Excuse me while I finish the remainder of this bowl – it’s calling my name!
Creative Serving Suggestions for Your Incredible Hummus
This versatile Za’atar Roasted Garlic Hummus isn’t just for dipping. Its rich flavor and creamy texture make it an excellent addition to a variety of meals and snacks. Here are some inspired ways to enjoy it:
- Classic Dip: Serve it generously in a bowl with an assortment of vibrant, crisp cut vegetables such as cucumber slices, carrot sticks, bell pepper strips, and celery. Don’t forget warm, toasted pita bread, fluffy naan shards, or even crispy bagel chips.
- Sandwich and Wrap Spread: Ditch the mayonnaise! Use this hummus as a healthier, flavorful spread for sandwiches, wraps, and even burgers. It adds moisture and a burst of Middle Eastern flavor.
- Elevated Appetizer Base: Create a show-stopping appetizer by using it as the base for a multi-layered hummus dip. Top it with finely chopped tomatoes, cucumbers, olives, feta cheese, and a final sprinkle of za’atar.
- Salad and Grain Bowl Booster: Swirl a dollop of hummus into your favorite salads or grain bowls for an instant creamy boost and added protein. It’s particularly good with roasted vegetables and Mediterranean-inspired grains.
- Sauce Thickener: Whisk a spoonful into salad dressings or even light sauces to add body, flavor, and an unexpected richness.
- Breakfast Delight: Spread it on toast or a bagel, then top with a fried egg, fresh herbs, and a drizzle of chili oil for a hearty and unique breakfast.
- Accompaniment to Grilled Meats: Serve alongside grilled chicken, lamb, or fish. The garlic and za’atar flavors beautifully complement smoky meats.
Love hummus as much as I do? Click Here for even more delicious hummus recipes and creative ideas!
Za’atar Roasted Garlic Hummus Recipe
Creamy and dreamy, this homemade roasted garlic hummus is infused with the delightful flavors of za’atar. This recipe yields approximately 2 cups, making about 16 (2-tablespoon) servings.
Yield: 16 servings (approx. 2 cups)
Prep Time: 15 mins
Cook Time: 30 mins
Total Time: 45 mins
Leave a Review »
Ingredients
- 4 to 6 large cloves garlic, skins left on
- 1 teaspoon extra light olive oil (or safflower oil, for roasting garlic)
- 2 (15 ounce) cans chickpeas, drained, with bean liquid (aquafaba) reserved
- 1/4 cup tahini
- 1/4 cup olive oil, plus extra for garnish
- Juice of ½ to 1 lemon (to taste)
- 1½ teaspoons kosher salt
- 1 tablespoon homemade za’atar, plus more for garnish
- 1 tablespoon minced fresh parsley, for garnish
Equipment
- Food Processor or High-Powered Blender
- Heavy-duty aluminum foil
- Mesh strainer
Instructions
- Preheat your oven to 400°F (200°C).
- Place the garlic cloves on a piece of heavy-duty aluminum foil and drizzle with approximately 1 teaspoon of extra light olive oil (or safflower oil). Fold up the sides of the foil and crimp them together to create a sealed pouch. Place this pouch into the preheated oven and roast for 30 to 35 minutes, or until the garlic is very soft and slightly caramelized. Remove from the oven and allow to cool completely until safe to handle, then carefully peel away the papery skins from the softened cloves.
- While the garlic roasts, open and drain the two cans of chickpeas. Ensure you reserve the liquid (aquafaba) from the cans in a separate bowl. You will need roughly 1 cup of this liquid for the hummus.
- In the bowl of a high-powered blender or food processor, combine the drained chickpeas, peeled roasted garlic cloves, 1/4 cup tahini, 1/4 cup olive oil, the juice from half a lemon (adjust to a whole lemon if you prefer more tang), and 1½ teaspoons kosher salt.
- Add about one ladle (approximately ½ to ¾ cup) of the reserved chickpea liquid to the food processor.
- Process the mixture on high until it becomes completely smooth and creamy. Stop periodically to scrape down the sides of the bowl with a spatula to ensure all ingredients are thoroughly blended.
- If the hummus is too thick or you desire a looser consistency, add more of the reserved chickpea liquid, one tablespoon at a time, and continue processing until your desired smooth and creamy texture is achieved. For a super silky finish, you might end up using a total of 1 to 1½ ladles (¾ to 1 cup) of liquid.
- Spoon the finished Za’atar Roasted Garlic Hummus into a serving bowl. Drizzle generously with a little extra olive oil, then sprinkle with the homemade za’atar and minced fresh parsley for a beautiful and aromatic finish.
- Serve immediately with warm pita bread, fresh vegetables, or homemade pita chips, and enjoy the incredible flavors!
Nutrition Information
(Approximate values per serving)
- Serving Size: 2 tablespoons
- Calories: 57 kcal
- Carbohydrates: 1g
- Protein: 1g
- Fat: 6g
- Saturated Fat: 1g
- Polyunsaturated Fat: 1g
- Monounsaturated Fat: 3g
- Sodium: 249mg
- Potassium: 24mg
- Fiber: 1g
- Sugar: 1g
- Vitamin A: 27IU
- Vitamin C: 1mg
- Calcium: 11mg
- Iron: 1mg
Author: Laurie McNamara
Course: Appetizers & Snacks
Cuisine: Middle Eastern
Enjoy! If you try this Za’atar Roasted Garlic Hummus recipe, I’d love to know what you think! Snap a photo and share it on social media, tagging me on Twitter or Instagram!
[This post contains affiliate links, which means I may earn a small commission if you make a purchase through links marked with an asterisk, at no extra cost to you.]