
Mastering the Art of Poached Eggs: A Step-by-Step Guide to Perfection
There’s something uniquely satisfying about a perfectly poached egg. That delicate, tender white encasing a rich, creamy, runny yolk is a culinary delight that transforms any meal into a gourmet experience. For many, the idea of poaching an egg can seem daunting, a skill often reserved for professional chefs or weekend brunch specialists. However, I’m here to assure you that with the right technique and a few simple tricks, you can master the art of poaching eggs consistently, every single time. This comprehensive guide will walk you through my tried-and-true method, ensuring flawless results that will impress both your taste buds and your guests.
My journey with poached eggs began years ago, a cherished memory of my mother creating this simple yet elegant dish. I distinctly remember my surprise when she revealed her secret ingredient: a splash of vinegar in the water. That first bite, a tender white yielding to a warm, golden yolk, was a revelation. From that moment, I was hooked. I’ve always preferred an egg that’s not overcooked, especially when it comes to the yolk. The pure joy of dipping a piece of crisp, buttered toast into a luscious, runny yolk is unparalleled, a truly comforting and indulgent breakfast ritual. This method guarantees that perfect texture, making it my ultimate go-to, whether I’m preparing a quick weekday breakfast or an elaborate weekend brunch menu.
Essential Tools and Ingredients for Perfect Poached Eggs
Achieving poached egg perfection begins with gathering your simple tools and fresh ingredients. Preparation is key to a stress-free poaching experience, allowing you to focus on the delicate cooking process. Having everything at hand ensures a smooth workflow, so you’re not scrambling (pun intended!) for items once the water is on the heat. I even like to have my bread ready for the toaster, knowing that once the egg hits the water, it’s a race against time to get that toast buttered and ready for dunking! Here’s what you’ll need:
- Fresh Eggs: The fresher the egg, the better. Fresher eggs have tighter, more viscous whites, which hold their shape beautifully in the hot water, resulting in a more compact and aesthetically pleasing poached egg with minimal wispy edges.
- White Vinegar: A crucial ingredient that helps the egg whites coagulate quickly, preventing them from spreading too much and dissolving into the water. Don’t worry, the amount used is so small that you won’t taste it in the final product!
- A Wooden Spoon or Spatula: Essential for gently creating the whirlpool in the water that aids in shaping the egg, and for carefully folding any stray whites back around the egg.
- A Slotted Spoon: Perfect for gently lifting the cooked egg from the water and allowing any excess water to drain away without tearing the delicate white.
- Small Pot or Deep Pan: Choose one that allows enough depth (at least 2-3 inches of water) for the egg to float freely without touching the bottom, ensuring even cooking.
- Small Dish or Ramekin: For cracking the egg into before carefully sliding it into the simmering water. This step significantly reduces the risk of a broken yolk or shell fragments entering your poaching liquid.
- Timer: Precision is important for that perfect runny yolk. A kitchen timer ensures consistent results every single time, removing any guesswork.
Step-by-Step Guide to Poaching Eggs
Follow these detailed steps, and you’ll be enjoying perfectly poached eggs in no time. The key is gentle handling, precise timing, and attention to water temperature. Let’s get started!
-
Prepare Your Poaching Water: Begin by filling a small pot or a deep pan with approximately 2-3 inches of water. The depth is important as it allows the egg to immerse fully and cook evenly without sticking to the bottom. Place the pot on the stove over medium heat. The goal is to bring the water to a gentle simmer, not a vigorous, rolling boil. You’ll know it’s ready when you see tiny, consistent bubbles forming at the bottom of the pan and slowly rising to the surface. If the water starts to boil too rapidly, simply reduce the heat to calm it down; aggressive boiling can cause the delicate egg to break apart.
-
Add the Secret Ingredient: Vinegar: Once your water is at that perfect gentle simmer, add a generous ‘glug’ of white distilled vinegar – approximately 1-2 tablespoons per quart of water. The vinegar plays a crucial role in the poaching process: it helps the egg whites coagulate more quickly, ensuring they bind together neatly around the yolk instead of spreading thinly throughout the water. Many worry about a vinegar taste, but rest assured, the minuscule amount absorbed by the egg is virtually undetectable in the final taste. It’s a simple, effective trick for maintaining the egg’s beautiful, compact shape.
-
Pre-Crack Your Egg into a Dish: Before introducing your egg to the simmering water, crack it into a small, shallow dish or ramekin. This step is vital for several reasons. First, it allows you to easily inspect for any tiny shell fragments that might have fallen in, which can be quickly removed. Second, and most importantly, it gives you complete control when gently sliding the egg into the water, significantly reducing the risk of breaking the delicate yolk. Trying to crack an egg directly over the pot often results in mishaps and a messy outcome. If poaching multiple eggs, crack each into its own small dish, ready to go.
-
Create a Gentle Whirlpool: With your water simmering steadily and vinegar added, take your wooden spoon or a spatula and gently stir the water in a circular motion. Aim for a moderate whirlpool effect right in the center of the pot. This swirling motion serves a crucial purpose: it helps to gather the egg whites neatly around the yolk as you introduce it, creating that classic compact, teardrop shape. This technique minimizes the dispersion of loose whites, resulting in a much neater and more appealing poached egg.
-
Gently Add the Egg: Slowly and carefully slide your pre-cracked egg from the small dish into the very center of the swirling water. The gentle current will encourage the whites to wrap beautifully around the yolk. Once the egg is in, you can use your wooden spoon to gently nudge any stray whites closer to the egg, encouraging them to cling together. It’s worth noting that the freshness of the egg significantly impacts how well the whites hold together. Fresher eggs have thicker whites that stay more intact. Eggs that are a bit older tend to have thinner, more watery whites that might separate more, but with the vinegar and whirlpool method, you’ll still achieve a delicious result.
-
The Magic of Timing: As soon as the egg enters the water, immediately set a timer for exactly 4 minutes. This precise timing is crucial for achieving that coveted tender white and perfectly runny yolk – the hallmark of a classic poached egg. Resist the urge to poke or prod the egg during this time; let it cook undisturbed in its gentle bath. If you prefer a slightly firmer yolk, you can extend the cooking time by an additional 30 seconds to 1 minute, but 4 minutes is the sweet spot for quintessential runny perfection.
-
Retrieve and Serve: Once the timer signals, carefully remove the poached egg from the water using a slotted spoon. Gently lift it and hold it briefly over the pan, allowing any excess hot water to drain thoroughly through the slots. This prevents your plate from getting watery and ensures the egg is ready to be seasoned and enjoyed. Transfer it directly to your plate or atop your awaiting toast or chosen accompaniment.
Pro Tips for Poaching Perfection
- Don’t Overcrowd the Pot: If you’re poaching multiple eggs, do them one or two at a time, depending on the size of your pot. Overcrowding reduces the water temperature significantly and can lead to eggs sticking together or uneven cooking. Cook in batches for best results.
- Maintain Water Temperature: Consistently maintain that gentle simmer. If the water is too hot and boiling vigorously, the egg can break apart or become rubbery. If it’s too cold, the whites won’t set properly or quickly enough, leading to excessive spreading.
- Freshness Matters: As mentioned, fresher eggs consistently yield the best results due to their thicker whites. If your eggs are a few weeks old, don’t despair! The vinegar and whirlpool method will still help immensely, but you might notice slightly more wispy whites.
- Season After Poaching: Always season your poached eggs with salt and pepper after they are cooked and drained. Adding salt directly to the poaching water can affect the coagulation of the whites, potentially making them tougher or causing them to break down more easily.
Serving Suggestions for Poached Eggs
The versatility of poached eggs is truly remarkable. While they are a breakfast classic, they can elevate almost any meal with their delicate texture and rich flavor:
- Classic Breakfast: The timeless pairing with buttered toast, crispy bacon, or savory sausages. A sprinkle of fresh herbs like chives or parsley adds a lovely, bright touch.
- Eggs Benedict: The quintessential poached egg dish! Layered perfectly on an English muffin with Canadian bacon and rich, velvety hollandaise sauce, it’s a brunch staple.
- Avocado Toast: A healthy, popular, and vibrant option. Top a slice of creamy avocado toast with a perfectly poached egg for a protein boost, an extra layer of richness, and a satisfying creamy texture.
- Salads: Add a poached egg to a warm spinach salad, a vibrant spring mix with vinaigrette, or even a classic Nicoise salad for added richness, protein, and a delightful burst of runny yolk.
- Grain Bowls: Elevate your quinoa, farro, or rice bowls with a perfectly poached egg. It transforms a simple grain bowl into a delicious, nutritious, and satisfying meal.
- Soups and Stews: For an unexpected yet comforting twist, gently drop a poached egg into a hearty lentil soup, a clear chicken broth, or a light vegetable stew just before serving.
- Asparagus with Poached Egg: A simple yet elegant side dish or light lunch. Roasted or steamed asparagus spears pair wonderfully with a runny poached egg, often drizzled with a touch of olive oil and lemon.
Seasoning Your Poached Eggs
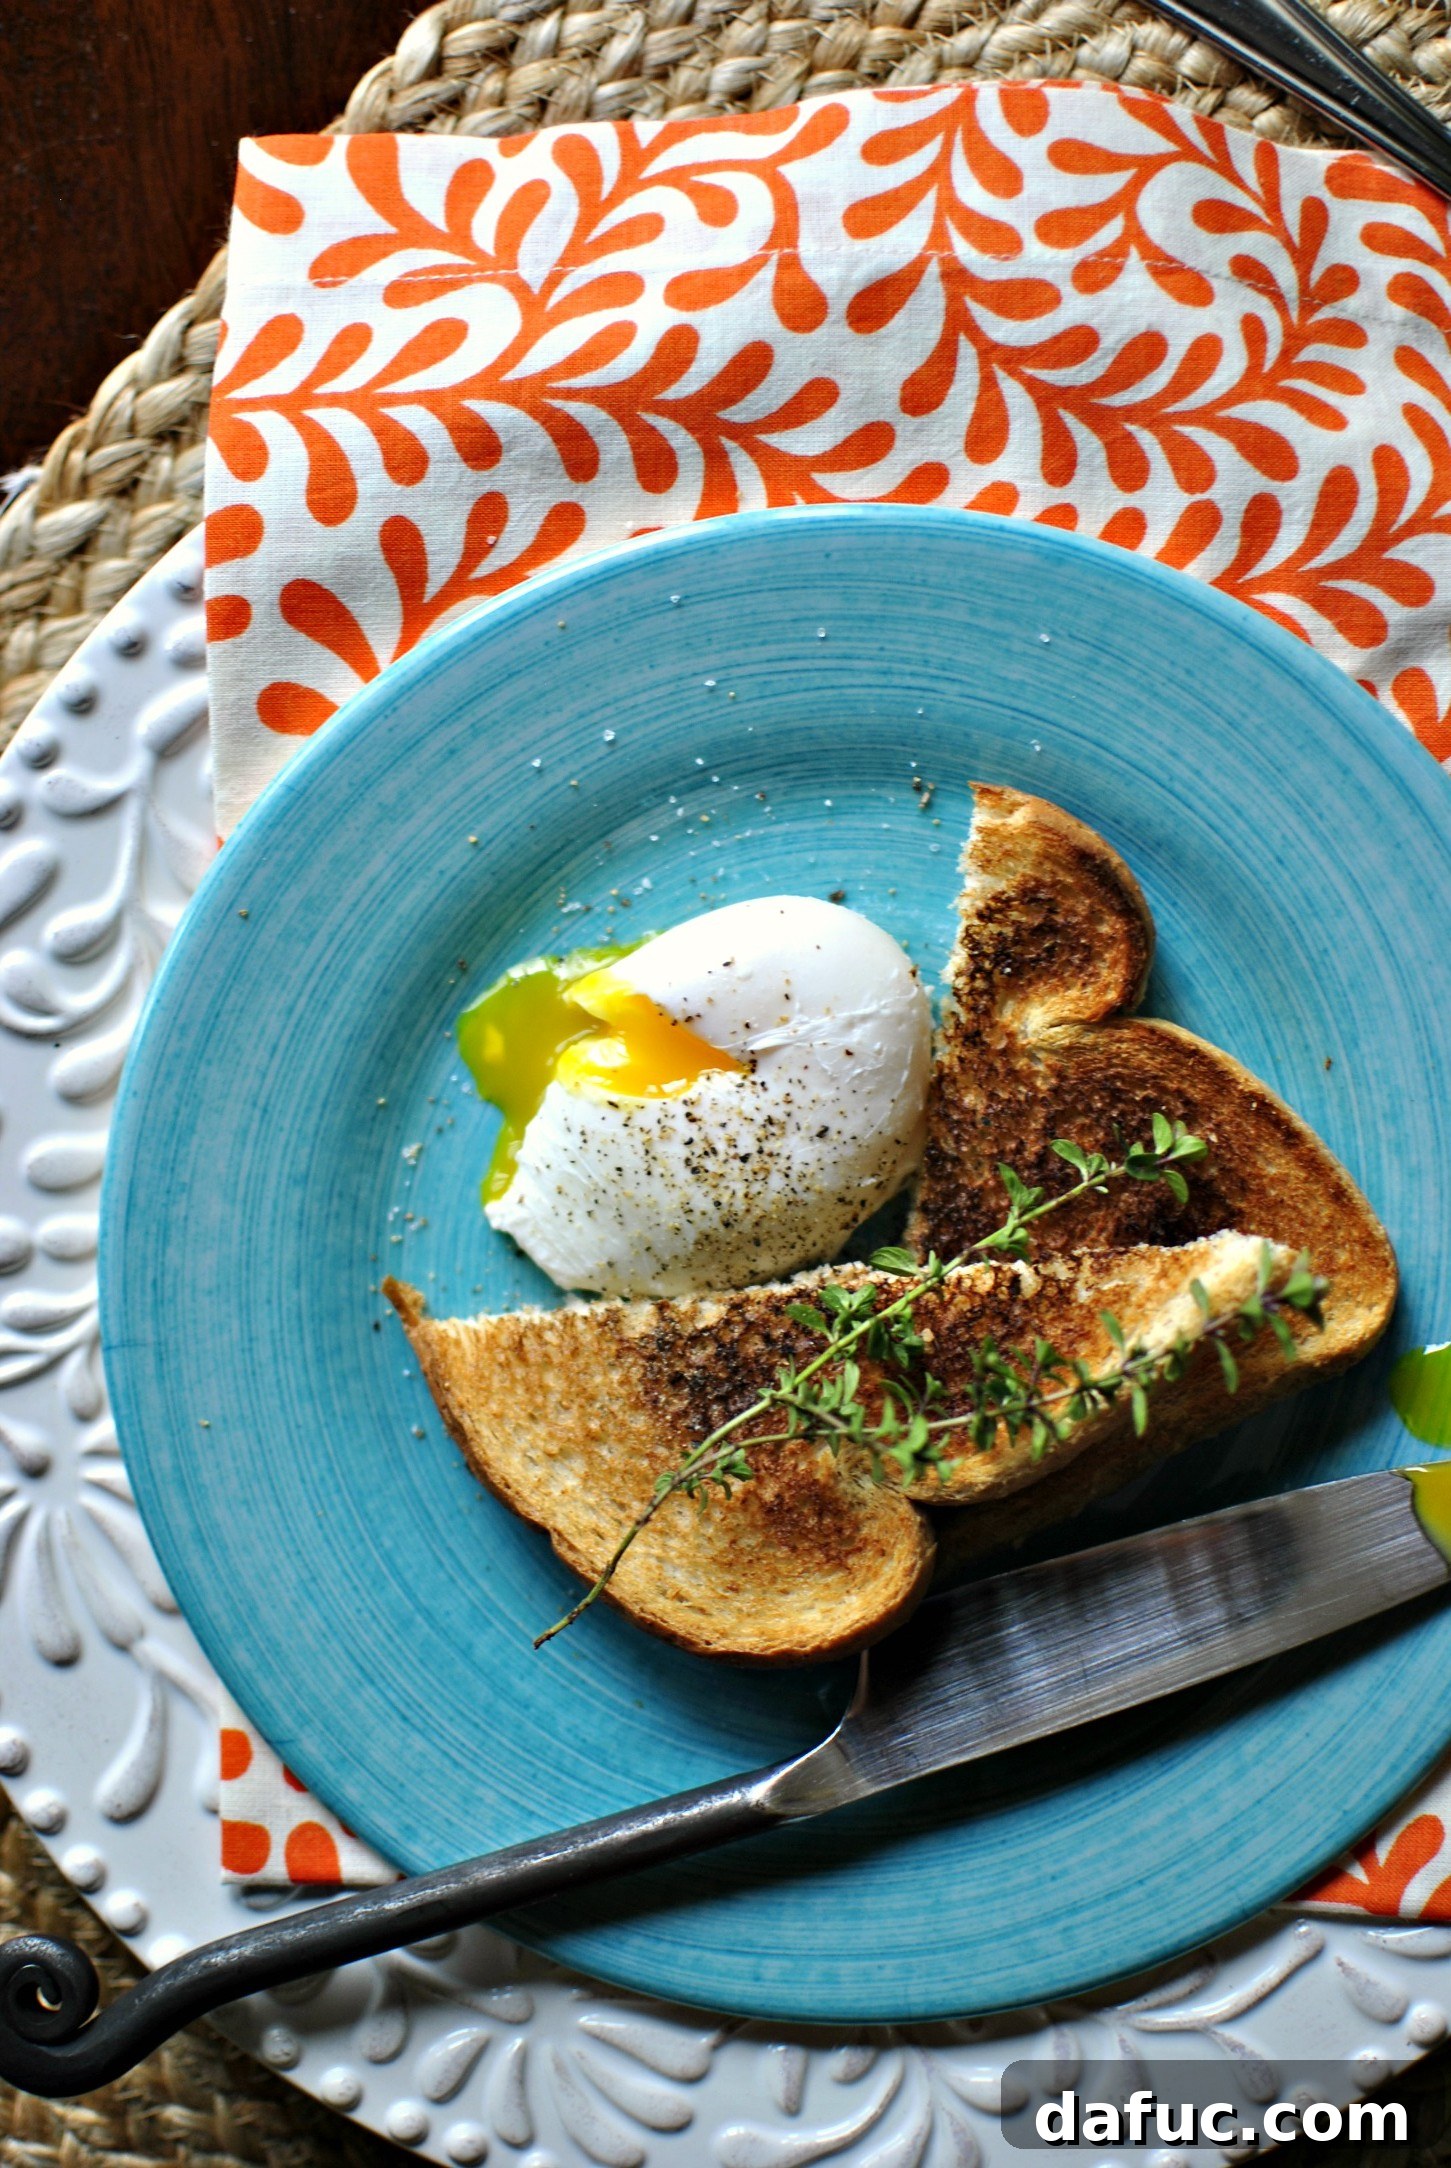
Once your beautifully poached egg is ready, perfectly drained and gleaming, it’s time to add the finishing touches that bring out its best flavors. I personally adore mine simply seasoned with a generous sprinkle of sea salt and a liberal grind of fresh black pepper. The delightful contrast of the tender egg white and rich yolk against the sharp, fresh seasoning is divine.
For an extra layer of herbaceous flavor and enticing aroma, a few fresh thyme leaves scattered over the top are an absolute game-changer. The subtle, earthy note of thyme complements the rich egg perfectly, adding a sophisticated touch. Don’t hesitate to experiment with other fresh herbs like finely chopped chives, delicate dill, or even a pinch of red pepper flakes if you enjoy a little heat and spice with your eggs.
Then comes the best part – the glorious moment of cutting into the tender white, watching that vibrant, golden yolk spill out onto your plate, and then, of course, the glorious act of dunking your crisp, buttered toast right into that luscious pool of richness! Seriously, this is where all the careful effort and precise timing truly pay off. The eating, the savoring, the pure, unadulterated enjoyment of a perfectly cooked egg is an experience in itself.
The Unrivaled Joy of the First Bite!
There’s nothing quite like the moment your toast or fork pierces the delicate skin of a perfectly poached egg, releasing its vibrant, runny yolk. This golden cascade mixes beautifully with the tender whites and any accompanying ingredients, creating a symphony of textures and flavors in every single mouthful. It’s this pure, unadulterated pleasure that makes mastering poached eggs such a rewarding culinary achievement. Every bite is a testament to the simple elegance of fresh ingredients prepared with care and attention.
Enjoy! I truly hope this comprehensive guide empowers you to achieve poached egg perfection in your own kitchen. There’s immense satisfaction in creating such a delicate and delicious dish. If you give this method a try, I would absolutely love to see your beautiful creations! Feel free to snap a photo and tag me on Twitter or Instagram!

Print Recipe
Pin Recipe
Perfect Poached Eggs
How to make perfectly poached eggs every single time. Whether it’s served with toast and bacon or on a spring salad, this is my go-to method for consistently flawless results!
Yield: 1 Serving
Prep Time: 5 mins
Cook Time: 4 mins
Total Time: 9 mins
Ingredients
- 1 Large Fresh Egg
- 2 tablespoons White Distilled Vinegar (per quart of water)
- Kosher Salt, to taste
- Freshly Ground Black Pepper, to taste
- Fresh Thyme Leaves, optional, for garnish
Instructions
- Fill a small pot or deep pan with 2-3 inches of water. Bring it to a gentle simmer over medium heat (look for tiny bubbles at the bottom, avoid a rolling boil). Add the white vinegar.
- Carefully crack one egg into a small dish or ramekin.
- Using a wooden spoon, gently stir the simmering water in a circular motion to create a whirlpool effect in the center of the pot.
- Slowly and carefully slide the egg from the small dish into the very center of the swirling water.
- Immediately set a timer for 4 minutes. This timing ensures a tender white and a perfectly runny yolk.
- Once the timer signals, use a slotted spoon to carefully remove the poached egg. Hold it briefly over the pan to allow excess water to drain thoroughly.
- Transfer the egg to a plate or toast, then sprinkle generously with salt, freshly ground black pepper, and optional fresh thyme leaves. Serve immediately.
Nutrition Information (Per 1 Egg Serving)
- Calories: 69 kcal
- Carbohydrates: 1g
- Protein: 6g
- Fat: 4g
- Saturated Fat: 1g
- Polyunsaturated Fat: 1g
- Monounsaturated Fat: 2g
- Trans Fat: 1g
- Cholesterol: 164mg
- Sodium: 63mg
- Potassium: 61mg
- Sugar: 1g
- Vitamin A: 238IU
- Calcium: 27mg
- Iron: 1mg
Author: Laurie McNamara
Course: Breakfast & Brunch
Cuisine: American, French