
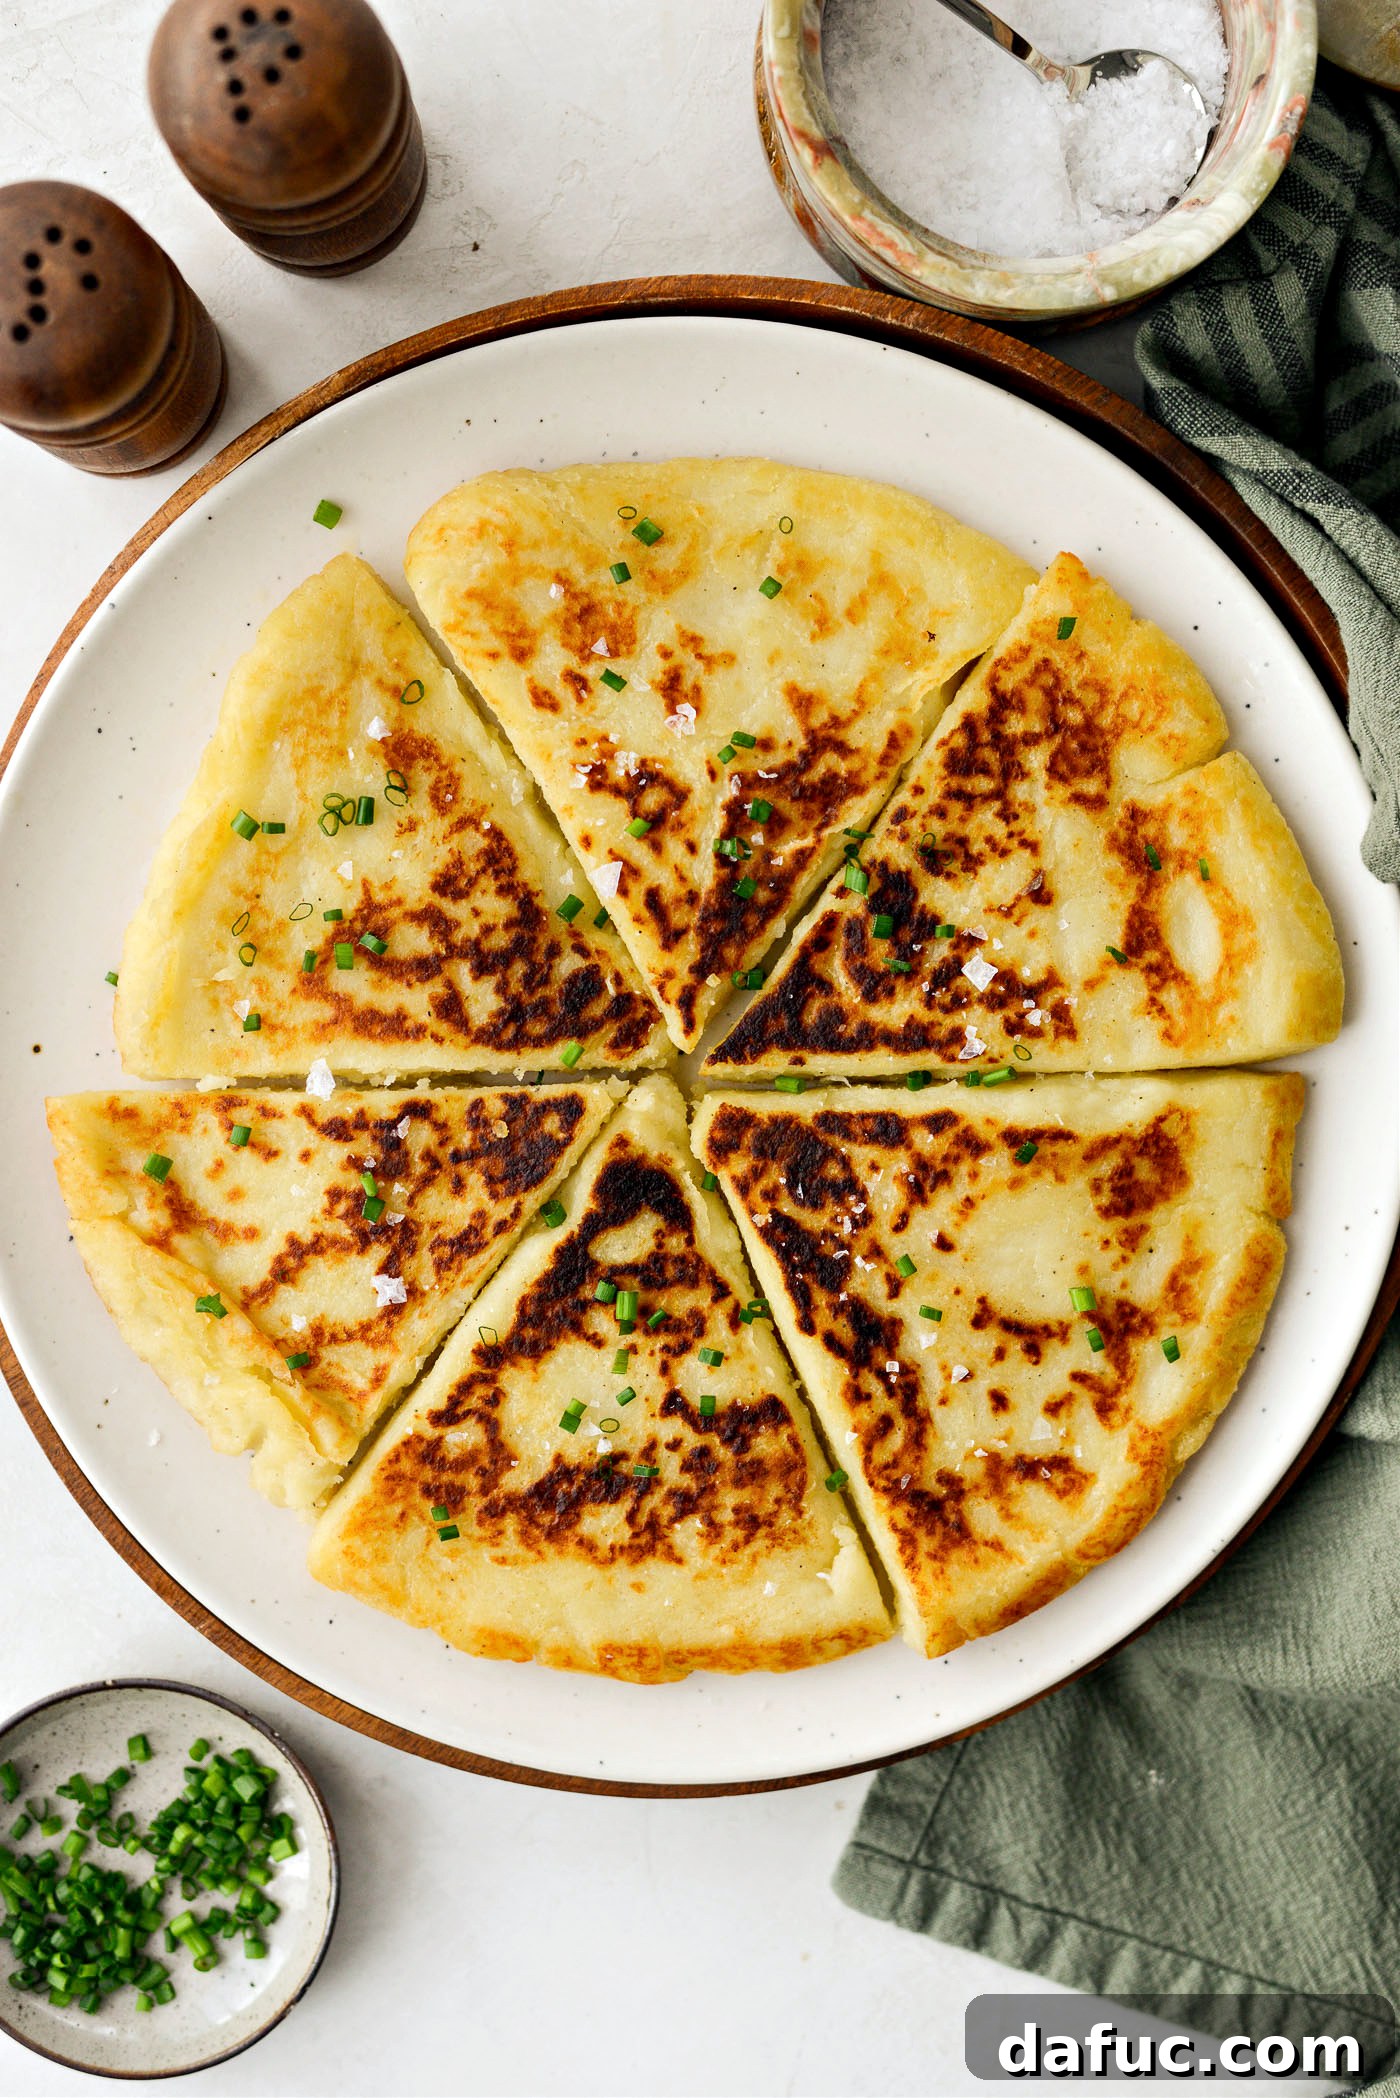
There’s nothing quite like a warm, comforting breakfast to start your day, and these **Irish Potato Farls** are the quintessential addition to any morning spread. Imagine perfectly steamed and mashed potatoes, lovingly blended with just the right amount of flour, rich melted butter, and a pinch of salt and pepper, then expertly pan-fried to a golden crisp. These traditional Irish potato cakes, often referred to as “farls” due to their quartered, “farl” shape, are a celebration of simplicity and flavor. Designed to serve six, this recipe promises a hearty and authentic taste of Ireland right in your own kitchen. Whether you’re planning a full Ulster Fry or simply seeking a delightful side to your eggs, these farls deliver a unique texture and savory depth that will elevate any breakfast or brunch.
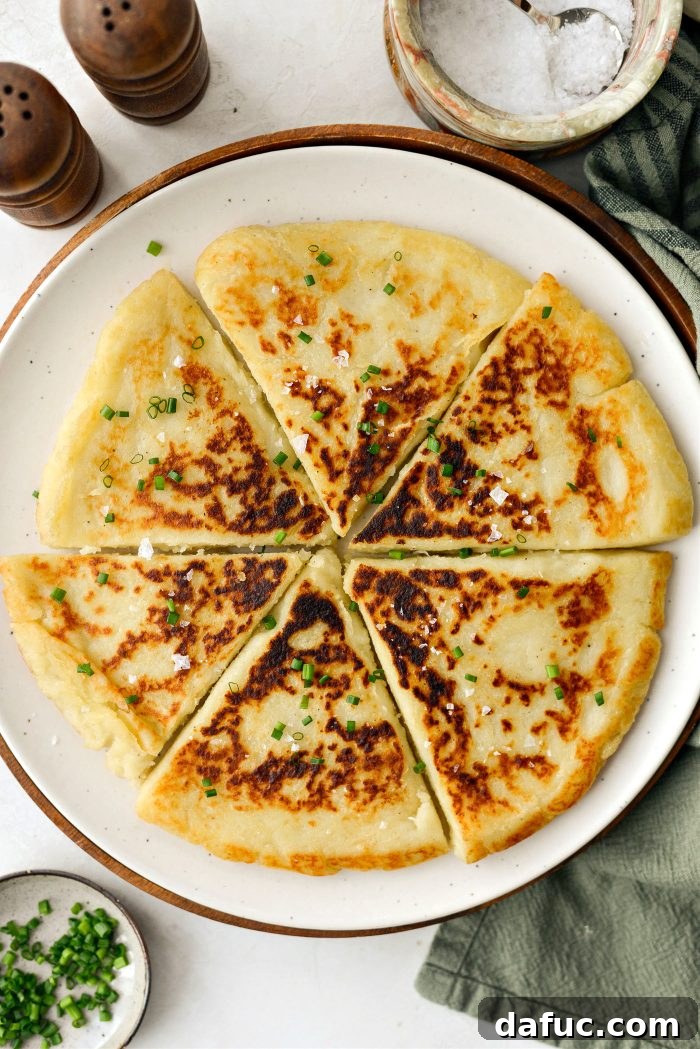
What Exactly Are Irish Potato Farls?
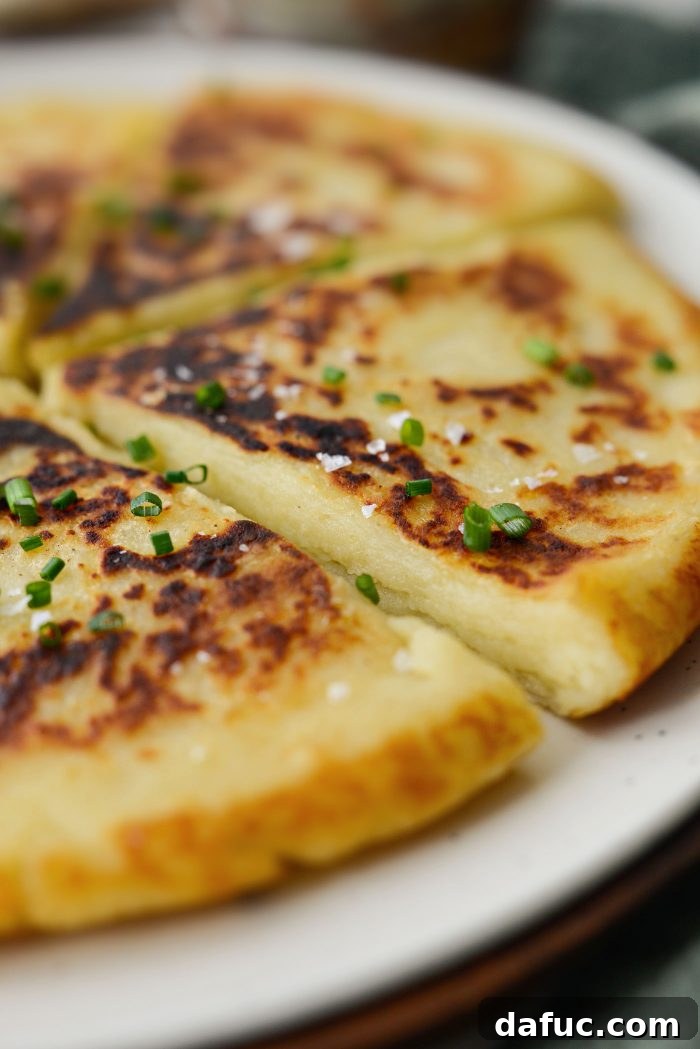
**Irish Potato Farls** are a beloved staple of Irish cuisine, particularly popular in Northern Ireland where they frequently feature in the famed Ulster Fry. At their core, these are humble potato skillet breads, crafted from a simple yet brilliant combination of steamed mashed potatoes, flour, butter, salt, and pepper. The beauty of farls lies in their straightforward preparation and incredibly satisfying taste. They are dense yet tender on the inside, with a wonderfully crispy exterior thanks to pan-frying.
Throughout Ireland and beyond, these delightful potato creations go by several names, reflecting regional nuances and historical traditions. You might hear them called **boxty** in some areas, a term often associated with a slightly different preparation method that sometimes includes raw grated potato, though the end result shares a similar comforting essence. Other common monikers include **potato cakes**, **potato fadge**, or **tattie scones**, especially in Scotland, where a very similar dish holds a cherished place in breakfast culture. Regardless of the name, the concept remains the same: a delicious, carbohydrate-rich accompaniment that transforms a simple meal into something special.
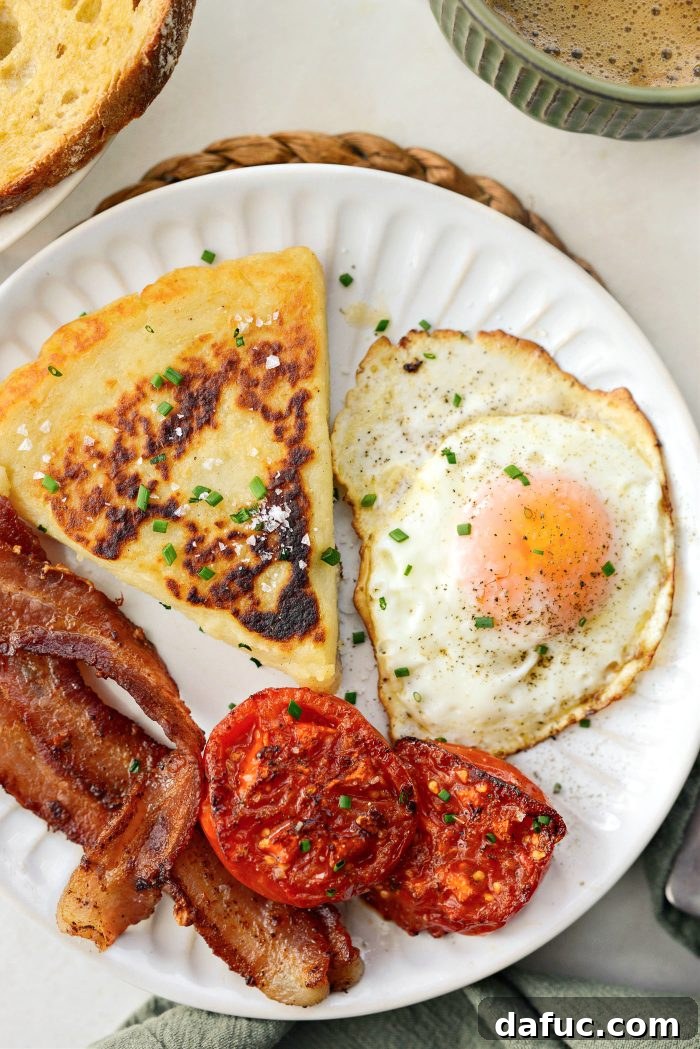
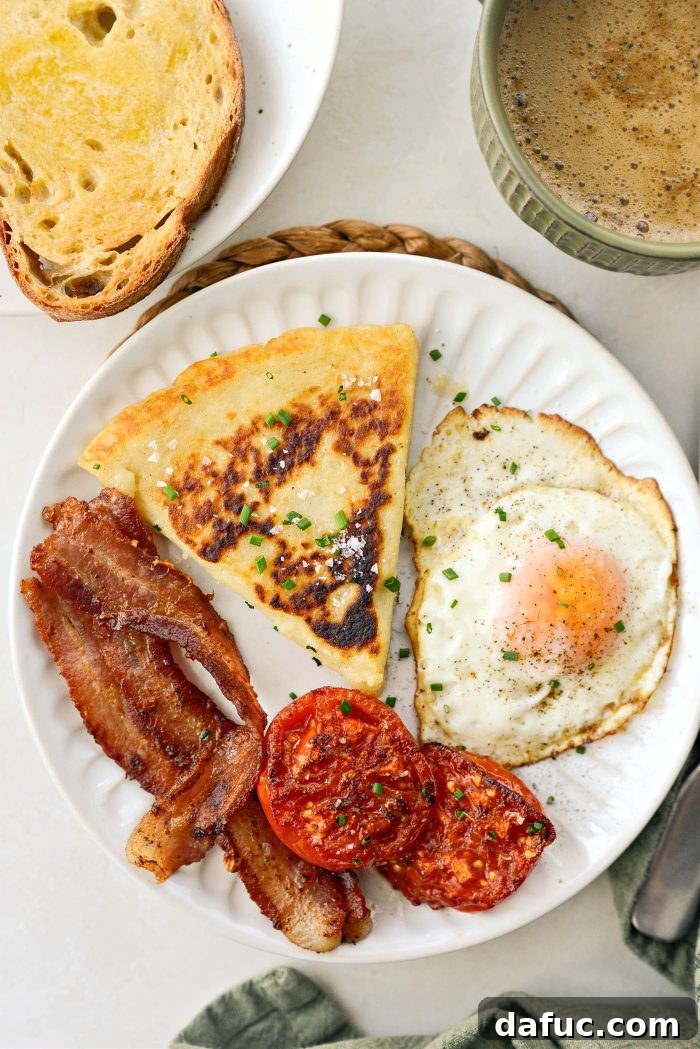
Traditionally, farls are served as a cornerstone of a full Irish breakfast, alongside classic components such as crispy bacon, savory sausages, perfectly fried eggs, and rich black pudding. However, their versatility extends far beyond this traditional plate. They make an excellent base for a creative breakfast sandwich, perhaps layered with cheese, egg, and a slice of ham. Alternatively, for a simpler, yet equally delightful experience, they can be enjoyed warm, generously spread with a dollop of butter and a spoonful of your favorite fruit jam. Their mild, earthy flavor makes them a perfect canvas for both savory and sweet pairings, allowing them to complement a wide range of dishes.
Why You Need These Homemade Potato Farls in Your Life
These **homemade Irish Potato Farls** are more than just a breakfast side; they’re an experience. They strike a perfect balance, being savory and slightly dense, yet boasting a remarkably creamy, smooth center that melts in your mouth. The contrast between the rich, buttery interior and the deliciously crispy, golden-brown edges is simply irresistible. Each bite delivers a deeply satisfying potato flavor, enhanced by the subtle seasoning. I personally love breaking off a piece and dipping it into a runny egg yolk – it’s pure comfort food bliss!
Beyond their incredible taste and texture, making potato farls from scratch is a surprisingly simple and rewarding process. It’s an excellent way to use up leftover mashed potatoes, reducing food waste and transforming them into a fresh, exciting dish. The ingredients are readily available, and the steps are straightforward, making this recipe accessible to cooks of all skill levels. Plus, serving a batch of warm, freshly made farls to family and friends is a wonderful way to share a piece of Irish culinary heritage and create memorable breakfast moments.
Key Ingredients for Authentic Irish Potato Farls
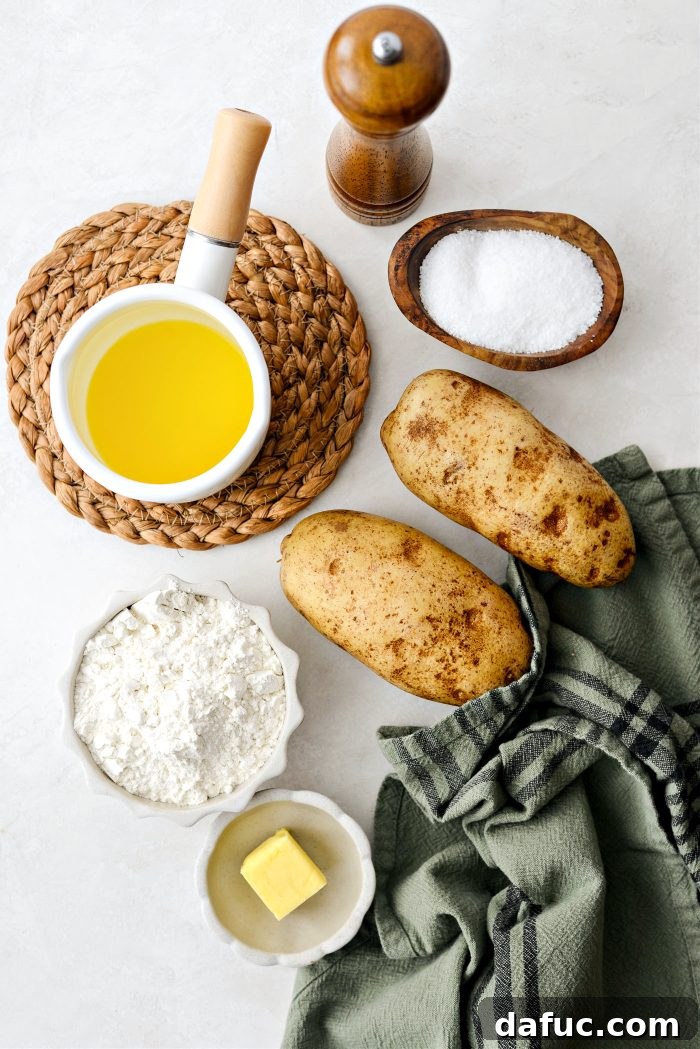
Creating truly delicious **Irish Potato Farls** relies on a handful of humble ingredients, each playing a vital role in achieving that perfect texture and flavor. Here’s a closer look at what you’ll need and why these choices matter:
- Russet Potatoes: These are the star of the show. Russet potatoes, also known as baking potatoes, are high in starch and relatively low in moisture, which makes them ideal for mashing. When steamed and mashed, they yield a fluffy, dry texture that readily absorbs butter and flour, preventing the farls from becoming gummy or overly wet. While you could experiment with other potato types, russets consistently deliver the best results for the classic farl consistency.
- Unbleached All-Purpose Flour: This acts as the essential binder in our farl dough. All-purpose flour provides the structure needed to hold the mashed potatoes together, allowing the dough to be shaped and fried without falling apart. Using unbleached flour often results in a slightly softer texture and a more natural flavor profile, complementing the potato rather than overpowering it.
- Kosher Salt: Salt is crucial for enhancing the natural flavors of the potato. Kosher salt, with its larger flakes, allows for better control over seasoning and dissolves well into the potato mixture, ensuring every bite is perfectly seasoned without being overly salty.
- Freshly Ground Black Pepper: A touch of freshly ground black pepper adds a subtle warmth and a gentle bite, elevating the overall savory profile of the farls. Grinding it fresh ensures maximum aroma and flavor impact.
- Butter (Salted): Butter is key for richness and flavor. It’s incorporated into the potato dough for moisture and taste, and also used generously in the skillet for frying. Using salted butter adds another layer of seasoning and contributes to those irresistible crispy edges.
For Serving:
While the farls are delicious on their own, a few simple garnishes can elevate the experience:
- Flaky Sea Salt: A sprinkle of flaky sea salt just before serving adds a delicate crunch and a burst of clean, briny flavor that contrasts beautifully with the warm, buttery farls. It’s a finishing touch that truly makes a difference.
- Snipped Fresh Chives: Fresh chives offer a mild oniony flavor and a vibrant green color, adding both visual appeal and a refreshing herbaceous note that brightens the rich potato taste.
Step-by-Step: Crafting Your Own Delicious Irish Potato Farls
1. Prepare the Potatoes for Mashing
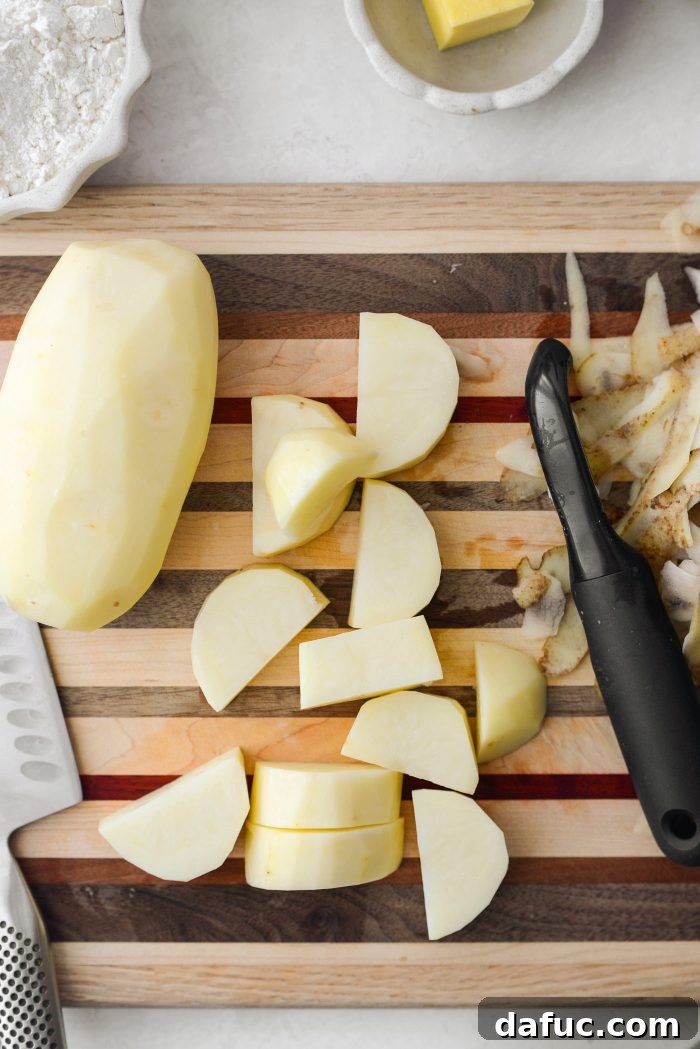
The foundation of exceptional **Irish Potato Farls** begins with perfectly prepared potatoes. Start by thoroughly washing, peeling, and then roughly chopping about 1-1/2 pounds of russet potatoes. After peeling, you should have approximately 1-1/4 pounds of potato flesh. Chopping them into uniform pieces ensures they steam evenly, leading to a consistently tender texture.
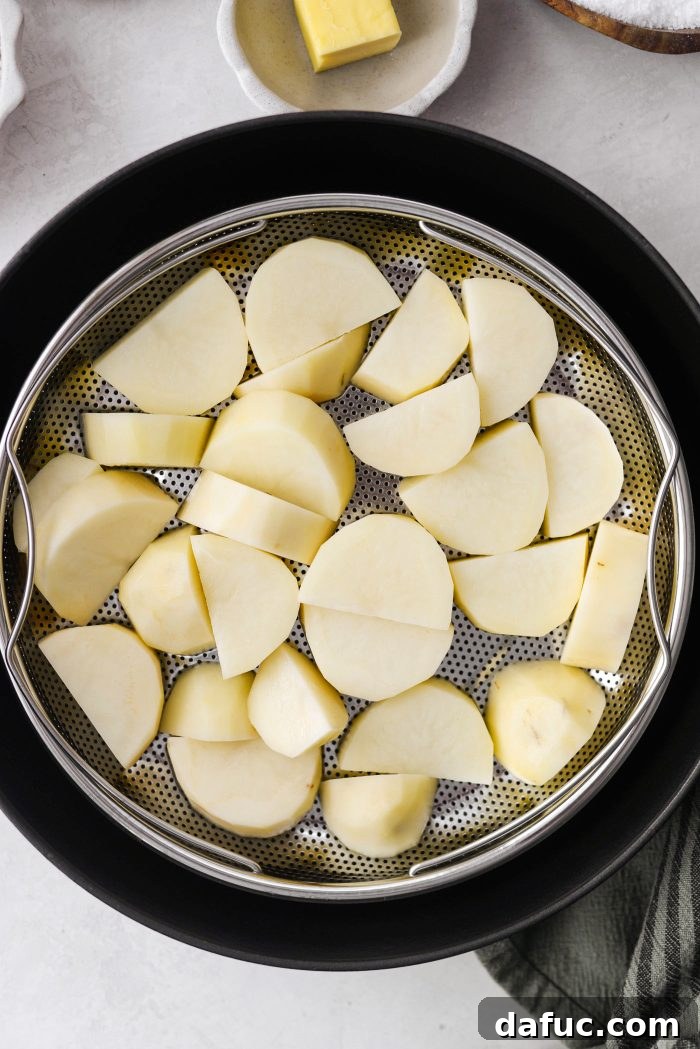
Next, set up your steaming apparatus. Place a steamer basket into a deep-sided pan and fill the pan with water, ensuring the water level comes just to the bottom of the basket, without touching the potatoes. Arrange the chopped potatoes in an even layer within the steamer basket to allow for proper steam circulation.
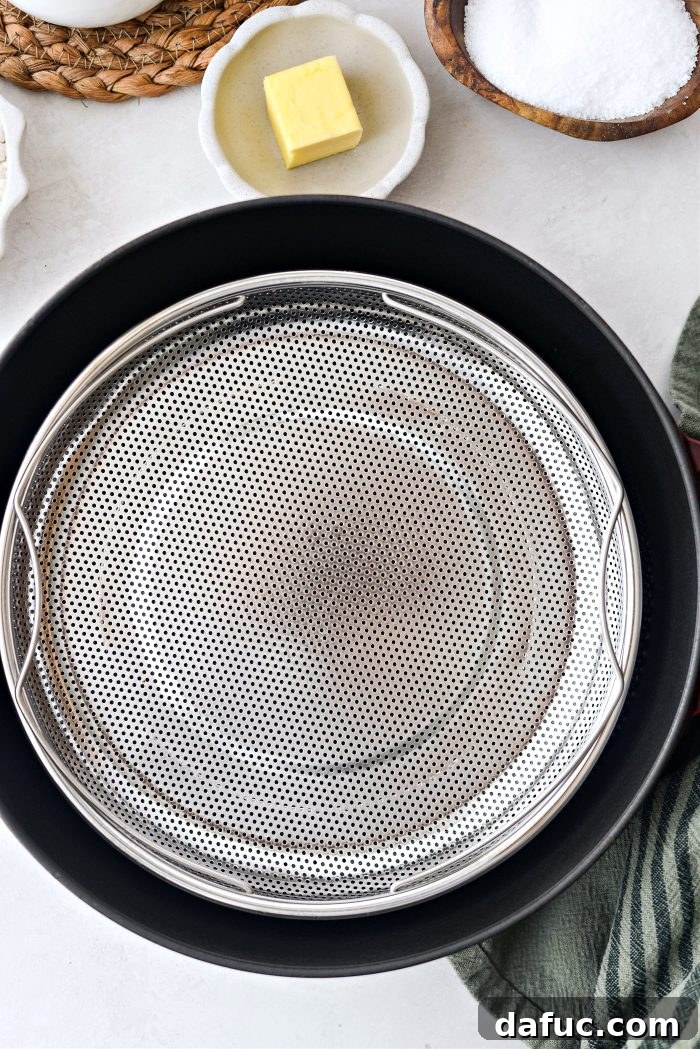
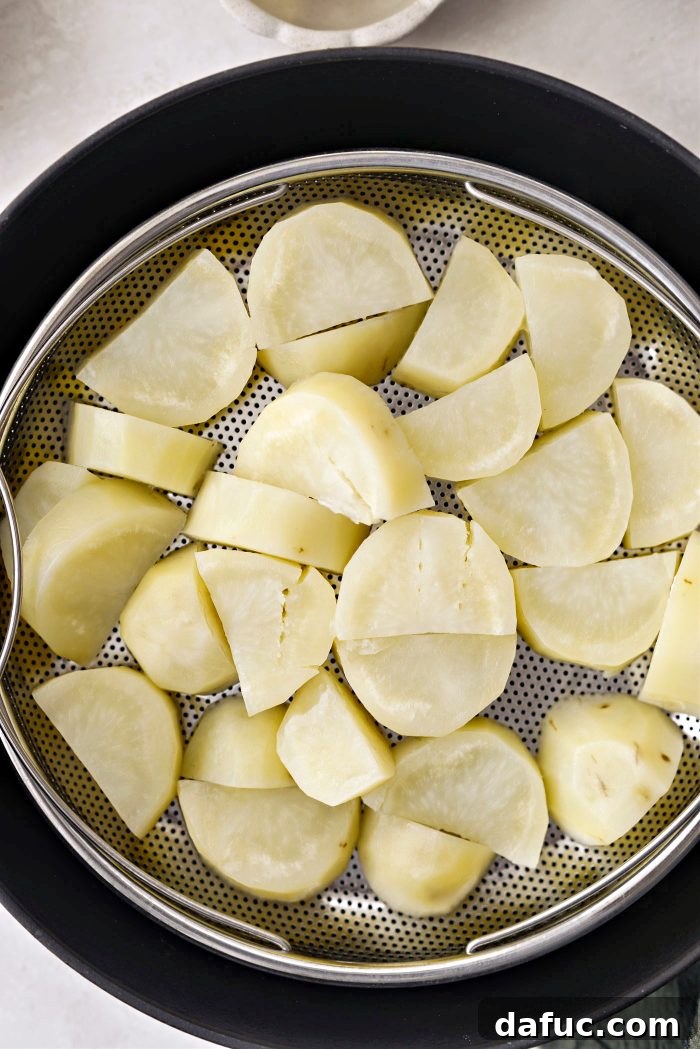
Cover the pan tightly with a lid, then bring the water to a simmer over medium heat. Allow the potatoes to steam for about 20 to 25 minutes, or until they are incredibly tender and easily pierced with a fork. Steaming is preferred over boiling as it prevents the potatoes from becoming waterlogged, which is crucial for a light and fluffy farl. Once cooked, the potatoes will be soft and ready for the next step.
Immediately transfer the hot, steamed potatoes to a mesh sieve that’s set over a mixing bowl. This step is vital for allowing any residual moisture to evaporate, ensuring your mashed potatoes are as dry as possible. Let them dry out for approximately 5 minutes.
After they’ve had a chance to dry, use the back of a sturdy spoon to press the potatoes through the mesh sieve and into the bowl below. This method creates exceptionally fine and lump-free mashed potatoes, which is key for a smooth farl texture. Don’t forget to scrape any potato clinging to the underside of the sieve into the bowl. While a potato ricer can also be used, many find a mesh sieve delivers a superior, finer consistency for farls.
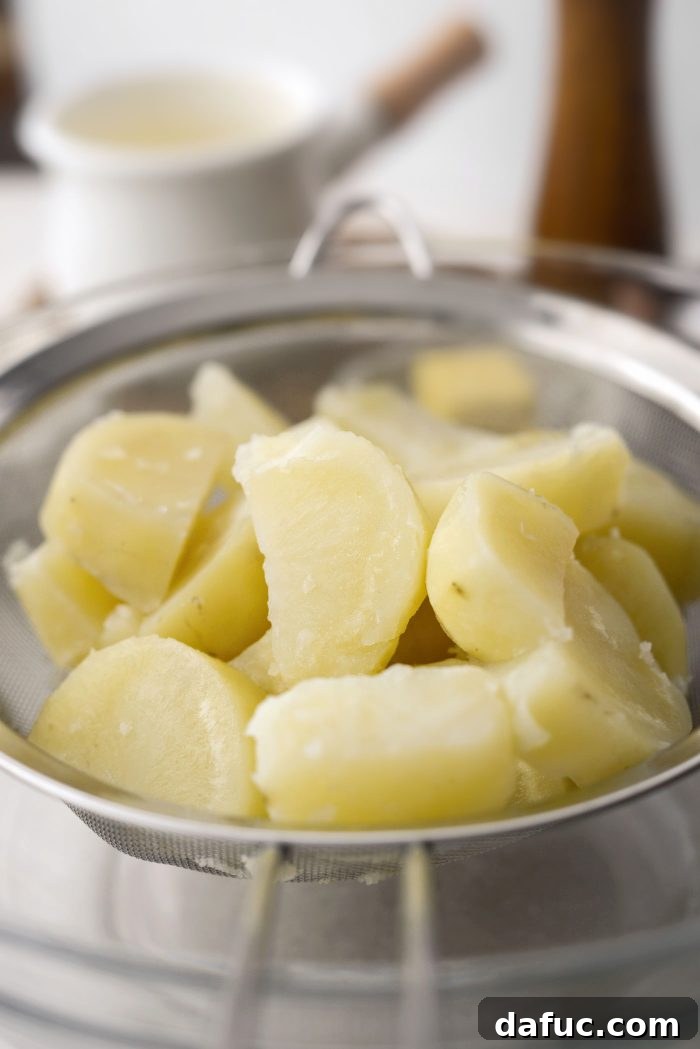
2. Form the Potato Farl Dough
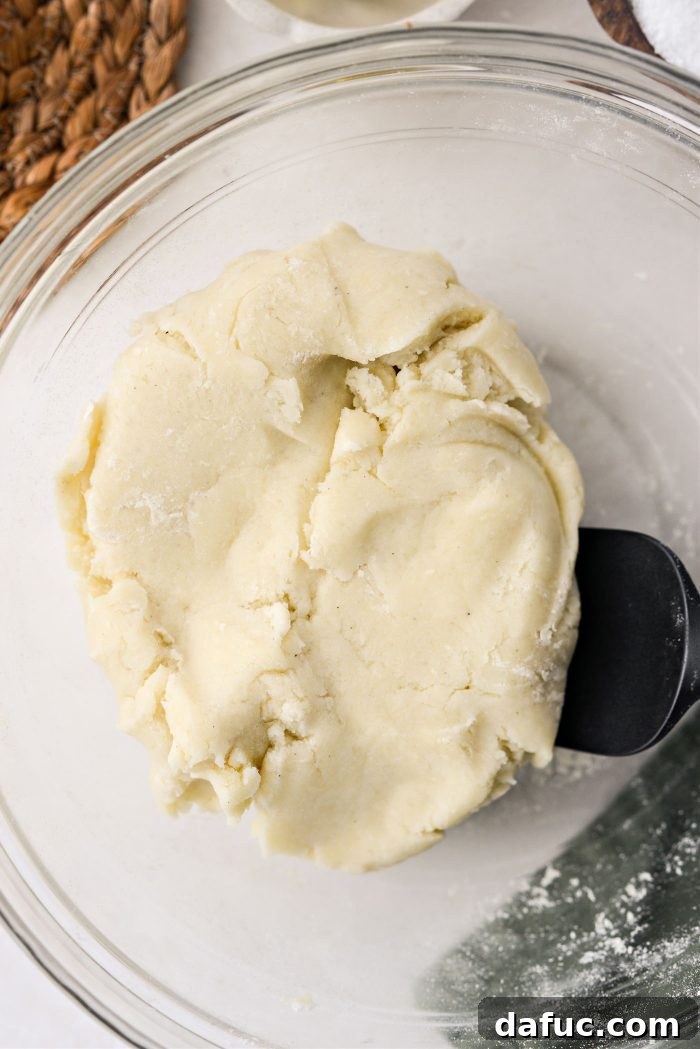
Now that your potatoes are perfectly mashed, it’s time to bring the dough together. To the sieved potatoes in the mixing bowl, add 3/4 cup of unbleached all-purpose flour, 1-1/2 teaspoons of kosher salt, 1/2 teaspoon of freshly ground black pepper, and 2 tablespoons of melted butter. These ingredients will bind together to create the distinctive farl dough.
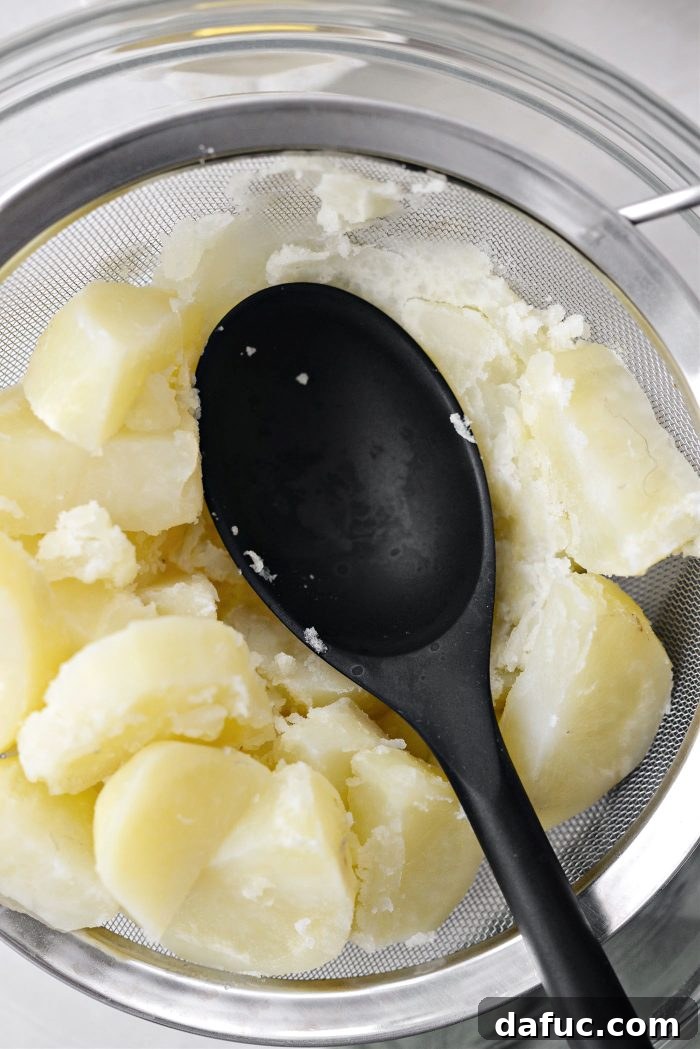
Using a sturdy spatula, gently mix all the ingredients until they are thoroughly combined. Be careful not to overmix, as this can develop the gluten in the flour too much, potentially leading to a tougher farl. Mix just until a cohesive dough forms. The goal is a consistent blend where the flour and butter are evenly distributed throughout the potatoes.
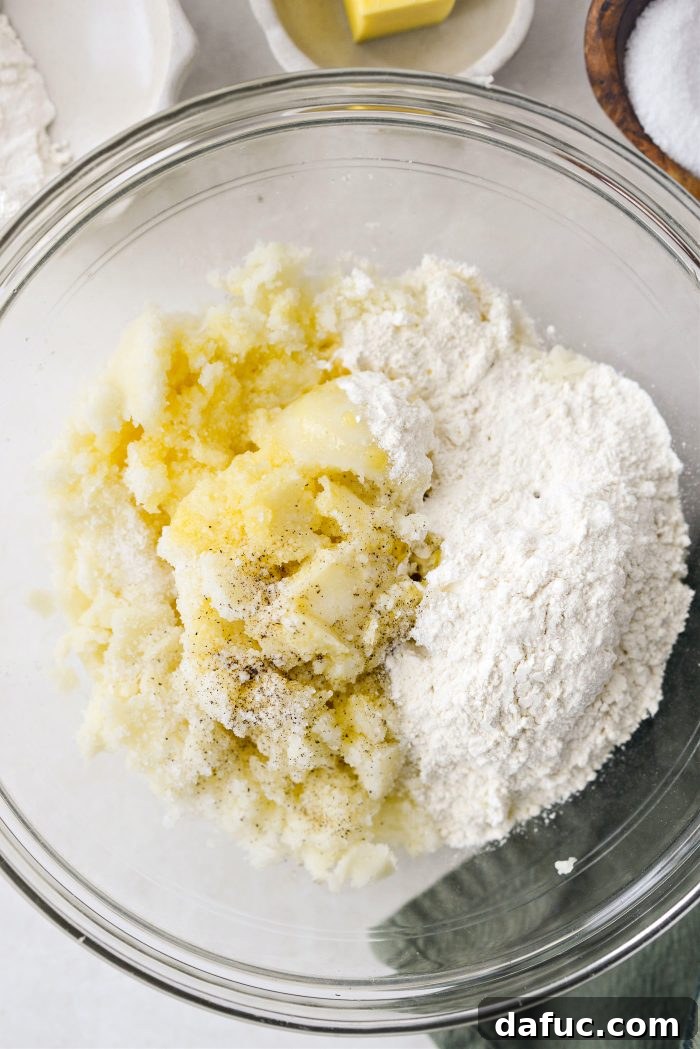
The mixture should come together to form a soft, pliable, dough-like consistency. It shouldn’t be sticky or crumbly, but rather firm enough to hold its shape. If it feels too wet, you can add a tiny bit more flour, a teaspoon at a time, until it reaches the desired texture.
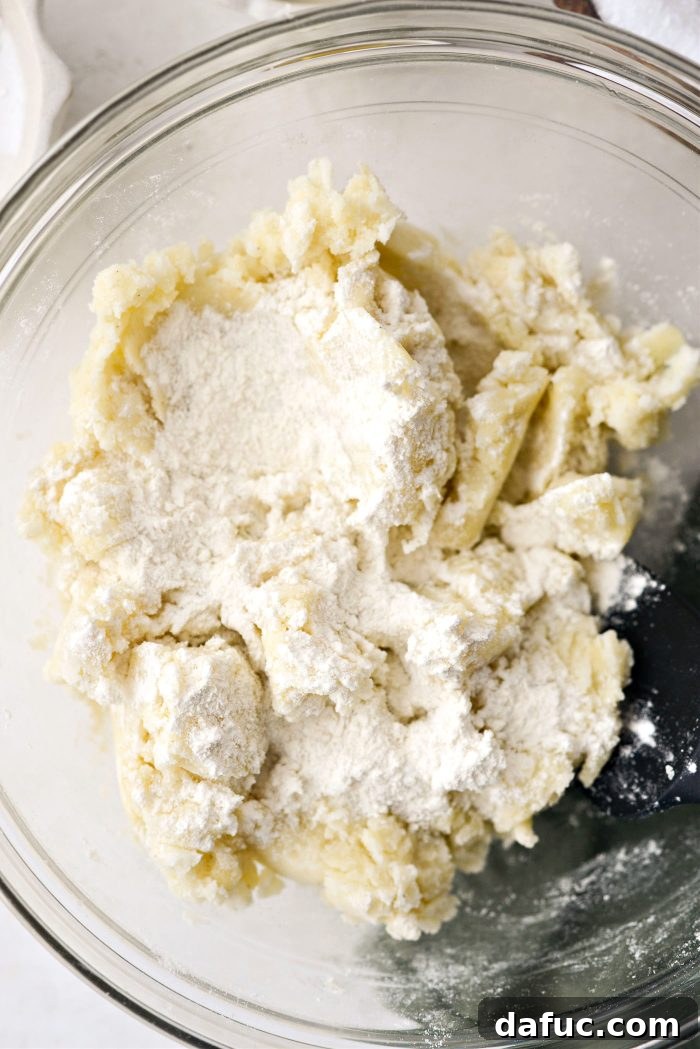
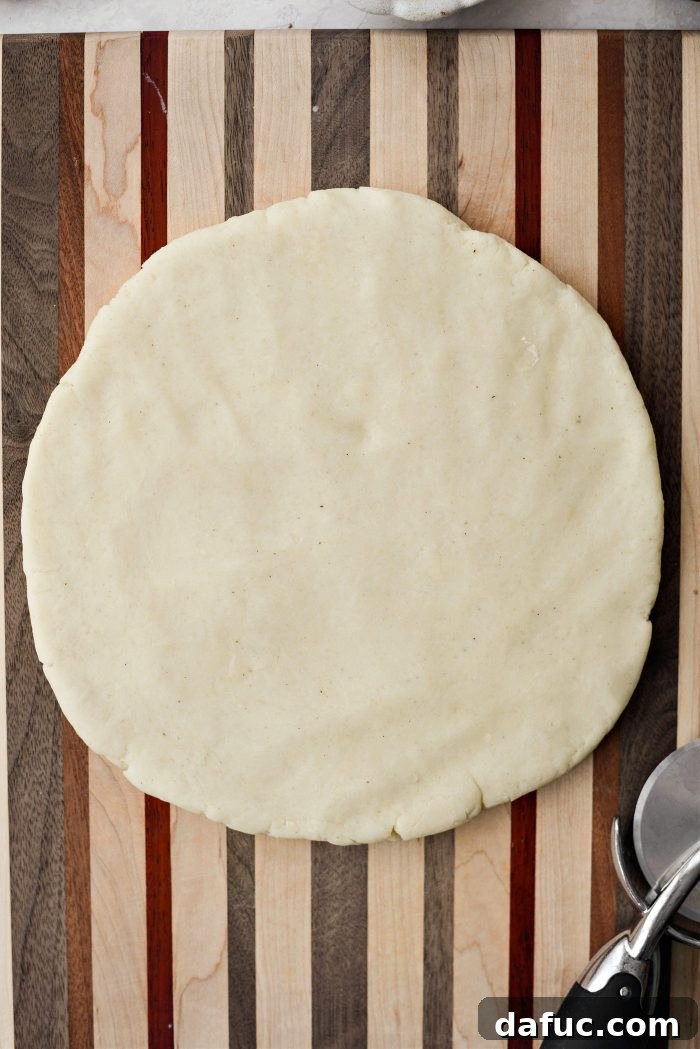
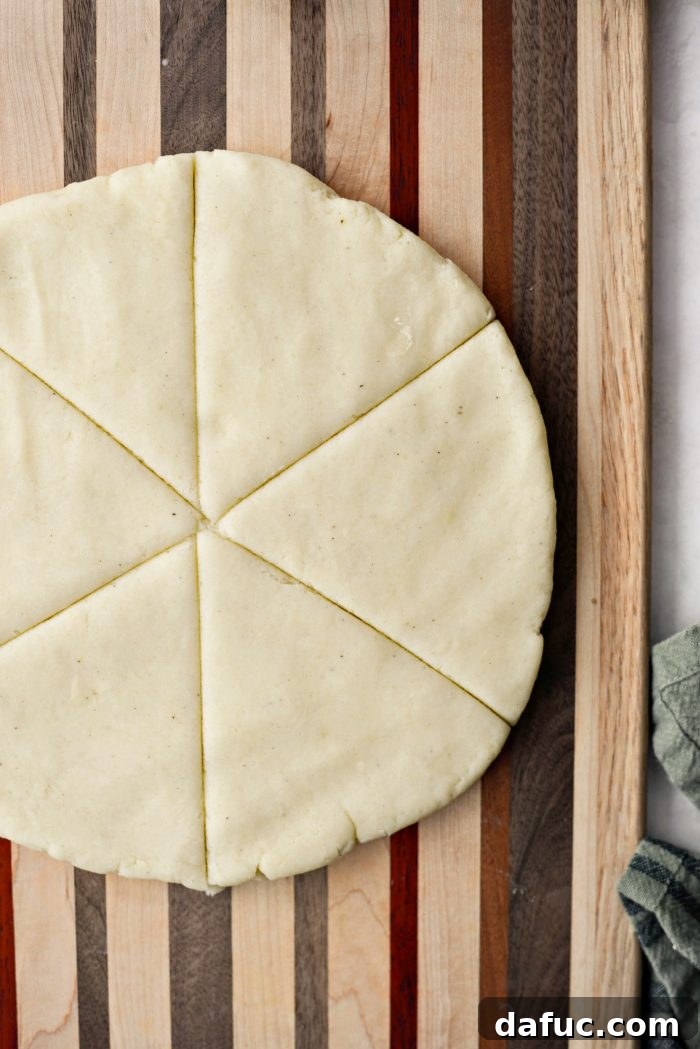
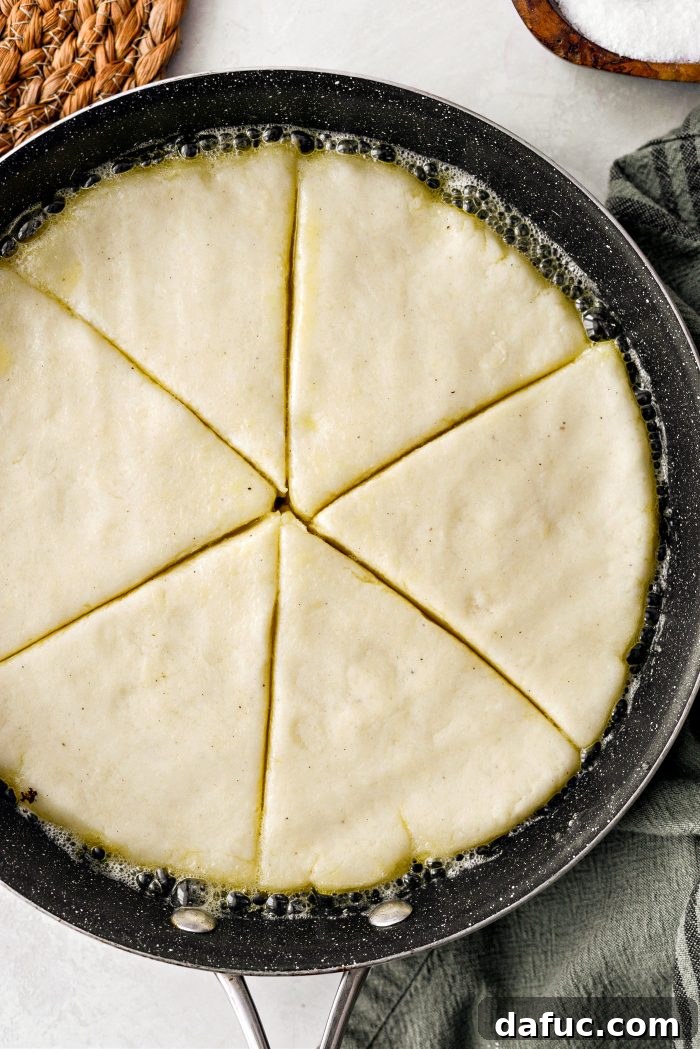
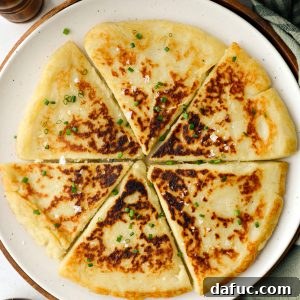
Once your dough is ready, lightly flour a clean work surface. Transfer the potato dough onto the floured surface and gently press and shape it into a large, round disc, approximately 10 inches in diameter and about a 1/2-inch thick. You can eyeball this measurement, aiming for an even thickness across the entire disc. For the classic farl shape, use a pizza cutter or a sharp knife to cut the large disc into 6 equal wedges, much like slicing a pizza. These wedges are your individual potato farls, ready for frying.
3. Pan-Fry to Golden Perfection
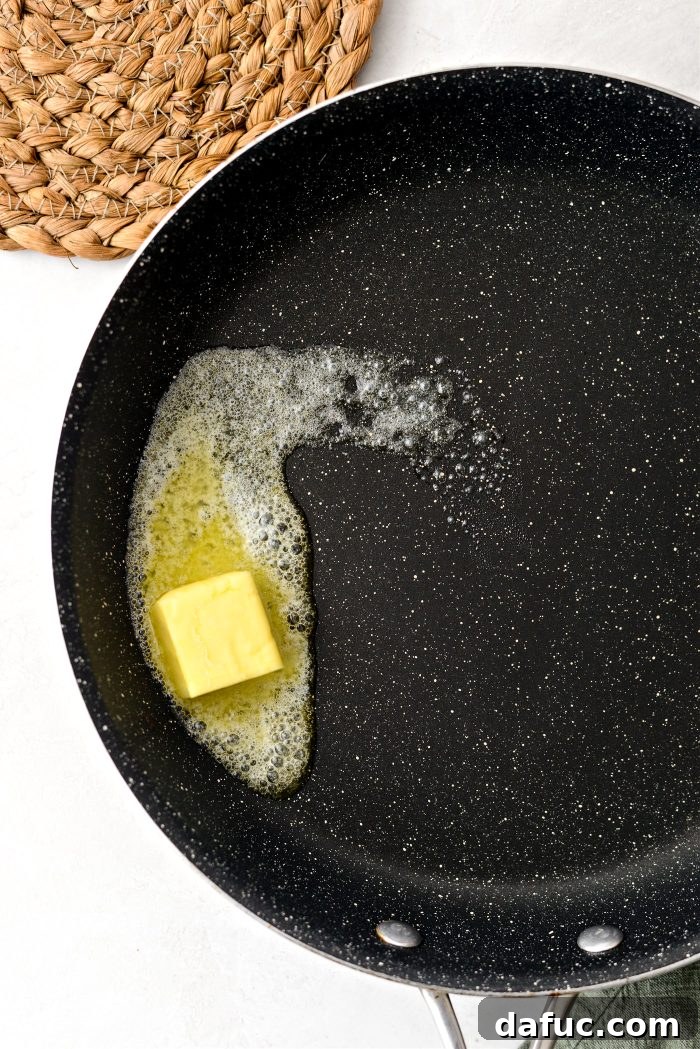
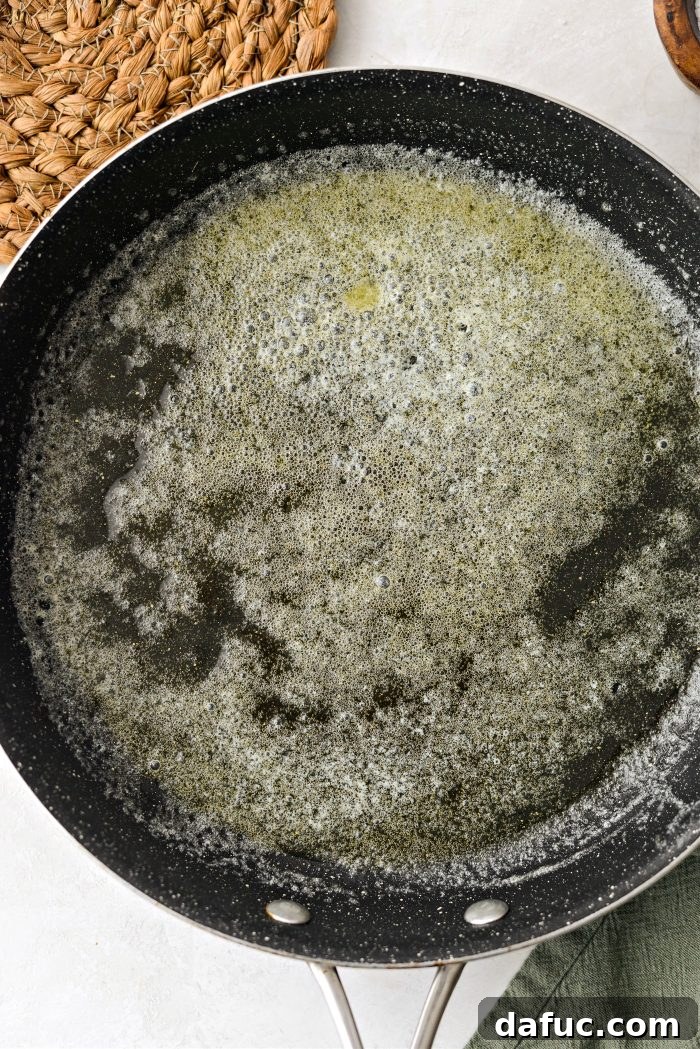
With your **Irish Potato Farls** shaped, it’s time to achieve that irresistible golden crust. Heat a 12-inch nonstick skillet over medium heat. Add 2 to 3 tablespoons of butter to the hot skillet, allowing it to melt and foam. Swirl the butter around to evenly coat the bottom of the pan. You want the butter to be bubbling gently, indicating it’s hot enough but not scorching.
Carefully place the potato wedges into the hot, buttered skillet, making sure not to overcrowd the pan. You might need to cook them in batches, depending on the size of your skillet. Cook the farls for 5 to 6 minutes on the first side, or until the underside develops a beautiful golden-brown color and a satisfying crispness. This golden crust is crucial for both flavor and texture.
Using a spatula, carefully turn each farl over to cook the second side. Continue frying for another 5 to 6 minutes, or until that side is also golden brown and crispy. The total cooking time might vary slightly based on your stove and pan, so keep an eye on them to prevent burning. The goal is a uniform golden hue on both sides.
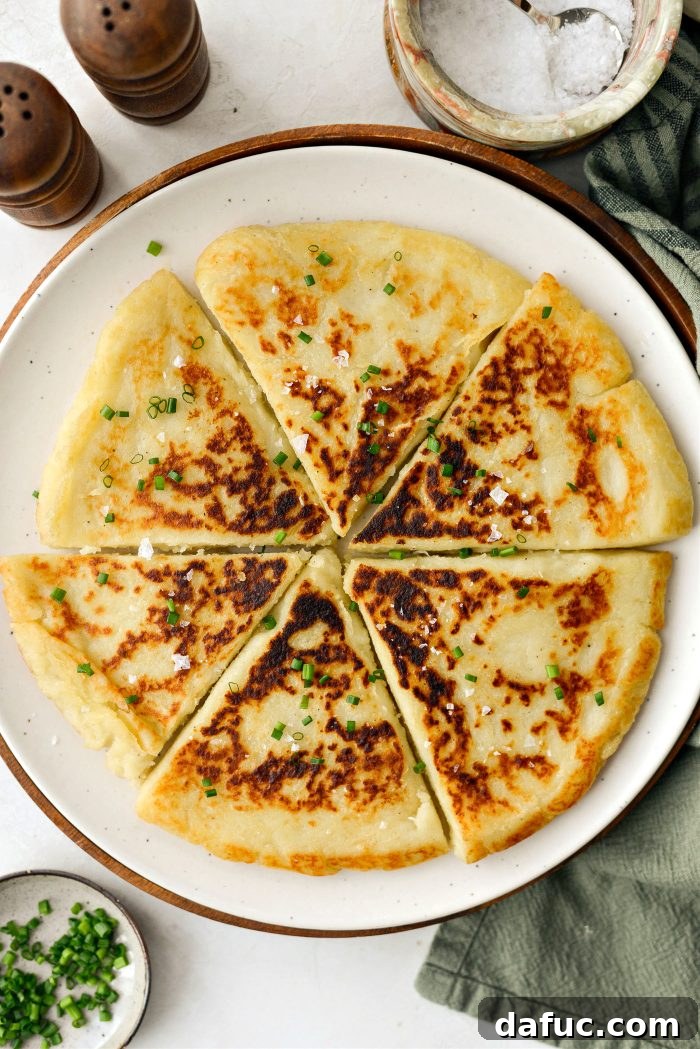
Once both sides are perfectly golden and crispy, transfer the **Irish Potato Farls** to a plate. Serve them immediately, garnished with a sprinkle of flaky sea salt and a scattering of snipped fresh chives. These farls are best enjoyed fresh off the skillet when their texture is at its peak – savory, smooth on the inside, and wonderfully crisp on the outside. Enjoy the authentic taste of Ireland!
Serving Suggestions for Your Irish Potato Farls
The beauty of **Irish Potato Farls** lies in their versatility. While they are a non-negotiable component of a traditional Irish breakfast (often called an Ulster Fry), their mild, savory flavor makes them a fantastic accompaniment to a wide variety of meals, or even a simple snack. Here are some popular and delicious ways to enjoy your freshly made farls:
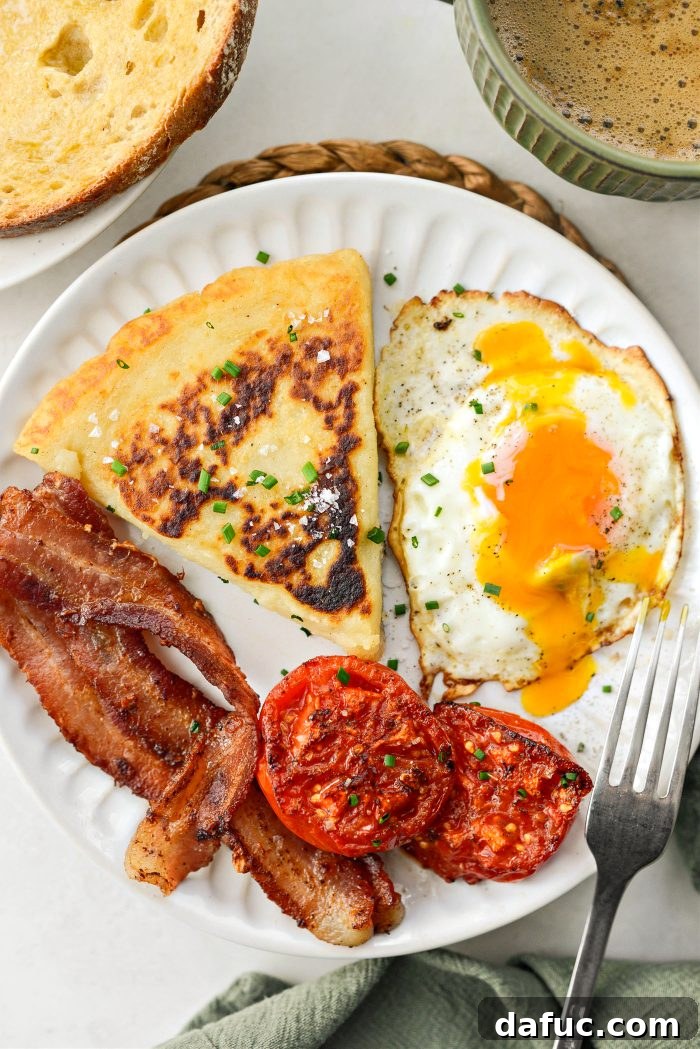
- Classic Breakfast Plate: Pair them with perfectly **fried eggs** (especially with a runny yolk for dipping!), crispy **fried ham, sausage, or bacon**, and traditional **black pudding**. This is the authentic Irish experience.
- Breakfast Sandwich Base: Use a farl as the bread for a hearty breakfast sandwich. Layer it with a fried egg, cheese, and your choice of breakfast meat for a truly satisfying start to the day.
- Simple & Sweet: For a delightful contrast, serve warm farls simply spread with extra **butter and your favorite jam**. The sweetness of the jam complements the savory potato beautifully.
- With Tomatoes: Add a fresh element by serving them alongside **blistered or seared tomatoes**. The acidity of the tomatoes cuts through the richness of the farls.
- As a Side Dish: Farls aren’t just for breakfast! They make a wonderful alternative to dinner rolls or mashed potatoes with hearty stews, roasts, or any comfort food meal.
- Savory Toppings: Experiment with toppings like cream cheese and smoked salmon, a dollop of sour cream and chives, or even a sprinkle of grated cheddar cheese while still warm.
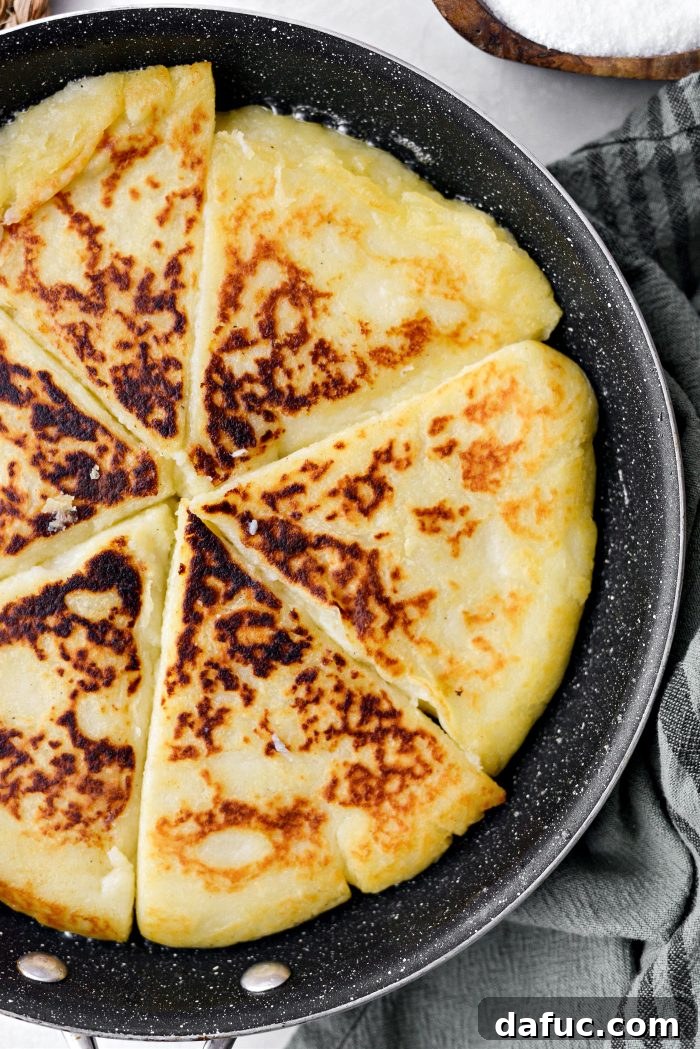
Regardless of how you choose to enjoy them, these farls are best served warm, allowing their rich, buttery flavor and unique texture to shine. They are savory and slightly dense, yet with a creamy smooth interior, offering a delightful contrast to their crispy, buttery edges. Their rich potato flavor makes them a comforting and satisfying choice any time of day.
Tips for Making the Best Irish Potato Farls Every Time
While the recipe for **Irish Potato Farls** is straightforward, a few key tips can ensure your farls are consistently perfect:
- Use the Right Potatoes: As mentioned, russet potatoes are ideal due to their high starch content and dry texture when cooked. This prevents a gummy or overly dense farl.
- Steam, Don’t Boil: Steaming the potatoes instead of boiling them prevents them from absorbing excess water, which can make the dough difficult to work with and result in less crispy farls.
- Dry the Potatoes Thoroughly: After steaming, letting the potatoes dry in a sieve for a few minutes is a crucial step. This further reduces moisture, leading to a fluffier mash and a better dough consistency.
- Mash Completely: Whether using a sieve or a ricer, ensure your potatoes are completely free of lumps. A smooth mash translates to a smooth farl.
- Don’t Overmix the Dough: Once the flour is added, mix just until combined. Overmixing can develop the gluten in the flour, making the farls tough. Gentle handling is key.
- Uniform Thickness: When shaping the disc, aim for an even 1/2-inch thickness. This ensures consistent cooking and browning for all your farls.
- Proper Pan Temperature: Medium heat is ideal for frying. Too low, and they’ll soak up too much butter and won’t get crispy; too high, and they’ll burn before cooking through. You want the butter to be bubbling gently.
- Don’t Crowd the Pan: Cook the farls in batches if necessary. Overcrowding lowers the pan’s temperature and steams the farls instead of frying them, preventing that coveted crispy exterior.
- Serve Immediately: Potato farls are at their absolute best when fresh and warm off the skillet. While they can be reheated, their texture will change.
Storage and Reheating
**Irish Potato Farls** are undeniably best enjoyed on the day they are made, fresh and warm from the skillet, when their crispy edges and creamy centers are at their peak. However, if you find yourself with leftovers, they can certainly be stored and reheated. Allow them to cool completely, then store them in an airtight container in the refrigerator for up to 2-3 days.
To reheat, the best method to revive some of their crispness is to pan-fry them again over medium heat with a little butter until heated through and re-crisped on the outside. You can also warm them in an oven or toaster oven at 350°F (175°C) for about 10-15 minutes, or until warm. While reheating in a microwave is possible, it will result in a softer texture, and they will lose much of their initial crispiness. Despite losing some of their original crunch, reheated farls still offer a delicious potato flavor that makes for a comforting meal the next day.
Frequently Asked Questions About Irish Potato Farls
Here are some common questions people ask about making and enjoying **Irish Potato Farls**:
Q: Can I use leftover mashed potatoes for this recipe?
A: Absolutely! This recipe is fantastic for using up leftover mashed potatoes, provided they are not overly seasoned or mixed with too many additions (like cheese or gravy). Ensure they are plain enough to be repurposed into farls. You might need to adjust the flour slightly if your mashed potatoes are wetter than what’s made from freshly steamed potatoes.
Q: What’s the difference between potato farls and boxty?
A: While often used interchangeably, traditionally, boxty (especially in its “pancake” form) typically includes a mixture of raw grated potato and cooked mashed potato, giving it a slightly different texture and flavor. Potato farls, as described here, are primarily made from cooked, mashed potatoes, resulting in a smoother, softer interior.
Q: Can I make potato farls gluten-free?
A: You can try using a gluten-free all-purpose flour blend. However, results may vary, as gluten-free flours behave differently than wheat flour and may affect the texture and binding properties. Look for a blend specifically designed for baking.
Q: How can I add more flavor to my potato farls?
A: Feel free to get creative! You can add finely chopped herbs like parsley or rosemary to the dough. A pinch of garlic powder or onion powder can also enhance the savory profile. For a cheesy twist, incorporate a small amount of grated strong cheddar cheese into the dough before shaping.
Q: Why are my potato farls not getting crispy?
A: Several factors can cause this. Ensure your mashed potatoes are as dry as possible, don’t overcrowd the pan, and make sure your skillet is at the correct medium heat. Also, use enough butter for frying to achieve that golden, crispy crust.
Q: Are potato farls suitable for freezing?
A: Yes, you can freeze cooked potato farls. Allow them to cool completely, then place them in a single layer on a baking sheet to freeze solid. Once frozen, transfer them to a freezer-safe bag or container. They can be frozen for up to 1-2 months. Reheat from frozen in a pan or oven until thoroughly warmed and re-crisped.
Enjoy! We hope you love this **Irish Potato Farls recipe** as much as we do. It’s a taste of true Irish comfort that’s perfect for any meal. If you give this recipe a try, we’d love to hear from you! Snap a photo of your delicious farls and share it on social media. Tag us on Twitter or Instagram!
Print Recipe
Pin Recipe
Irish Potato Farls
These classic Irish Potato Farls are the perfect accompaniment to your breakfast! Made from fluffy mashed steamed potatoes mixed with flour, melted butter, salt, and pepper, then pan-fried to a golden crisp. This recipe serves 6 people and brings authentic Irish flavor to your table.
Yield: 6 servings
Prep Time: 20 minutes
Cook Time: 12 minutes
Total Time: 32 minutes
Ingredients
- 1½ pounds russet potatoes, peeled and chopped
- ¾ cup unbleached all-purpose flour
- 1½ teaspoons kosher salt
- ½ teaspoon freshly ground black pepper
- 2 tablespoons melted butter, divided
- 2 to 3 tablespoons butter, for frying
FOR SERVING:
- Flaky sea salt
- Snipped fresh chives
Instructions
- Prepare the Potatoes: Wash, peel, and roughly chop 1-1/2 pounds of russet potatoes (about 1-1/4 pounds peeled). Place a steamer basket into a deep-sided pan and fill with water just to the bottom of the basket. Add potatoes in an even layer. Cover, and bring water to a simmer over medium heat for 20 to 25 minutes, or until potatoes are very tender.
- Mash the Potatoes: Transfer the hot, steamed potatoes to a mesh sieve set over a mixing bowl and let them dry out for about 5 minutes. Use the back of a spoon to press the potatoes through the mesh sieve and into the bowl below. Scrape any potato from the underside of the sieve. (Alternatively, you could use a potato ricer for very smooth results.)
- Form the Dough: To the mashed potatoes, add the 3/4 cup unbleached all-purpose flour, 1-1/2 teaspoons kosher salt, 1/2 teaspoon freshly ground black pepper, and 2 tablespoons melted butter. Using a spatula, mix until thoroughly combined and the mixture forms a cohesive dough-like consistency.
- Shape the Farls: Lightly flour a clean work surface. Transfer the potato dough and gently press and shape it into a 10-inch round disc that is about 1/2-inch thick. Use a pizza cutter or sharp knife to cut the dough into 6 equal wedges.
- Fry the Farls: Melt 2 to 3 tablespoons of butter in a 12-inch nonstick skillet over medium heat. The butter should melt and be gently bubbling. Carefully add the potato farl wedges into the pan, ensuring not to overcrowd (cook in batches if necessary). Cook for 5 to 6 minutes or until the underside is golden brown and crispy.
- Finish Cooking: Carefully turn each wedge and continue to cook for another 5 to 6 minutes, or until both sides are golden and heated through.
- Serve: Serve the potato farls immediately with a sprinkle of flaky salt and snipped fresh chives. While best fresh, they can be reheated the next day, though they may lose some crispiness.
Notes
Nutrition Disclaimer: All information presented on this site is intended for informational purposes only. I am not a certified nutritionist, and any nutritional information shared on SimplyScratch.com should only be used as a general guideline.
Nutrition Information (per serving)
- Serving Size: 1 wedge
- Calories: 214kcal
- Carbohydrates: 33g
- Protein: 4g
- Fat: 8g
- Saturated Fat: 5g
- Polyunsaturated Fat: 0.4g
- Monounsaturated Fat: 2g
- Trans Fat: 0.3g
- Cholesterol: 20mg
- Sodium: 618mg
- Potassium: 494mg
- Fiber: 2g
- Sugar: 1g
- Vitamin A: 236IU
- Vitamin C: 6mg
- Calcium: 20mg
- Iron: 2mg
Author: Laurie McNamara
Course: Breakfast & Brunch
Cuisine: Irish