
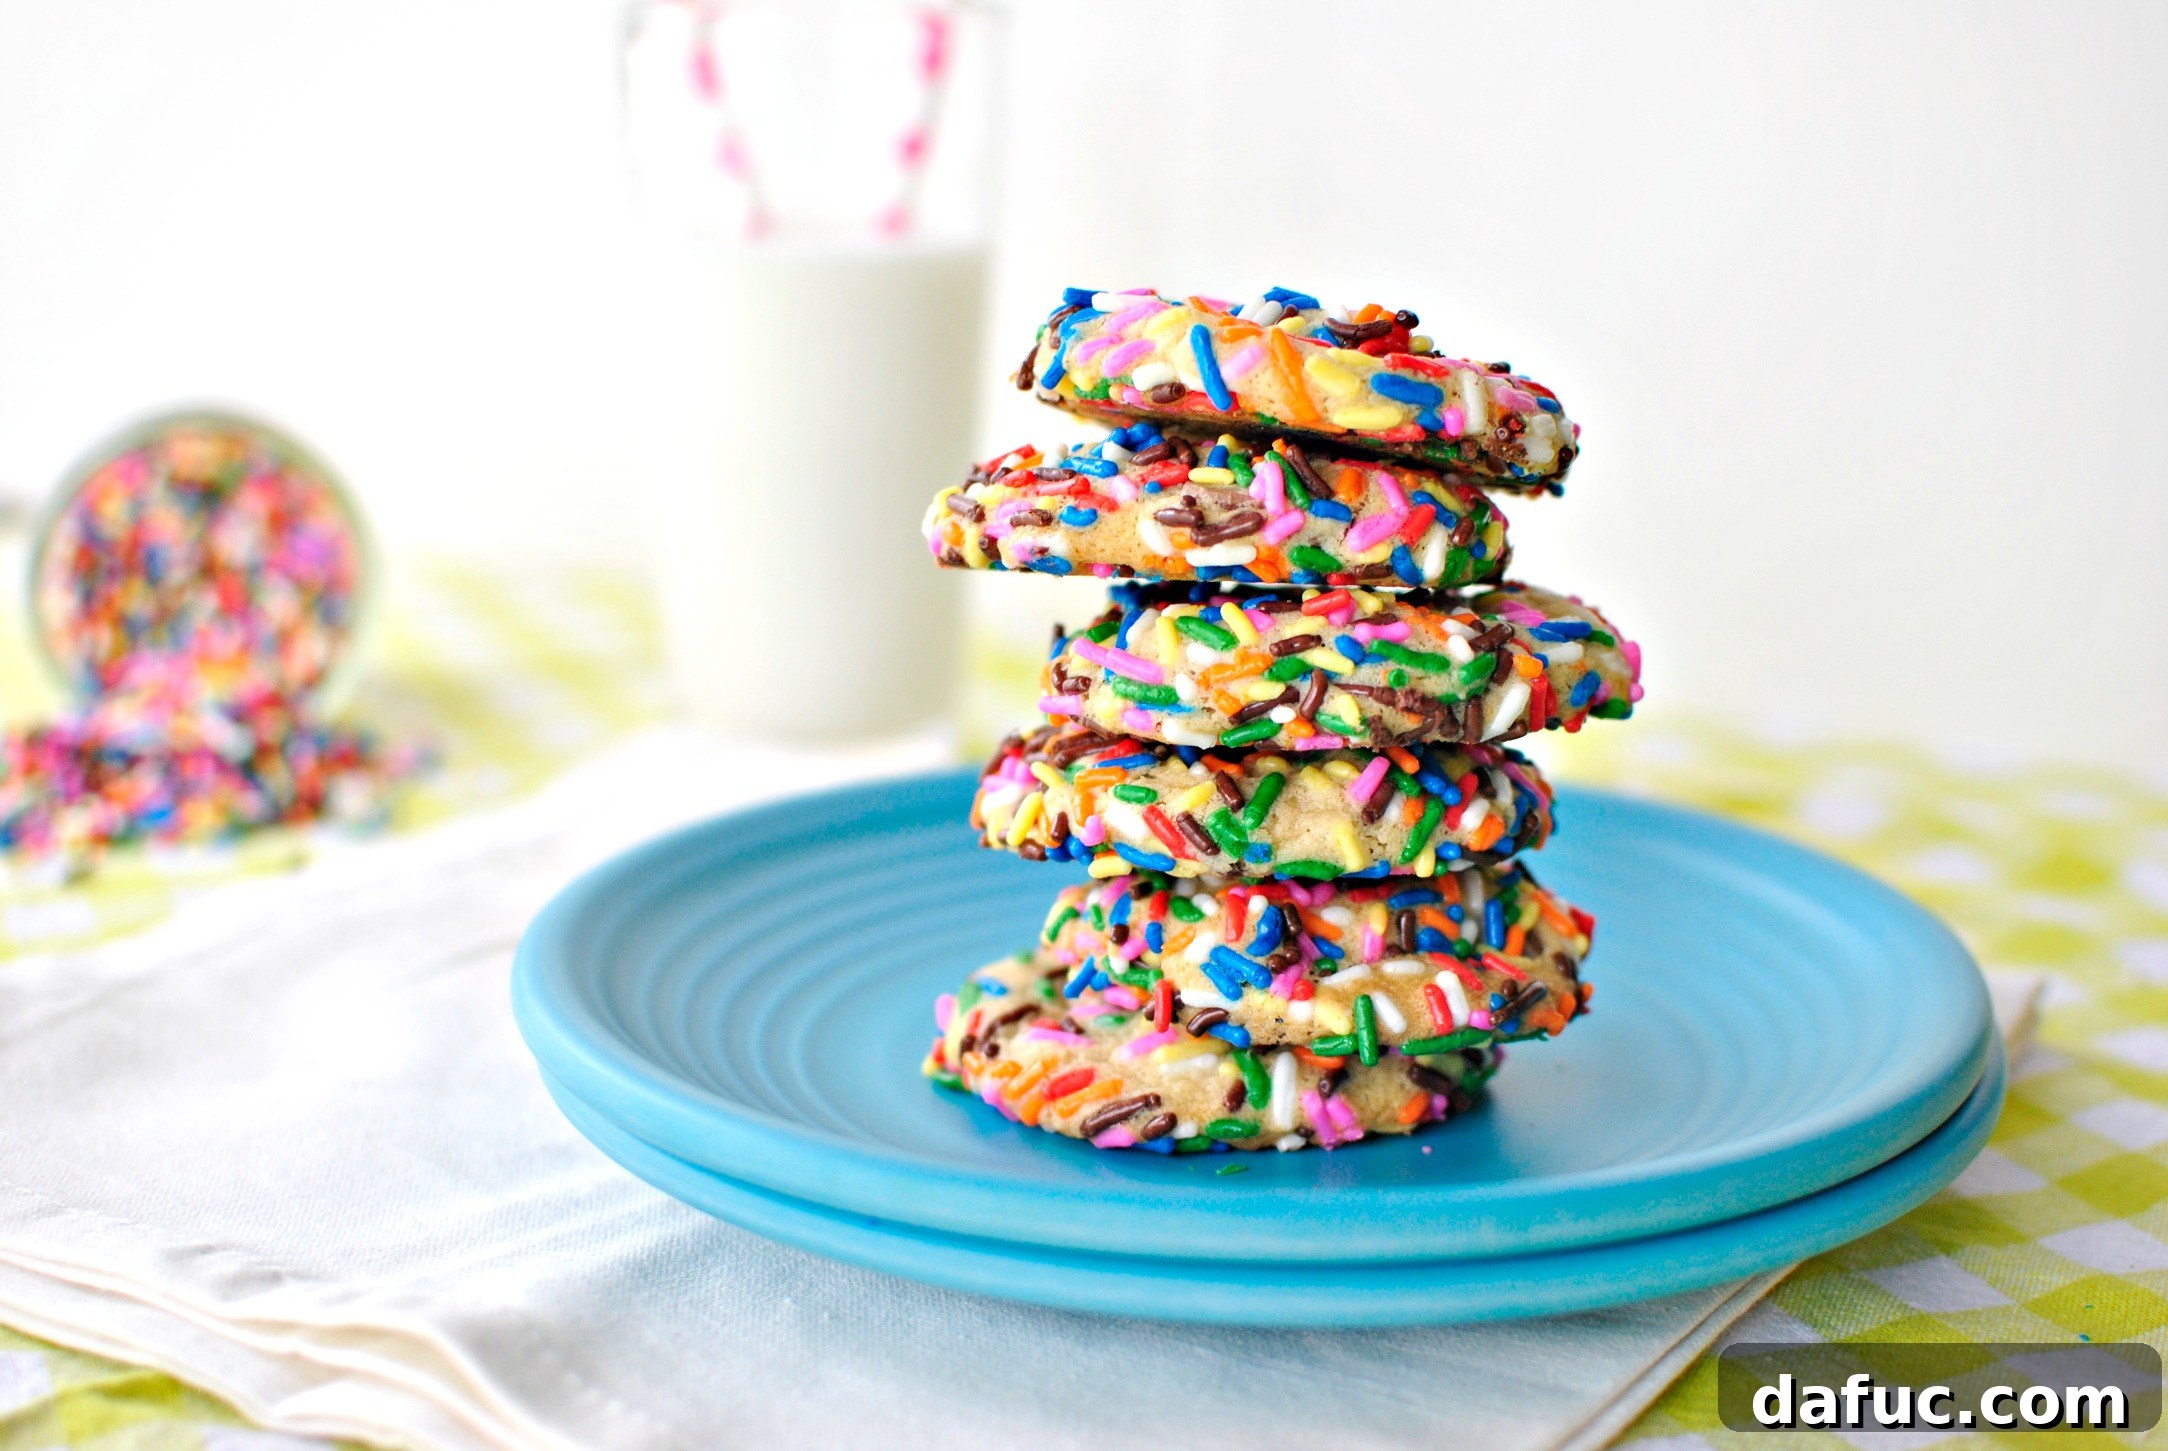
Welcome to a celebration of joy, flavor, and a touch of whimsical magic! If you’re looking for a dessert that brightens any day and brings smiles to every face, you’ve found it. These Chocolate Chip Sprinkle Cookies aren’t just a treat; they’re an experience—soft, perfectly chewy chocolate chip cookies generously coated in a vibrant kaleidoscope of sprinkles. Whether it’s a birthday, a holiday, or just a regular Friday in need of a pick-me-up, these cookies are designed to delight.
Remember the first time you baked something from scratch? For many, the classic chocolate chip cookie holds a special place, often learned from a trusty recipe like the one on the back of a chocolate chip bag. It’s a foundational recipe that, despite its apparent simplicity, can still require a quick glance at the instructions even after years of practice. The exact measurements of flour, sugar, or butter can sometimes slip our minds, no matter how many times we’ve made them. But the outcome? Always a comforting, delicious reward.
Today, we’re taking that beloved classic and elevating it to a new level of fun and festivity. Imagine that same soft, melt-in-your-mouth chocolate chip cookie, now dressed in its most celebratory attire. These aren’t just cookies; they’re tiny canvases of happiness, each bite bursting with the familiar taste of homemade goodness and the playful crunch of colorful sprinkles. It’s a guaranteed mood booster and a perfect recipe for sharing.
The Art of the Sprinkle: Why These Cookies Stand Out
While any cookie can theoretically be rolled in sprinkles, the pairing of a perfectly baked, chewy chocolate chip cookie with a lavish coating of colorful sprinkles creates a truly irresistible combination. The soft interior and slightly crisp edges of the cookie provide the ideal backdrop for the crunchy, sweet bursts of the sprinkles. This recipe was born from a desire to make baking even more joyful, inspired by two young, imaginative minds who believed that every day could use a little more sparkle.
Baking these cookies isn’t just about following a recipe; it’s an interactive experience. It’s a wonderful opportunity for family bonding, where little hands can help measure, mix, and, of course, generously roll the dough in sprinkles. The sheer delight on their faces as they transform simple dough into vibrant, festive treats is a reward in itself. Be prepared for a delightful mess and an abundance of sugary smiles—these cookies are designed to be shared and enjoyed with loved ones.
Choosing Your Sprinkles
The beauty of sprinkle cookies lies in their versatility. While classic rainbow “jimmies” are a popular choice, don’t hesitate to get creative with your sprinkle selection.
- Holiday Themes: Red and green for Christmas, pastels for Easter, orange and black for Halloween, or patriotic colors for national holidays.
- Special Occasions: Choose sprinkles that match a party theme, a favorite color, or a school mascot. Confetti sprinkles add a different texture, while sanding sugar provides a fine, sparkling coating.
- Everyday Fun: A mix of vibrant colors can turn an ordinary afternoon snack into a mini celebration.
The type of sprinkle can subtly change the texture and appearance of your cookies, allowing for endless customization and creativity.
Gathering Your Ingredients: The Foundation of Flavor
A great cookie starts with quality ingredients. For this recipe, you’ll need standard pantry staples, but paying attention to a few details can make all the difference.
Dry Ingredients: The Building Blocks
In a medium bowl, you’ll combine 2-1/4 cups of unbleached all-purpose flour, 1 teaspoon of baking soda, and 1 teaspoon of kosher salt.
Whisk these dry ingredients together thoroughly. This step is crucial for ensuring the baking soda and salt are evenly distributed throughout the flour, leading to consistent leavening and flavor in every cookie. Set this mixture aside.
Wet Ingredients: The Heart of the Cookie
Next up, let’s talk butter. You’ll need two sticks (1 cup) of unsalted butter, softened to room temperature.
A quick “fun fact” for aspiring bakers: many years ago, I used to buy unsalted butter for everything – spreading on bread, drizzling on popcorn, you name it. I genuinely didn’t realize there was a noticeable taste difference between salted and unsalted butter. Oh, how wrong I was! For baking, especially cookies, unsalted butter is almost always preferred. It gives you complete control over the salt content in your recipe, preventing your cookies from becoming overly salty. Always allow your butter to soften to room temperature for optimal creaming with sugar, which creates that lovely light and fluffy texture.
Add 3/4 cup of both light brown sugar and granulated sugar to your softened butter in the mixer. The combination of these two sugars is key to achieving the perfect cookie texture: the granulated sugar contributes to crisp edges, while the brown sugar adds chewiness and moisture, along with a rich, caramel-like flavor.
Beat this mixture on medium-low speed until the sugars are fully incorporated into the softened butter and the mixture becomes notably light and fluffy. This creaming process incorporates air, which is essential for a tender cookie.
With the mixer still on low speed, slowly add in two large eggs, one at a time, blending well after each addition. This ensures the eggs are fully emulsified into the butter mixture, contributing to a smooth, uniform dough.
Finally, add one teaspoon of pure vanilla extract and mix just until combined. Vanilla is a flavor enhancer that brings out the best in the chocolate and sugar.
Bringing it All Together: The Dough
Gradually add the dry ingredients to the wet mixture, about a third at a time. Mix on low speed just until each addition is incorporated. Be careful not to overmix the dough once the flour is added, as this can develop the gluten too much, resulting in tougher cookies. Mix until barely combined, with a few streaks of flour still visible, then proceed.
Now for the star of the show (besides the sprinkles!): the chocolate chips. Add one cup of your favorite milk chocolate chips. You can also experiment with semi-sweet, dark chocolate, or even white chocolate chips for a different flavor profile. Mix on low speed just until the chips are evenly distributed throughout the dough. Again, avoid overmixing.
The Fun Part: Rolling in Sprinkles!
This is where the magic truly happens and the cookies come alive! Prepare a shallow bowl with your chosen rainbow sprinkles.
Scoop out rounded two-tablespoon portions of the cookie dough. For consistent sizing and baking, a cookie scoop is highly recommended.
Gently drop each scoop of cookie dough into the bowl of sprinkles.
Roll the dough ball around in the sprinkles until it’s completely coated in a glorious rainbow. Don’t be shy – the more sprinkles, the merrier!
Place the sprinkle-coated dough balls about two inches apart on a baking sheet lined with parchment paper or a silicone baking mat. This spacing allows them to spread without touching.
Baking to Golden Perfection
Preheat your oven to 375°F (190°C) and bake for 8-10 minutes.
Keep a close eye on them. Cookies are typically done when the edges are lightly golden brown and the centers are still soft but set. Overbaking can lead to dry, crumbly cookies, so it’s always better to underbake slightly for that perfect chewy texture.
Once baked, allow these gorgeous chocolate chip sprinkle cookies to cool on the baking sheet for a few minutes. This crucial step allows them to firm up slightly before you attempt to move them. Then, carefully transfer them to a wire rack to cool completely.
Truth be told, while a warm, gooey cookie straight from the oven is a divine pleasure, I often find myself preferring chocolate chip cookies the next day, once the chocolate chips have fully re-solidified and the flavors have had a chance to meld even further. But let’s be honest, resisting a warm cookie is a challenge few can master!
Enjoying Your Culinary Creation
These chocolate chip sprinkle cookies are more than just a sweet treat; they’re a burst of pure happiness. They are an excellent recipe to tackle with children, providing a hands-on, colorful baking adventure. They’re perfect for birthday parties, celebratory events, or simply when you’re in the mood for a dose of nostalgia and a delightful pick-me-up that reminds you of childhood joy.
Now, go grab an ice-cold glass of milk. There’s truly no better pairing for a warm, chewy, sprinkle-coated chocolate chip cookie. The crisp coolness of the milk perfectly complements the rich sweetness of the cookie, creating a classic combination that never fails to satisfy.
Enjoy every single bite! And if you decide to try your hand at this fun and flavorful chocolate chip sprinkle cookie recipe, we’d love to hear about it. Snap a photo of your vibrant creations and share them! Remember to tag us on social media so we can celebrate your baking success together!
Chocolate Chip Sprinkle Cookies Recipe
Print Recipe
Yield: 26 cookies
Summary:
Soft chewy chocolate chip cookies rolled in colorful sprinkles.
15 mins
15 mins
30 mins
Ingredients
- 2¼ cups unbleached all-purpose flour
- 1 teaspoon baking soda
- 1 teaspoon kosher salt
- 1 cup unsalted butter, softened to room temperature
- 3/4 cup granulated sugar
- 3/4 cup light brown sugar
- 2 large eggs
- 1 teaspoon pure vanilla extract
- 1 cup milk chocolate chips
- 1 cup rainbow sprinkles, jimmies
Instructions
- Preheat your oven to 375°F (190°C) and line a sheet pan with parchment paper or a silicone baking mat.
- In a medium bowl, whisk together the all-purpose flour, salt, and baking soda. Set aside.
- In the bowl of your stand mixer (or a large bowl with a hand mixer), beat two sticks of softened unsalted butter and both the light brown and granulated sugar on medium speed until the mixture is light and fluffy. Scrape down the sides of the bowl as needed.
- With the mixer on low speed, add one egg at a time, mixing well after each egg. Once both eggs are incorporated, add the teaspoon of pure vanilla extract and mix until just combined.
- Gradually add the whisked flour mixture to the wet ingredients in thirds, mixing on low speed until all the dry ingredients are just incorporated. Be careful not to overmix.
- Fold in the cup of milk chocolate chips until they are evenly distributed throughout the dough.
- Scoop rounded two-tablespoon portions of the cookie dough and roll them in a bowl of rainbow sprinkles until thoroughly coated.
- Place the sprinkle-coated dough balls two inches apart on the prepared baking sheet. Bake for 8-10 minutes, or until the edges are lightly golden and the centers are still soft.
- Allow the cookies to cool for a few minutes on the baking sheet before using a spatula to transfer them to a wire rack to cool completely.
Serving: 1 cookie,
Calories: 203kcal,
Carbohydrates: 29g,
Protein: 2g,
Fat: 9g,
Saturated Fat: 6g,
Polyunsaturated Fat: 1g,
Monounsaturated Fat: 2g,
Trans Fat: 1g,
Cholesterol: 34mg,
Sodium: 142mg,
Potassium: 28mg,
Fiber: 1g,
Sugar: 20g,
Vitamin A: 239IU,
Calcium: 11mg,
Iron: 1mg
Author: Laurie McNamara
Course: Desserts & Sweet Treats
Cuisine: American