
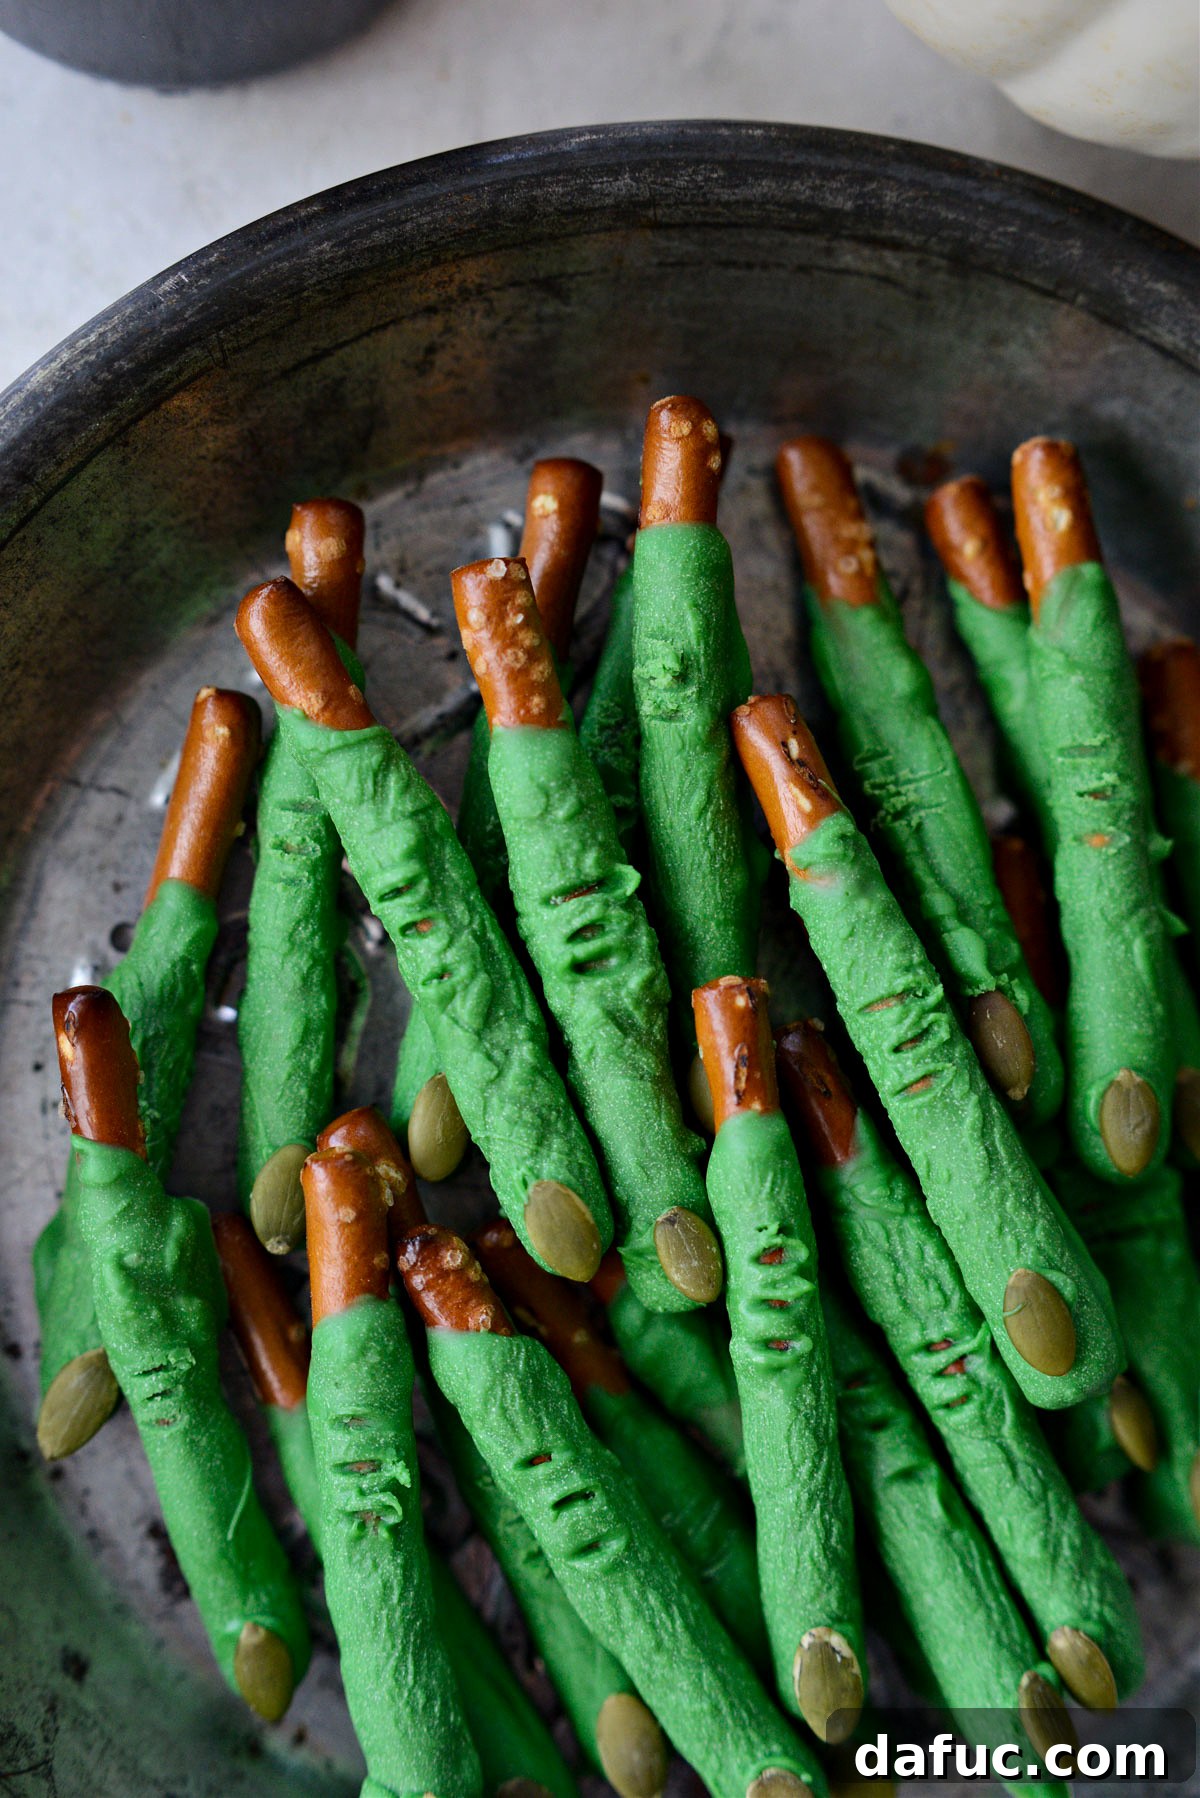
Easy & Spooky Witch Fingers: The Ultimate Halloween Pretzel Treat Recipe
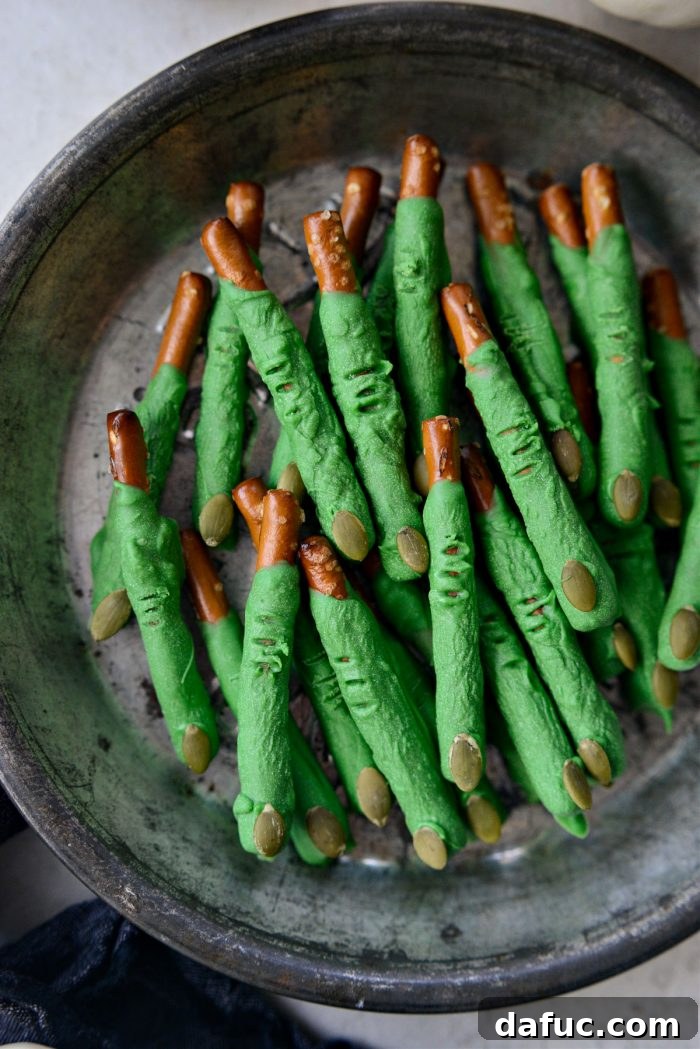
As the vibrant colors of autumn sweep across the landscape and a mysterious chill hints at the approaching season, our thoughts inevitably turn to Halloween. This beloved holiday isn’t just about elaborate costumes and haunted houses; it’s also a fantastic opportunity to unleash your creativity in the kitchen with themed treats that delight both the young and the young-at-heart. Among the easiest, most enjoyable, and visually striking Halloween snacks you can prepare are these delightfully ghoulish Witch Fingers. Imagine crunchy pretzel dippers transformed into grotesque, green digits, each tipped with a spooky pumpkin seed fingernail – it’s a truly fun and surprisingly effortless project for your spooky season celebrations. This recipe is designed to yield approximately 35 deliciously creepy fingers, making it perfect for a Halloween party crowd, a school treat exchange, or simply a dedicated coven of snackers!
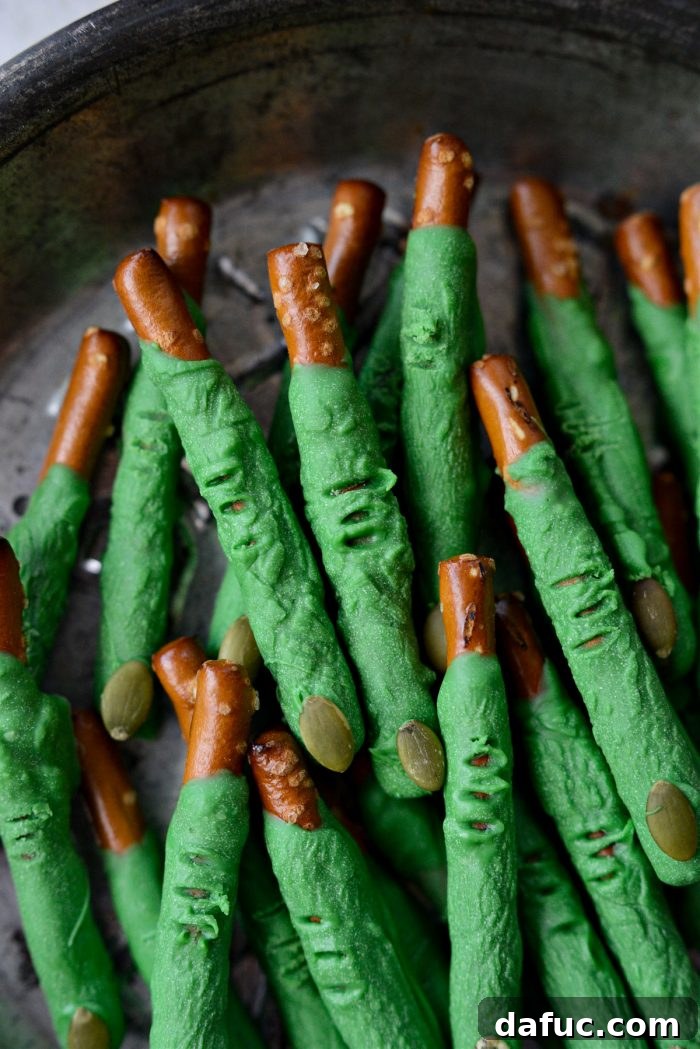
Why These Witch Fingers Are Your Perfect Halloween Treat
Perhaps you’ve found yourself saying, “Making intricate holiday treats just isn’t my forte,” or perhaps you classify yourself as more of a practical chef than an artistic baker. The wonderful news is, these Witch Fingers are designed with you in mind! Even if you don’t possess the steadiest hand or a knack for intricate decorating, you’ll find this recipe to be incredibly forgiving and immensely fun. The inherent charm of these treats lies in their wonderfully “gnarly” appearance – the more twisted, bumpy, and imperfect they look, the more authentic and delightfully disturbing they become! This makes them an ideal culinary activity for families, especially involving children. Kids will revel in the process of dipping pretzels and pressing on pumpkin seeds, embracing the creative chaos that makes each witch finger uniquely spooky.
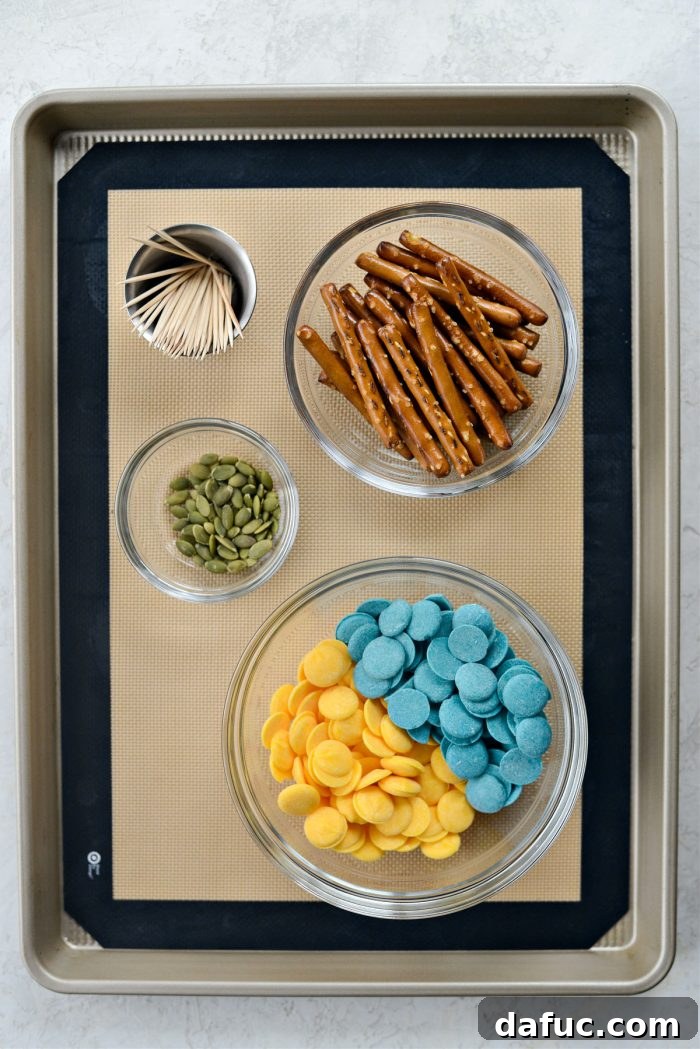
Gather Your Ghoulish Ingredients for Instant Spookiness
Preparing for these fantastically spooky snacks requires just a handful of easily accessible components. The minimalist ingredient list is a major part of what makes this recipe so appealing and widely accessible, eliminating the need for a scavenger hunt through specialty stores. A quick trip to your local grocery store is usually all it takes to gather everything you need to begin your magical transformation.
Essential Ingredients for Spooky Success:
- Candy Melts: The foundation for your vibrant, witchy green coating.
- Pretzels: Specifically, “pretzel dippers” are key for the ideal finger shape.
- Pumpkin Seeds: These will form the perfectly eerie and edible fingernails.
- Toothpick: A simple yet essential tool for crafting those creepy knuckle wrinkles.
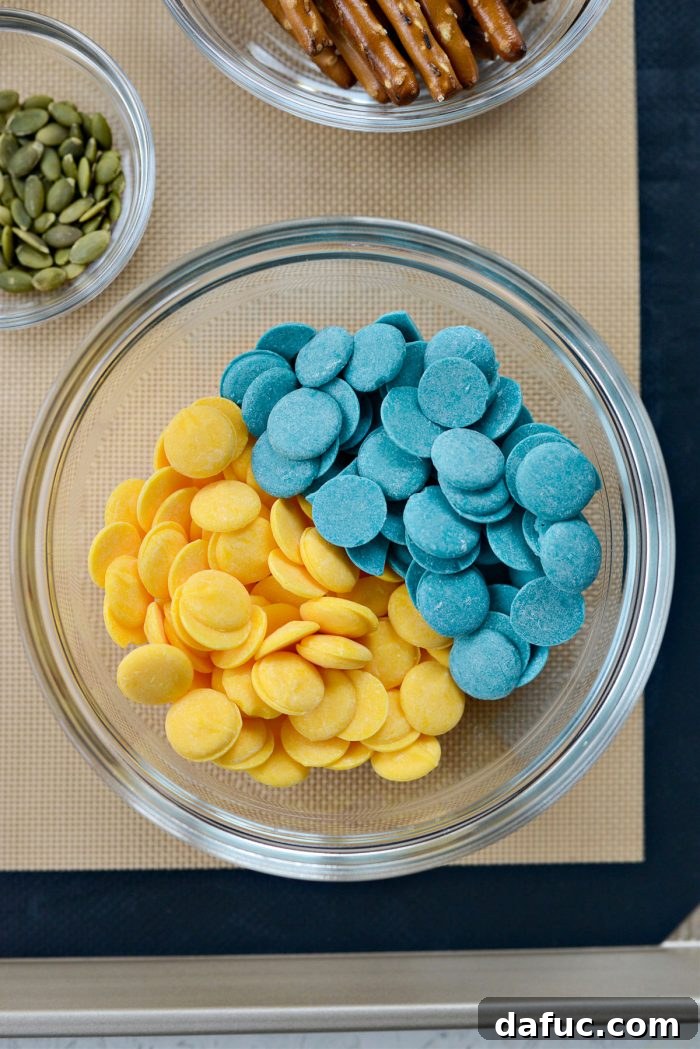
Choosing and Customizing Your Candy Melts for the Perfect Green
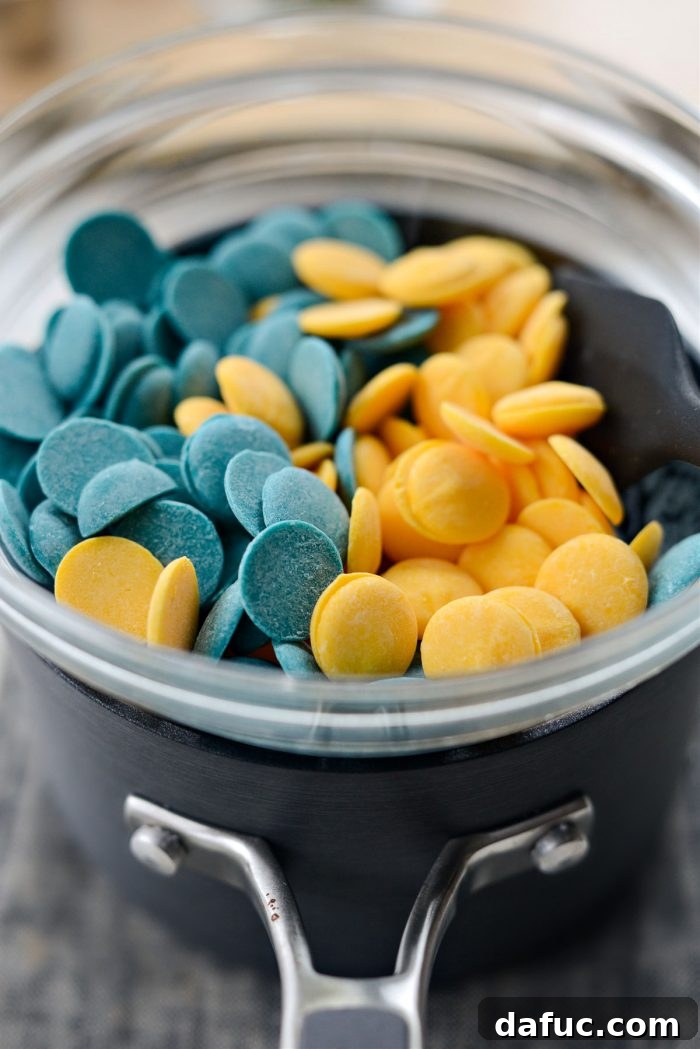
While bright green candy melts are typically abundant during the Halloween season, sometimes they can be surprisingly elusive. Don’t let an empty shelf for green melts derail your spooky ambitions! I’ve discovered that mixing colors can often yield an even more vibrant, captivating, and unique shade of green. For a truly striking color, consider combining 3/4 cup of yellow candy melts with 1/2 cup of turquoise candy melts. This blend creates a fantastic, lively green that truly pops and gives your witch fingers an otherworldly glow. If you find yourself completely without pre-colored melts, you can also use white candy melts and tint them with oil-based food coloring. It’s crucial to use oil-based dyes for chocolate, as water-based food coloring can cause the chocolate to seize and become unusable. Always opt for quality candy melts for the best melting consistency and flavor.
Selecting the Best Pretzels for Your Witchy Digits
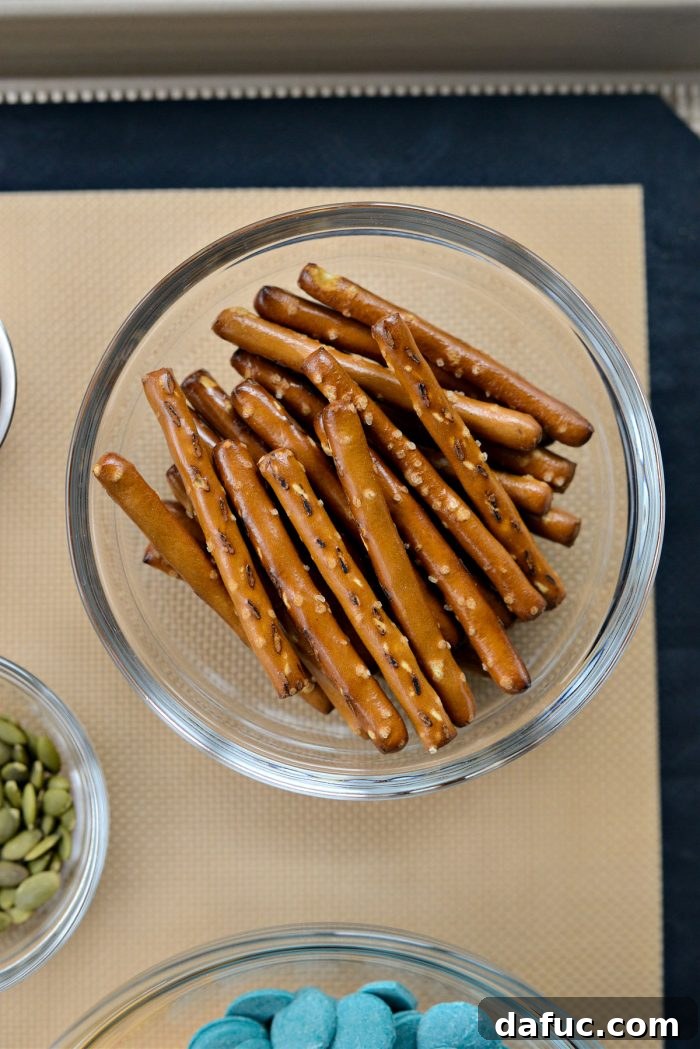
The type of pretzel you choose is quite important for achieving the most realistic and appealing Witch Fingers. For the most authentic and easiest “finger” shape, I highly recommend actively seeking out “pretzel dippers.” Many popular brands, such as Snyder, frequently carry these. They are typically thicker, straighter, and more elongated than traditional pretzel sticks or twisted pretzels, making them absolutely ideal for mimicking a witch’s digit. Their robust structure provides a good base for the chocolate coating and handling. If pretzel dippers are unavailable, thick pretzel rods cut to an appropriate finger-like length could serve as an alternative. However, I advise against using very thin pretzel sticks, as they tend to be fragile, break easily, and don’t offer sufficient surface area for the desired chocolate coating and detailing.
Crafting Your Spooky Witch Fingers: Step-by-Step Instructions
With all your essential ingredients now at hand, it’s time to embark on the enchanting process of bringing these creepy treats to life! The procedure is remarkably straightforward and enjoyable, guaranteeing success even for novice bakers or those with minimal kitchen experience. Follow these simple, well-detailed steps for perfectly ghastly Witch Fingers that will be the talk of your Halloween gathering.
Step 1: Expertly Melt the Candy Melts
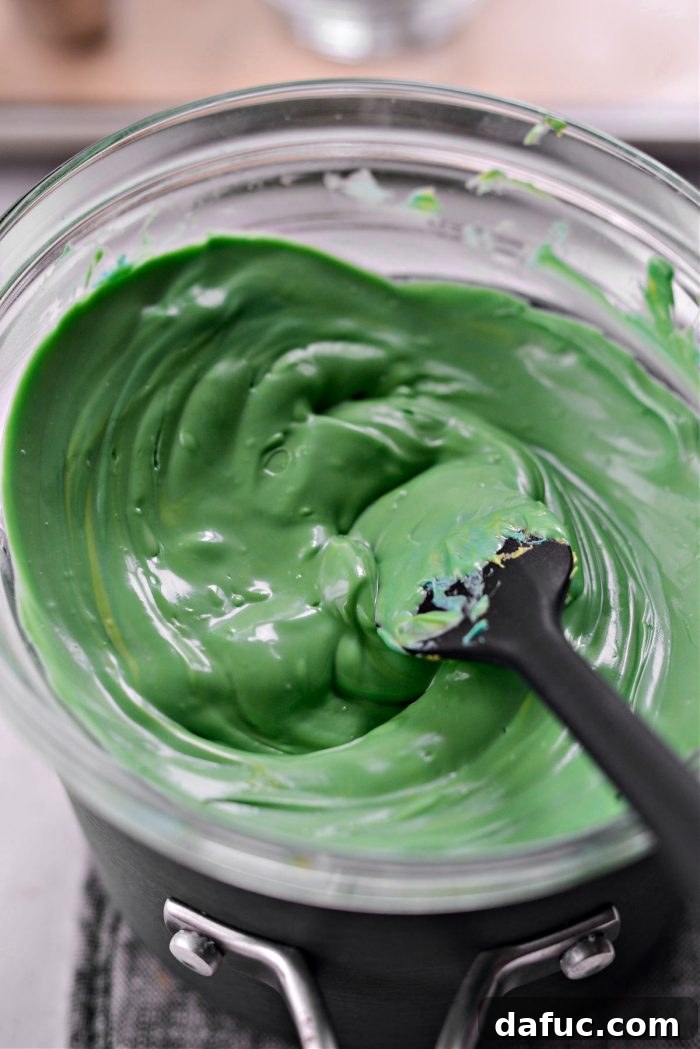
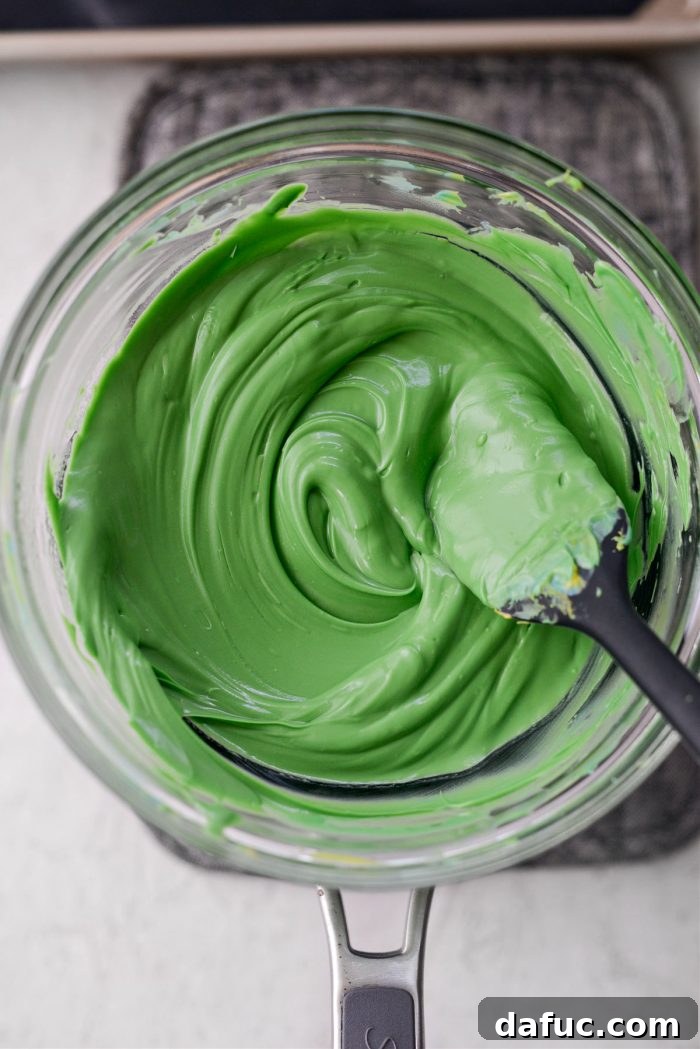
Achieving a smooth, consistent, and perfectly dippable chocolate coating is paramount, and proper melting technique is the key. The double boiler method is highly recommended for candy melts, as it provides gentle, indirect, and even heat, which is crucial for preventing scorching and maintaining a desirable texture. Begin by placing your chosen candy melts (or your carefully mixed yellow and turquoise blend) into a sturdy, heatproof bowl. Next, select a saucepan and fill it with approximately an inch of water. Carefully set the heatproof bowl containing the candy melts over the saucepan, ensuring that the bottom of the bowl does not make direct contact with the simmering water. Bring the water in the saucepan to a gentle simmer over medium heat. The rising steam from the simmering water will gradually and gently heat the bowl above, causing the candy melts to soften and liquefy. Stir the candy melts occasionally with a clean spatula or spoon until they are completely smooth, free of any lumps, and have a uniform consistency. This melting process typically takes a few minutes, so patience is a virtue here. Once fully melted, carefully remove the bowl from the saucepan using oven mitts, as both the bowl and its contents will be hot.
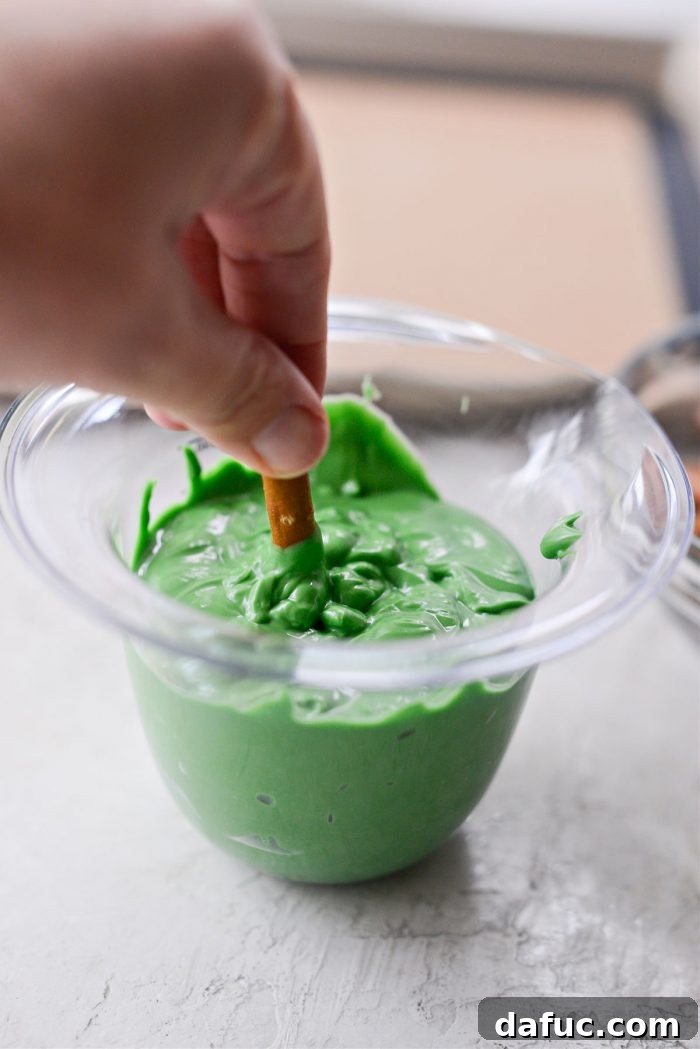
Step 2: Master the Art of Dipping Your Pretzels
With your candy melts now perfectly smooth and at the ideal dipping consistency, carefully pour the melted mixture into a heat-safe measuring cup or a tall, narrow glass. This specialized container shape is incredibly beneficial, as it makes submerging the pretzels much easier, minimizes waste, and helps ensure an even coating without excessive mess. Take one pretzel dipper at a time and confidently submerge it into the vibrant green melted candy. Swirl the pretzel gently, ensuring that it is mostly coated, but intentionally leave a small portion at the very end uncovered – this section will serve as the “stub” or base of the witch’s finger, adding to its authentic appearance. Don’t strive for absolute perfection in your coating; in fact, a slightly uneven or rustic coverage genuinely enhances the wonderfully grotesque and witchy aesthetic you’re aiming for.
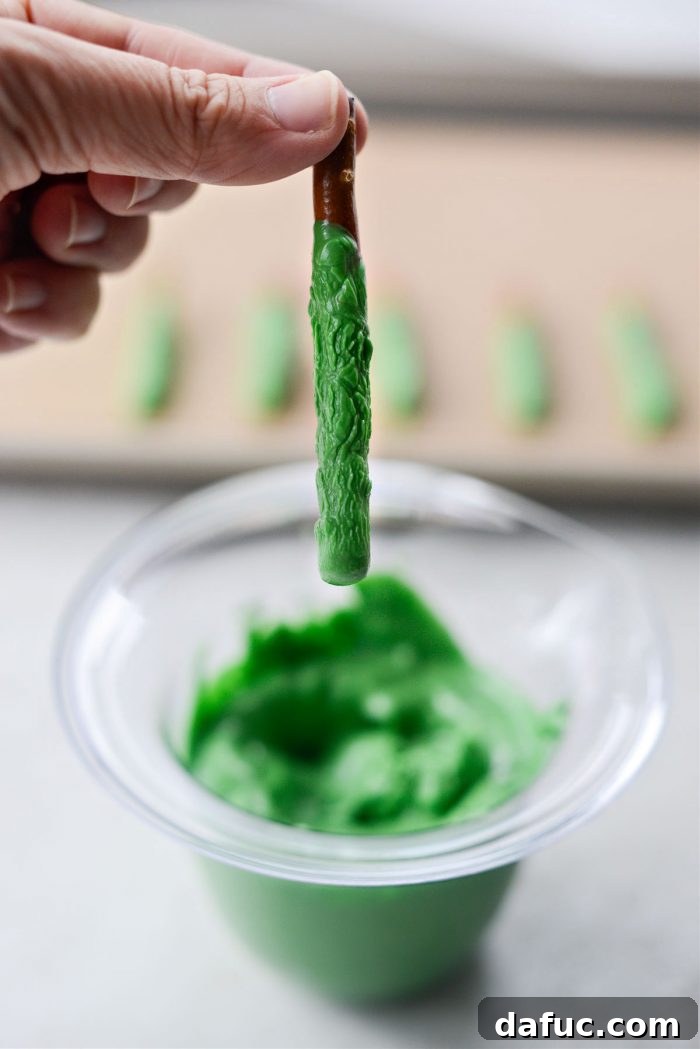
Step 3: Achieve the Desired “Gnarly” Texture and Arrange for Setting
Immediately after dipping each pretzel, gently tap or lightly shake off most of the excess chocolate. This critical step is what truly helps to achieve that distinctively “gnarly” or irregular texture, making your witch fingers look more authentically aged and less like perfectly smooth candy sticks. The slightly uneven drips, minor bumps, and textural variations are precisely what you want for that wonderfully creepy effect! Once the excess chocolate has been removed, carefully place the coated pretzel onto a sheet of parchment paper or a silicone mat. Ensure you leave a little space between each pretzel so they don’t touch or stick together as they cool and set. Repeat this dipping and placement process diligently with all remaining pretzels until your tray is filled with nascent witchy digits.
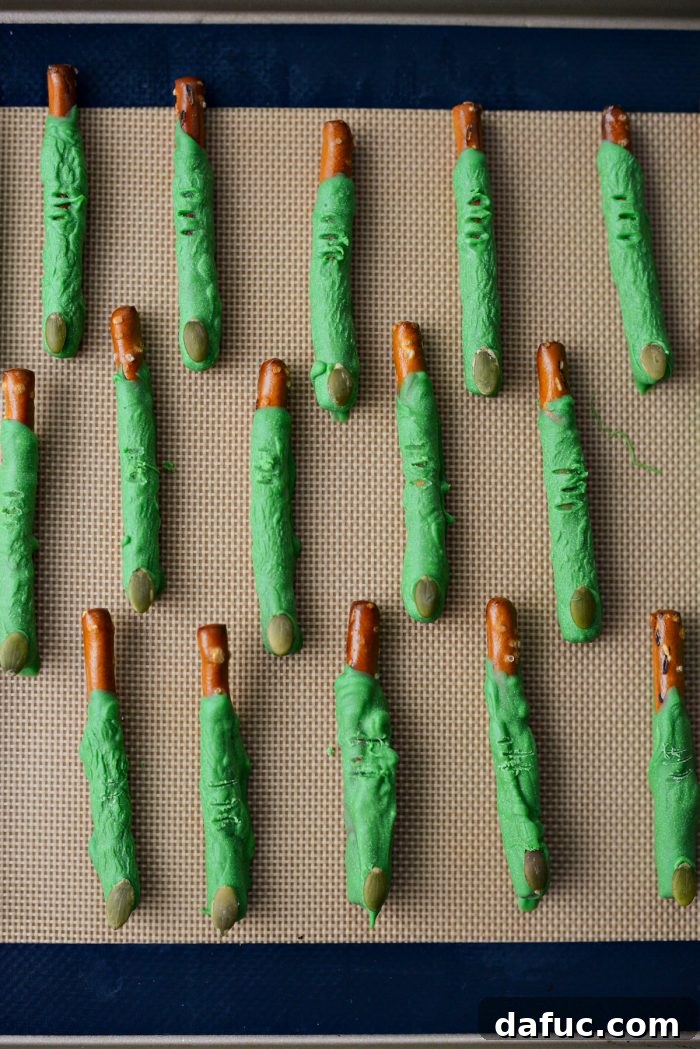
Step 4: Affix Pumpkin Seed Fingernails and Craft Knuckle Wrinkles
This is the moment where the true magic and eerie details come to life! While the candy coating on your pretzels is still slightly soft and tacky – but crucially, not entirely liquid – it’s time to add the iconic pumpkin seed fingernails. Take one raw, unsalted pumpkin seed and gently but firmly press it into the end of each pretzel where a fingernail would naturally be. If you find that the chocolate has begun to cool and harden too much, you can dab a tiny amount of fresh melted candy onto the back of the pumpkin seed before pressing it into place to ensure it adheres properly. For an extra, truly realistic and ghastly touch, grab your toothpick and gently etch in “knuckle wrinkles” on the main body of the pretzel, just below where the “fingernail” would attach. These small, deliberate lines add incredible detail and make your witch fingers look even more delightfully disturbing and authentic.
Once all your witch fingers are adorned with their nails and gruesome wrinkles, allow them ample time to cool and harden completely. You can let them set naturally at room temperature, which typically takes about 30-60 minutes, or if you’re in a hurry for your spooky celebration, you can place the parchment-lined tray into the refrigerator for approximately 10-15 minutes until the chocolate is firm and solid. Once the chocolate is fully set and hard to the touch, your spooky creations are officially ready to serve and impress!
Expert Tips and Tricks for the Perfect Batch of Spooky Fingers
To ensure your Witch Fingers are nothing short of spectacular, here are some helpful tips and tricks:
- Work in Manageable Batches: If you’re crafting a very large quantity of these treats, or if your kitchen environment is particularly warm, it’s wise to melt your candy in smaller batches. This technique helps to ensure the candy melts maintain their ideal dipping consistency throughout the entire process, preventing them from cooling and thickening too quickly.
- Embrace Color Creativity: While the classic vibrant green is undeniably iconic for witch fingers, don’t hesitate to experiment with other spooky hues! Consider using purple, black, or even orange candy melts to create a medley of different monster fingers or to match a specific Halloween theme. Food coloring gels can also be used with white chocolate for custom colors.
- Optimal Storage for Freshness: Once your Witch Fingers have fully set, store them in an airtight container at cool room temperature. They will remain fresh and delicious for up to one week, making them an excellent make-ahead treat for your Halloween festivities. Avoid refrigeration for extended periods, as it can sometimes cause condensation to form on the chocolate.
- Kid-Friendly Fun for All Ages: This recipe is a fantastic and safe activity for children of all ages! Encourage them to help with dipping the pretzels, gently pressing on the pumpkin seeds, and even carefully making the knuckle marks with a toothpick (under adult supervision, of course). Their enthusiastic and wonderfully imperfect creations will possess an authentic charm that adds to the festive spirit.
- Alternative Fingernail Ideas: If raw pumpkin seeds are not available, or if you’re looking for a different texture, consider using sliced almonds or even slivers of other nuts as alternative fingernails. These can offer a slightly varied aesthetic while still maintaining the creepy finger illusion.
- Troubleshooting Thick Chocolate: If your melted candy melts become too thick to dip easily, you can add a tiny amount of coconut oil or vegetable shortening (about 1/2 teaspoon at a time) and stir until it reaches the desired smooth, flowing consistency.
Serve Up Some Spooky Delight!
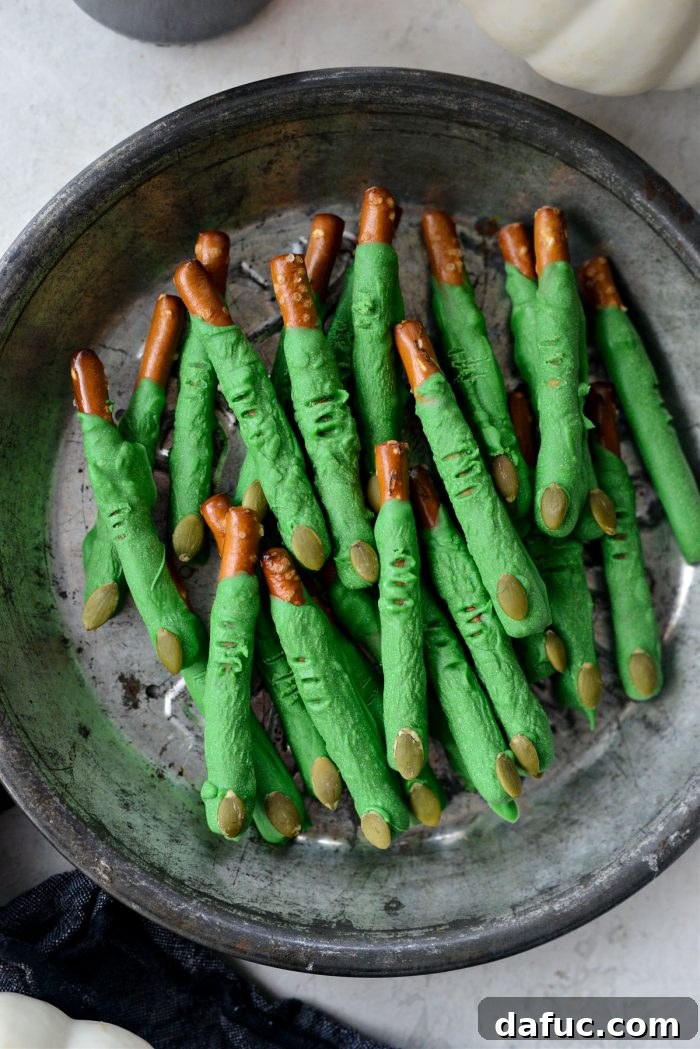
These Witch Fingers are more than just a sweet treat; they’re an interactive and memorable experience for your Halloween guests! Arrange them artistically on a platter for a Halloween party, carefully stick them into a “potion” (a glass of green punch or apple cider for a fun display), or simply present them in a spooky bowl as a captivating centerpiece. They are guaranteed to be a conversation starter and a highly anticipated favorite among all your partygoers. Prepare for compliments and requests for the recipe!
Happy Halloween!
May your Halloween be filled with abundant joy, delightful frights, and, most importantly, plenty of homemade, deliciously spooky treats!
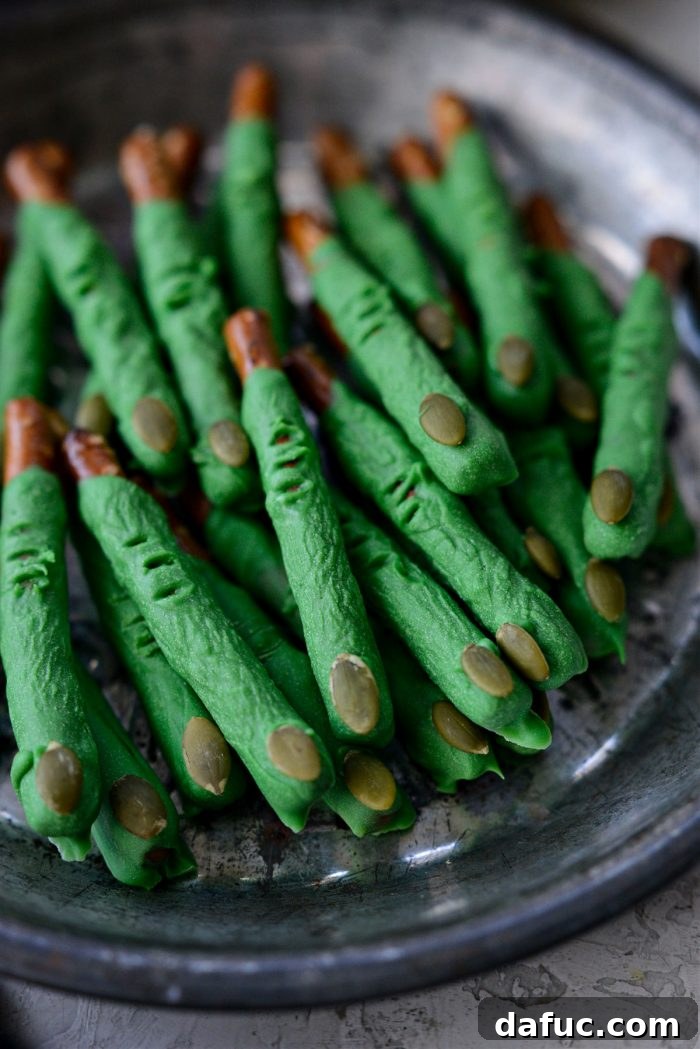
Enjoy your homemade Witch Fingers! We absolutely love seeing your creative and spooky culinary creations. If you decide to give this fun and easy recipe a try, please don’t forget to snap a photo and share it with our community by tagging @simply_scratch on Twitter or @simply_scratch on Instagram! We can’t wait to see your ghastly masterpieces. Happy haunting and happy baking!
Print Recipe
Pin Recipe
Witch Fingers
Witch Fingers are a fun and super easy Halloween treat, perfect for adding a spooky touch to any party. Pretzels are dipped into vibrant green melted chocolate and adorned with pumpkin seed fingernails, creating a delightful and edible fright. This no-bake recipe is enjoyable to make with kids and yields plenty of eerie snacks.
Ingredients
- 3/4 cup yellow candy melts
- 1/2 cup turquoise candy melts
- 35 pretzel “dippers”
- 35 pumpkin seeds, raw and unsalted
Instructions
- Place the candy melts in a heatproof bowl. For a custom green, use 3/4 cup yellow and 1/2 cup turquoise.
- Bring a saucepan with about an inch of water to a simmer over medium heat. Place the heatproof bowl over the saucepan, ensuring the bottom of the bowl does not touch the water. Reduce the heat to low.
- Stir the candy melts gently with a spatula or spoon until completely melted, smooth, and thoroughly combined. Be cautious as the bowl will become hot from the steam.
- Using oven mitts, carefully remove the bowl from the saucepan. Pour the melted candy into a heat-safe measuring cup or a tall, narrow glass for easier dipping.
- Dip each pretzel dipper into the melted green candy, swirling it to get most of the pretzel coated. Leave a small portion at one end uncovered to form the base of the finger.
- Gently tap or lightly shake off most of the excess chocolate to create a “gnarly” texture. Place the coated pretzels onto a sheet of parchment paper or a silicone mat, leaving space between each.
- While the candy coating is still slightly soft and pliable, secure one pumpkin seed onto the end of each pretzel to form a fingernail. If needed, use a tiny dab of melted candy to help it stick. Use a toothpick to carefully create realistic knuckle wrinkles along the pretzel’s body.
- Allow the witch fingers to cool and harden completely before serving. This can be done at room temperature (takes about 30-60 minutes) or by placing the tray in the refrigerator for 10-15 minutes for quicker setting.
Nutrition Information (Approximate Per Serving)
Serving: 1 pretzel | Calories: 32kcal | Carbohydrates: 4g | Protein: 1g | Fat: 2g | Saturated Fat: 1g | Polyunsaturated Fat: 1g | Monounsaturated Fat: 1g | Trans Fat: 1g | Sodium: 19mg | Potassium: 11mg | Fiber: 1g | Sugar: 3g | Vitamin A: 1IU | Vitamin C: 1mg | Calcium: 1mg | Iron: 1mg