
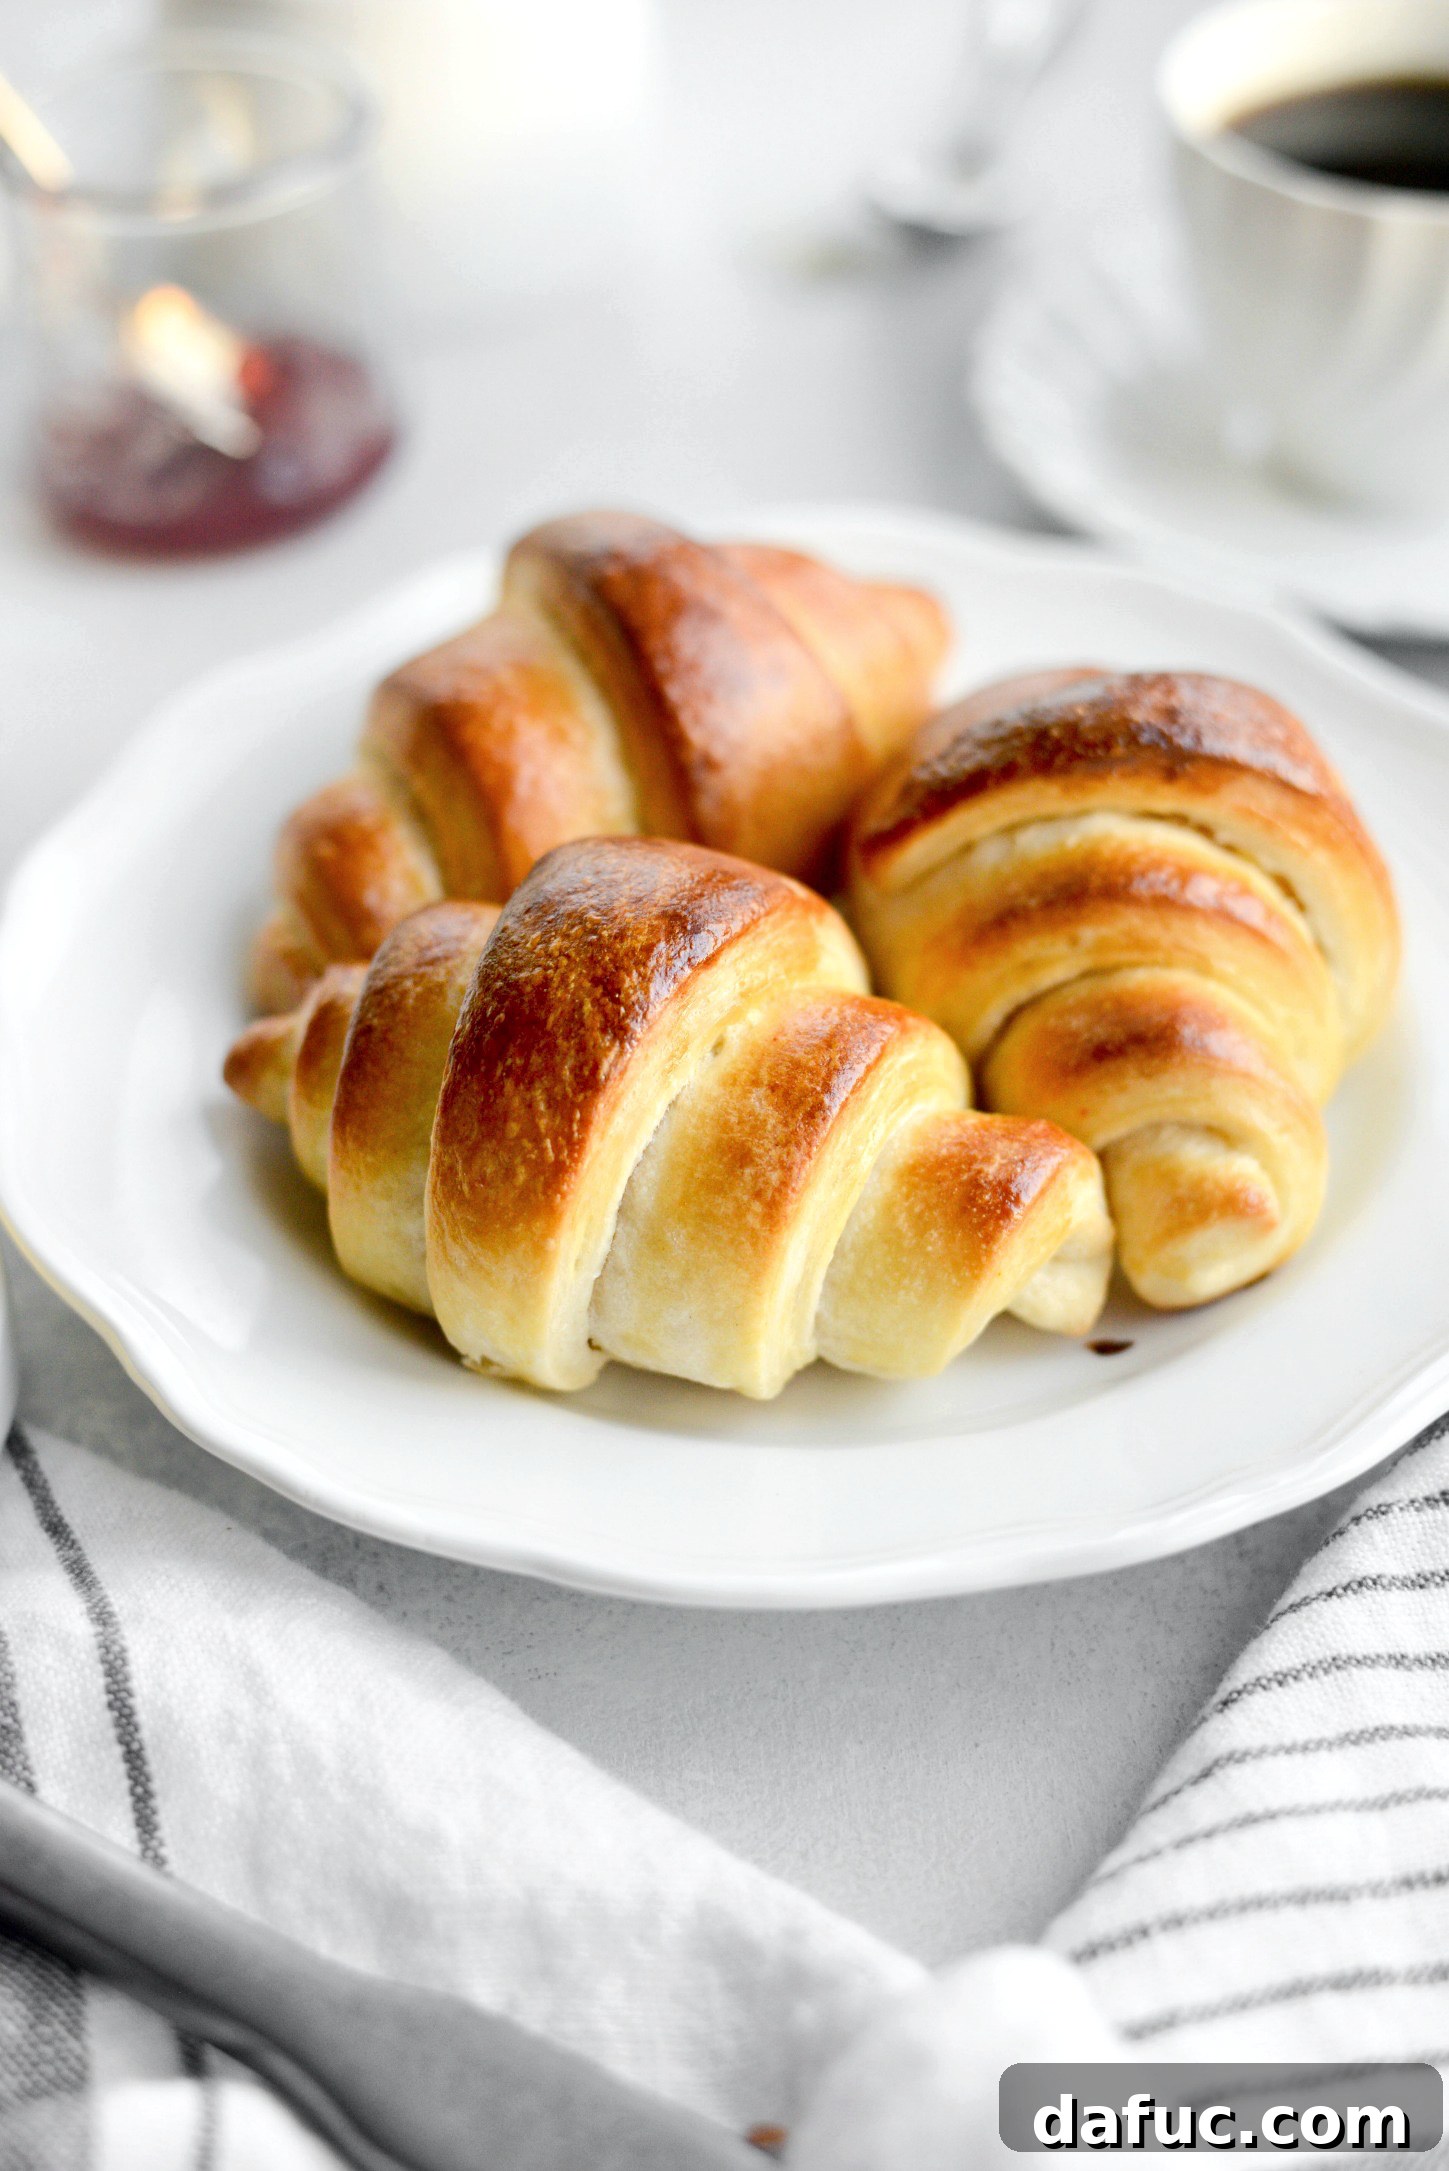
There’s nothing quite like the irresistible aroma of freshly baked croissants wafting through your kitchen. That buttery, flaky perfection, crisp on the outside and tender on the inside, often seems like a dream only achievable by professional pâtissiers or through the dubious convenience of store-bought, pre-made dough. But what if we told you that creating delicious, authentic-tasting croissants at home is not only possible but surprisingly straightforward? Forget the intimidation of traditional laminated dough and the disappointment of canned varieties; these easy homemade croissants are a game-changer.
If you’ve ever successfully tackled a batch of homemade biscuits or rolled out pie dough, then you possess all the fundamental skills needed to craft these golden beauties. Our simplified “cheater” croissant recipe delivers all the buttery, flaky goodness without the back-breaking, time-consuming effort typically associated with classic croissant making. Get ready to impress yourself and your loved ones with a pastry that truly surpasses any unrolled-from-a-can alternative.
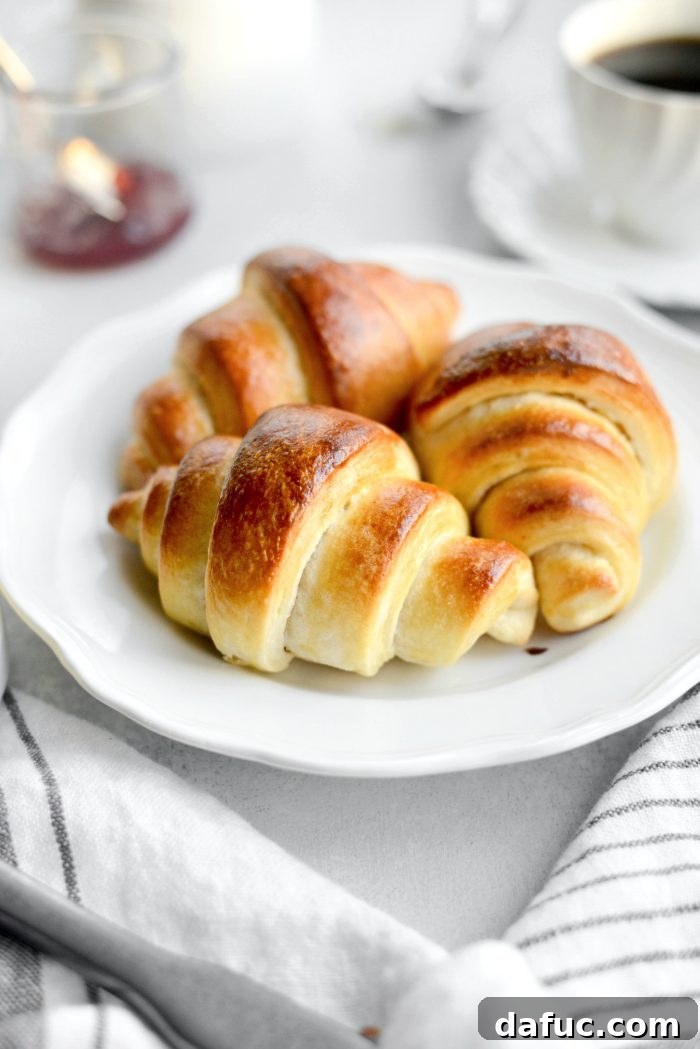
Mastering the Art of Easy Homemade Croissants
For a long time, the idea of making croissants from scratch felt like an unreachable culinary Everest. The thought of intricate folding techniques, precise chilling times, and the potential for a less-than-perfect result was enough to keep them firmly on my “someday, maybe” list. That was until I discovered this incredible, non-traditional method. It allowed me to cross homemade croissants off my bucket list with a triumphant smile, proving that flaky, delicious pastries don’t always require hours of intense labor. This recipe is designed to make the process enjoyable and the outcome consistently delightful.
Why Choose This Simplified Croissant Recipe?
- Reduced Complexity: Unlike traditional croissants which demand multiple, precise folds of butter into dough (known as laminating), this recipe incorporates cold butter directly into the flour, similar to making pie crust or biscuits. This significantly cuts down on the technical difficulty and time.
- Accessible Ingredients: You won’t need any specialized ingredients, just common pantry staples.
- Incredible Texture: Despite the simpler method, the result is wonderfully flaky layers and a tender, buttery interior that rivals more complex versions.
- Rewarding Experience: There’s immense satisfaction in pulling a tray of beautifully puffed, golden-brown croissants from your own oven.
These versatile pastries are perfect for a multitude of occasions. Imagine them warm from the oven, slathered with butter and your favorite jam, or alongside a steaming cup of coffee for a luxurious breakfast. They elevate any brunch spread, making it feel extra special. Beyond breakfast, these croissants offer endless possibilities:
- Slice them horizontally and fill with a creamy chicken salad for an elegant lunch.
- Wrap cocktail sausages in the dough before baking for a sophisticated take on “pigs-in-a-blanket.”
- Stuff with cheese and ham for a savory snack.
- Even dip them in chocolate for a decadent dessert!
My mind is buzzing with ideas for this incredible croissant dough. The possibilities truly are endless.
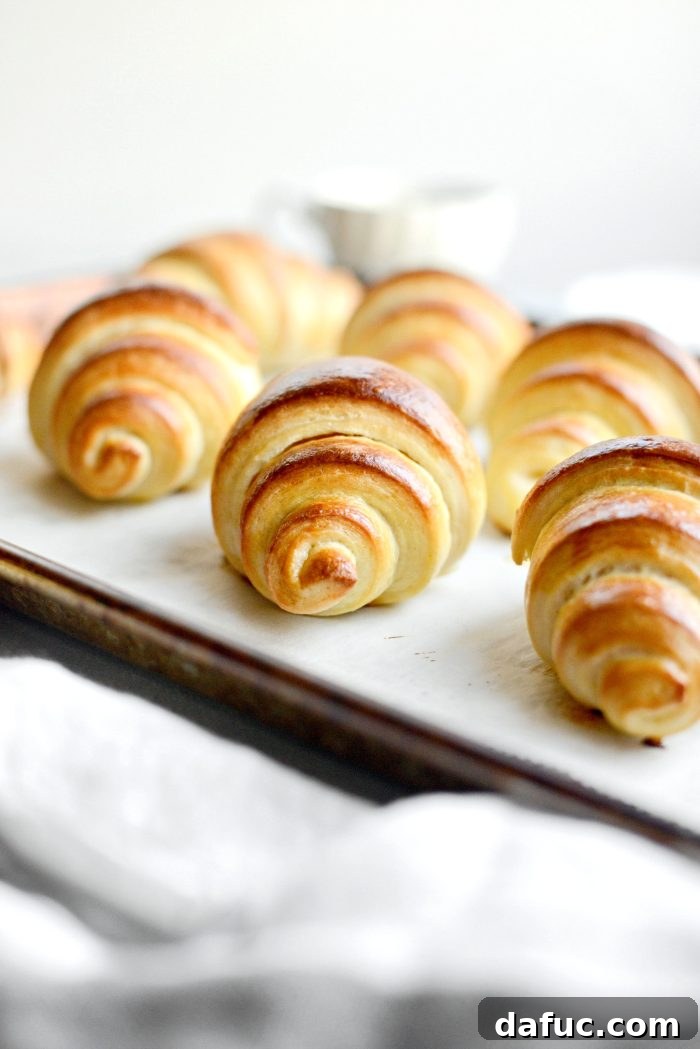
Can you almost smell the rich, warm butter?
That’s the magic of these croissants. The generous amount of cold butter, strategically incorporated, is what gives them their signature flavor and texture. It’s the secret to those coveted, airy layers that melt in your mouth.
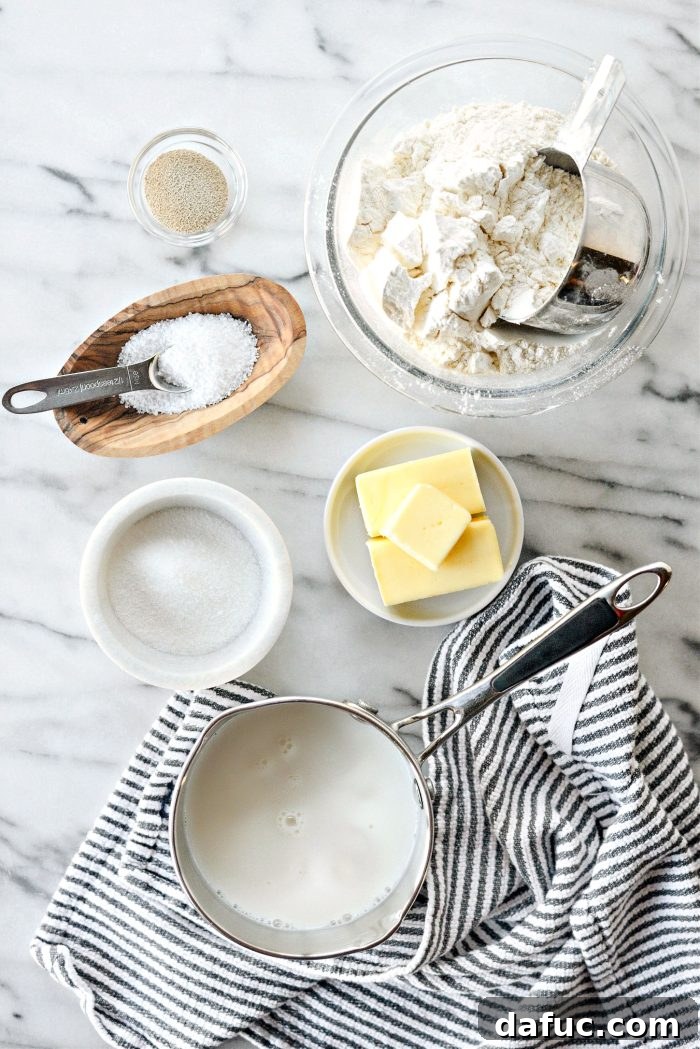
The dough for these easy homemade croissants comes together more quickly than you might imagine, making the initial stages of preparation a breeze. With just a few key ingredients and some chilling time, you’ll be well on your way to baking bliss.
Essential Ingredients for Your Easy Homemade Croissants:
To embark on this delightful baking journey, gather these simple yet crucial components:
- Bread Flour: The higher protein content in bread flour helps create a stronger gluten structure, which is essential for the chewiness and elasticity of the dough, allowing it to hold those beautiful layers.
- Salt: Crucial for balancing the sweetness and enhancing the overall flavor of your croissants. It also plays a role in regulating yeast activity.
- Warm Milk: Provides hydration for the dough and activates the yeast. Ensure it’s warm, not hot, to keep the yeast happy.
- Active Dry Yeast: The leavening agent that gives your croissants their airy, puffed texture.
- Cold Butter: This is the star of the show. Keeping the butter very cold and in solid pieces is paramount for achieving those distinct flaky layers.
- Sugar: Feeds the yeast and adds a subtle sweetness to the croissants, contributing to their golden-brown crust.
- Egg and Heavy Cream/Whole Milk for Egg Wash: Creates that irresistible glossy, deep golden finish on the baked croissants.
Step-by-Step Guide to Flaky Croissant Perfection
Let’s walk through each stage of this recipe to ensure your success in baking the most delicious easy homemade croissants.
1. Proofing the Yeast
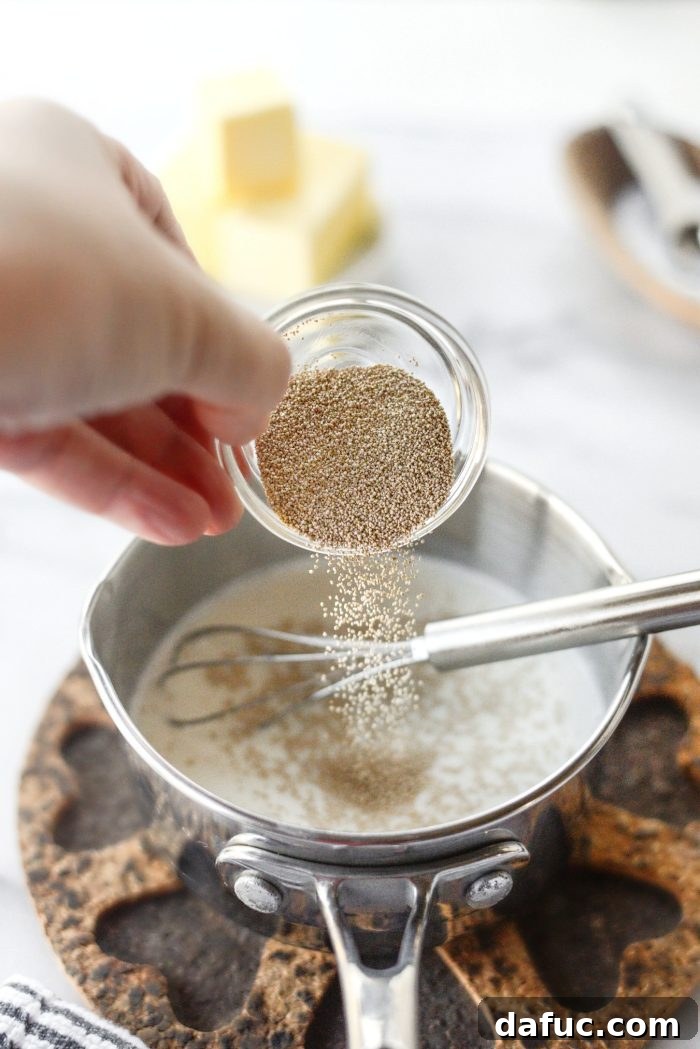
Begin by gently warming 1/2 cup of milk until it’s lukewarm (around 105-115°F or 40-46°C). It should feel comfortably warm to the touch, not hot. Stir in 3 tablespoons of sugar until it fully dissolves. Then, sprinkle 2 teaspoons of active dry yeast over the surface. Give it a gentle stir and set it aside. This allows the yeast to proof, creating a foamy layer on top, indicating it’s active. Crucially, let this mixture cool down completely to room temperature before proceeding. This step is vital to prevent softening the butter in later stages, which would compromise the flakiness of your croissants.
2. Preparing the Dry Ingredients
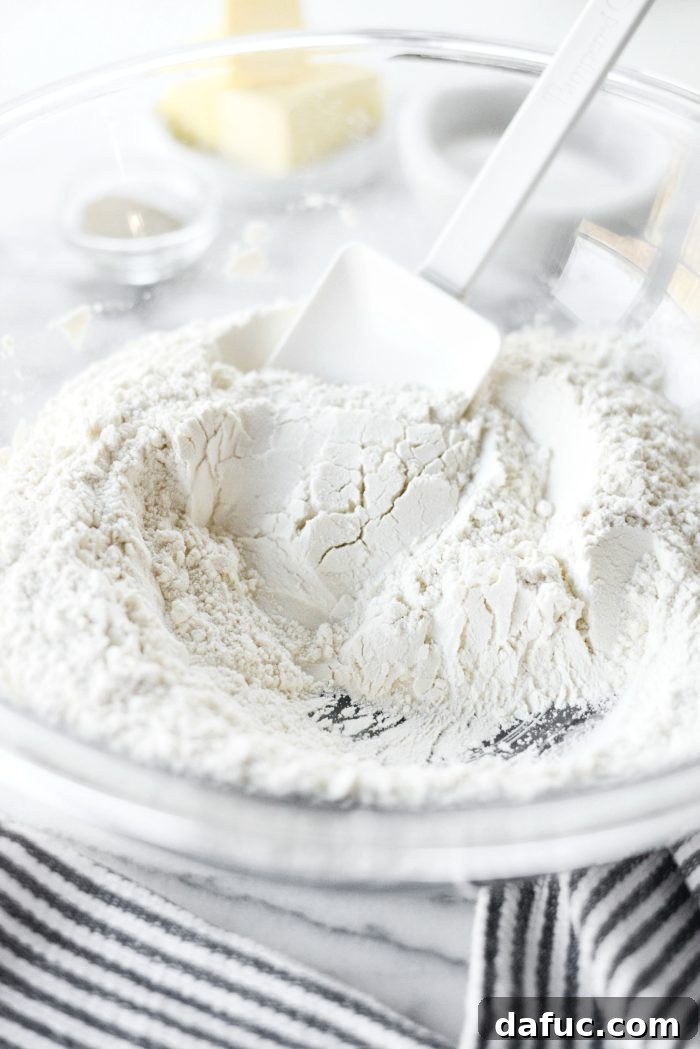
In a separate large mixing bowl, combine 1-1/2 cups of bread flour with 3/4 teaspoon of kosher salt. Use a whisk to ensure these dry ingredients are thoroughly mixed. Set this bowl aside for a moment.
3. Incorporating the Cold Butter
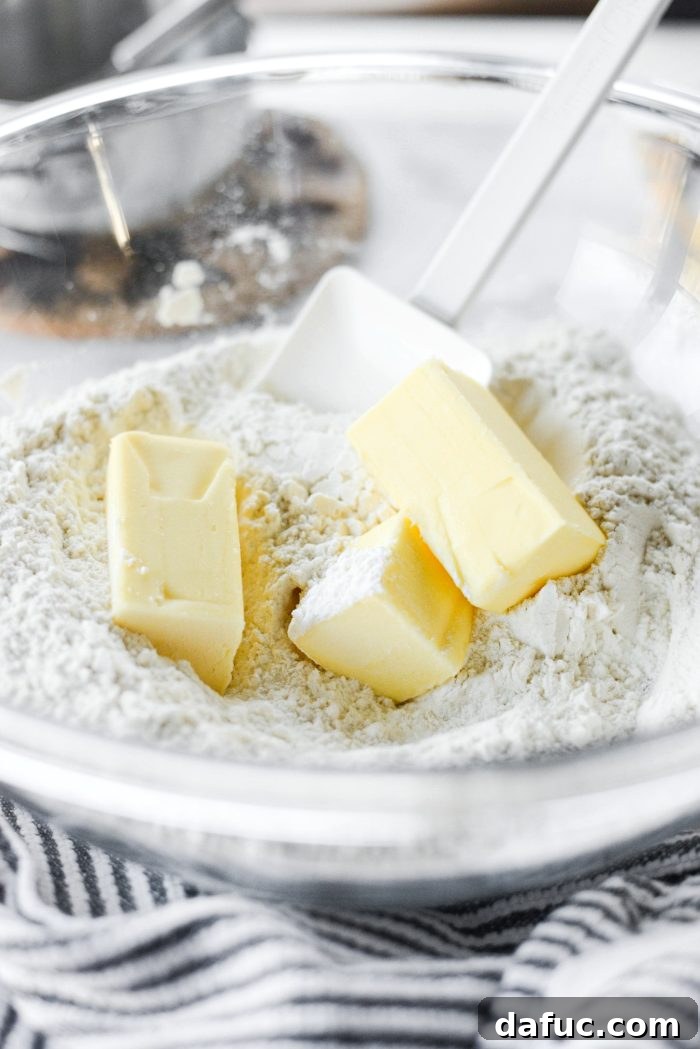
Now for the butter – the key to those glorious layers! Take 14 tablespoons (which is 1 stick plus 6 tablespoons) of unsalted butter and ensure it’s ice cold. For best results, I recommend slicing the butter into small cubes and even freezing them for 10-15 minutes prior to this step. The colder the butter, the better. Drop these cold butter pieces directly into your flour and salt mixture.
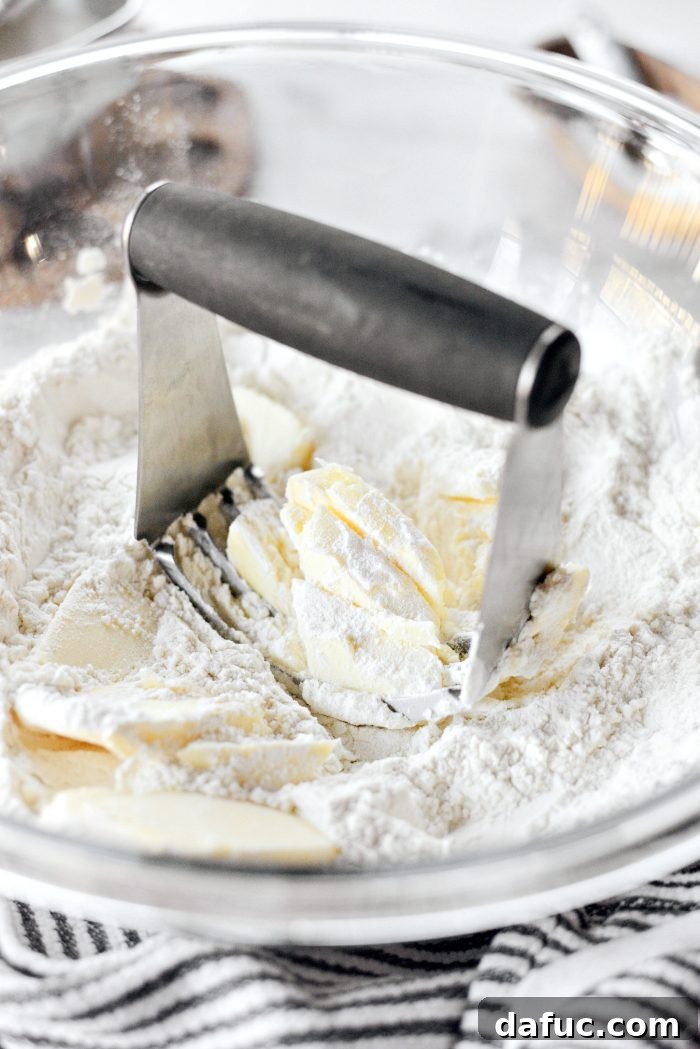
Using a pastry blender, cut the butter into the flour until the butter pieces are about the size of large peas. The goal here is not to fully incorporate the butter, but to leave distinct, small pieces. These butter pockets will create steam during baking, separating the layers of dough and resulting in that classic flaky texture.
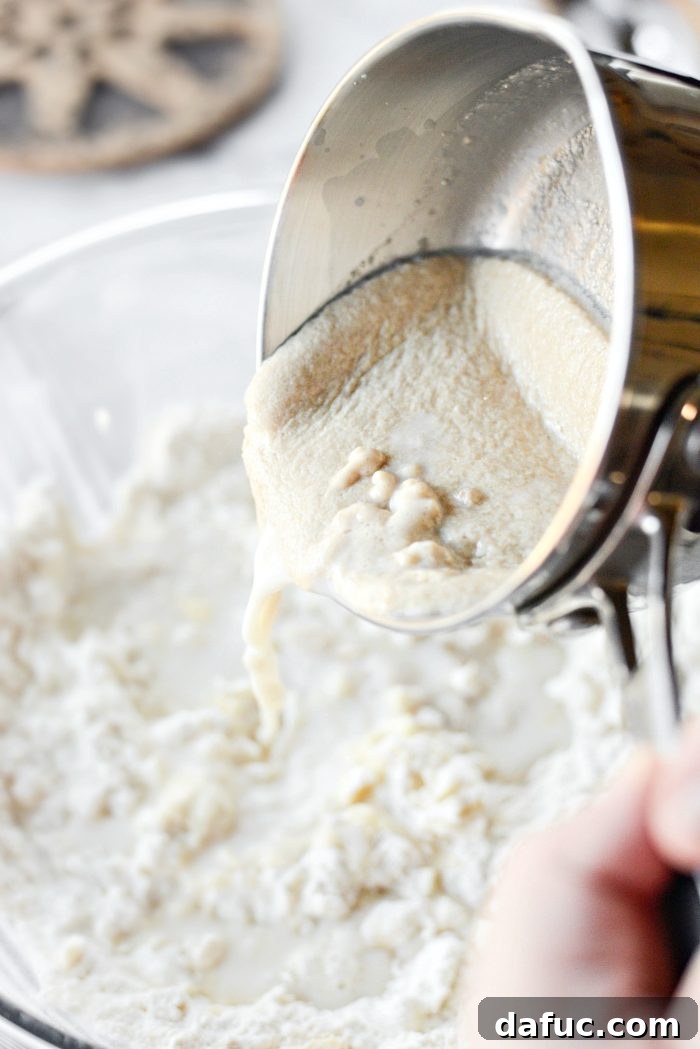
4. Combining Wet and Dry Ingredients
Now, gently pour the completely cooled yeast and milk mixture into your bowl of flour and butter. This is a critical point: ensure the yeast mixture is cool. The first time I attempted these croissants, I was impatient and added warm milk, which immediately softened my perfectly cold butter, leading to a less-than-flaky result. Learn from my mistake!
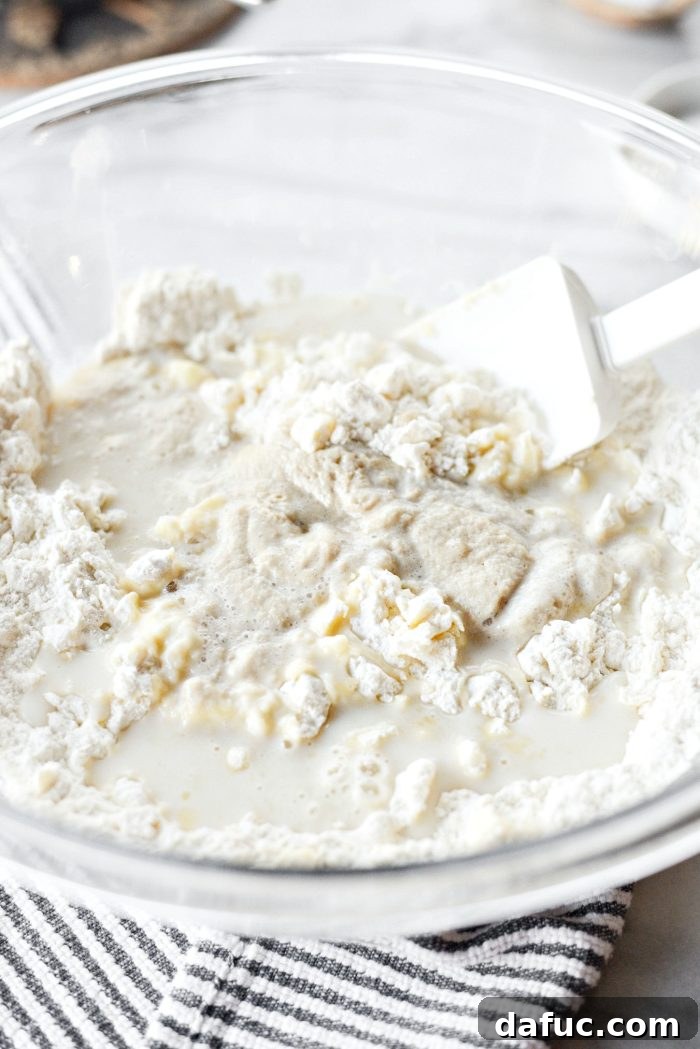
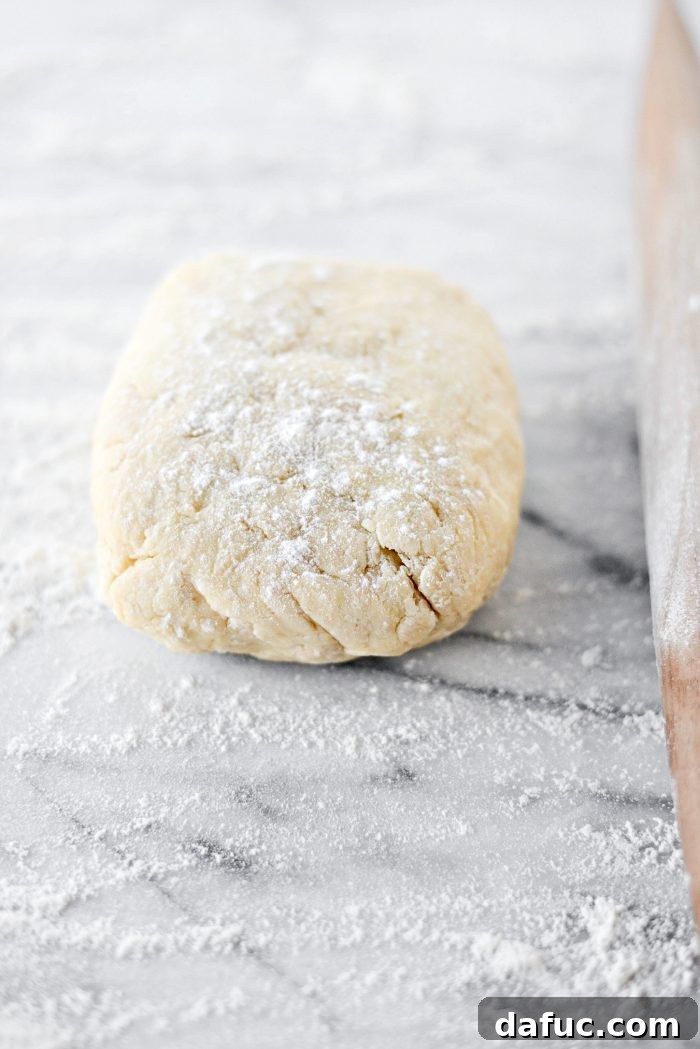
Stir everything together until the dough just comes together. Avoid overmixing. The dough will look shaggy and uneven, which is perfectly fine. The key is to handle it as little as possible to keep the butter cold and distinct. Once combined, gently gather the dough, wrap it tightly in plastic wrap, and place it in the freezer for 30 to 40 minutes. This quick chill helps firm up the butter and makes the dough easier to handle in the next step.
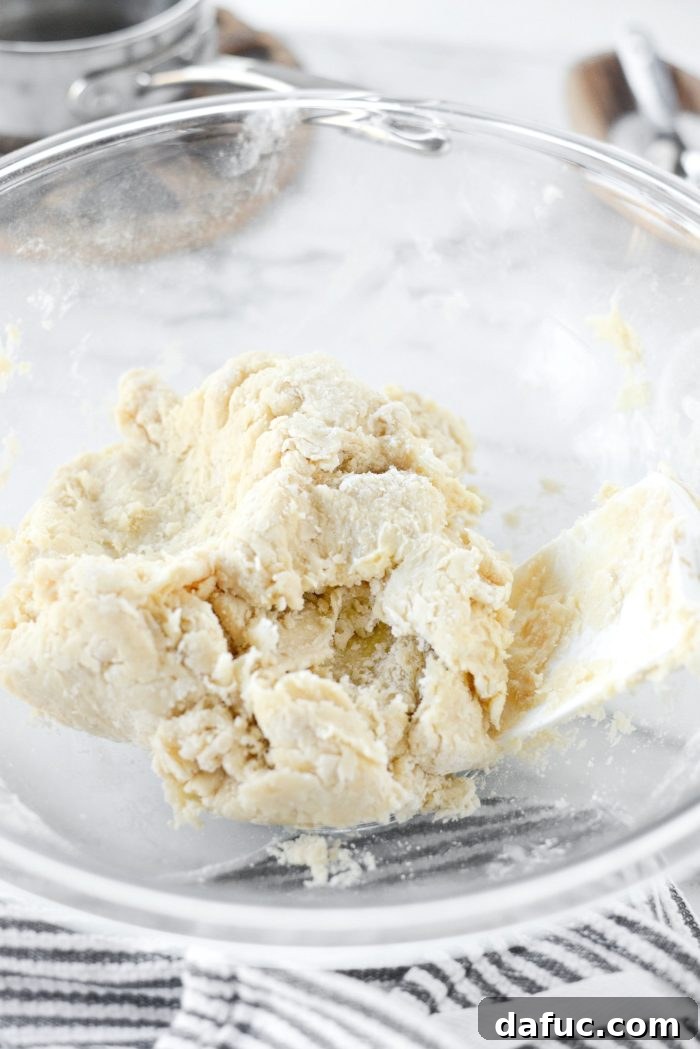
5. The Folding Process (Simplified Lamination)
Remove the chilled dough from the freezer. Lightly flour your work surface and dust your rolling pin with flour. Place the dough onto the floured surface.
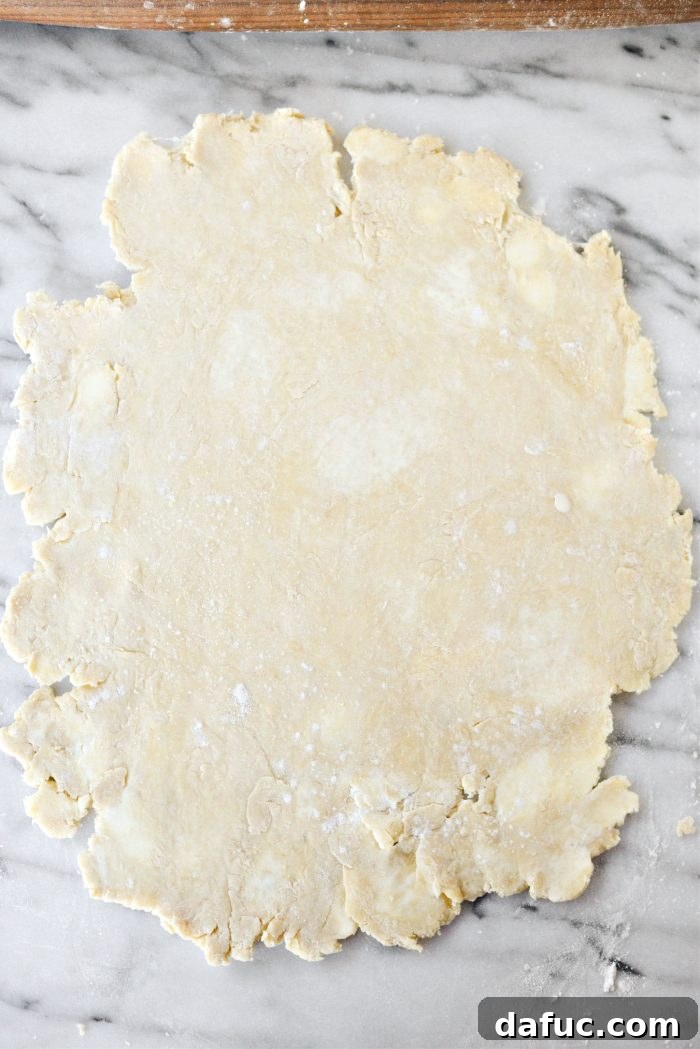
Using your floured rolling pin, roll the dough out into a large, somewhat rectangular shape. Don’t worry if it’s not perfectly geometric at first; the dough can be a bit stiff and challenging to manage when cold, but as you work it, it will become more pliable and take shape. Aim for an even thickness.
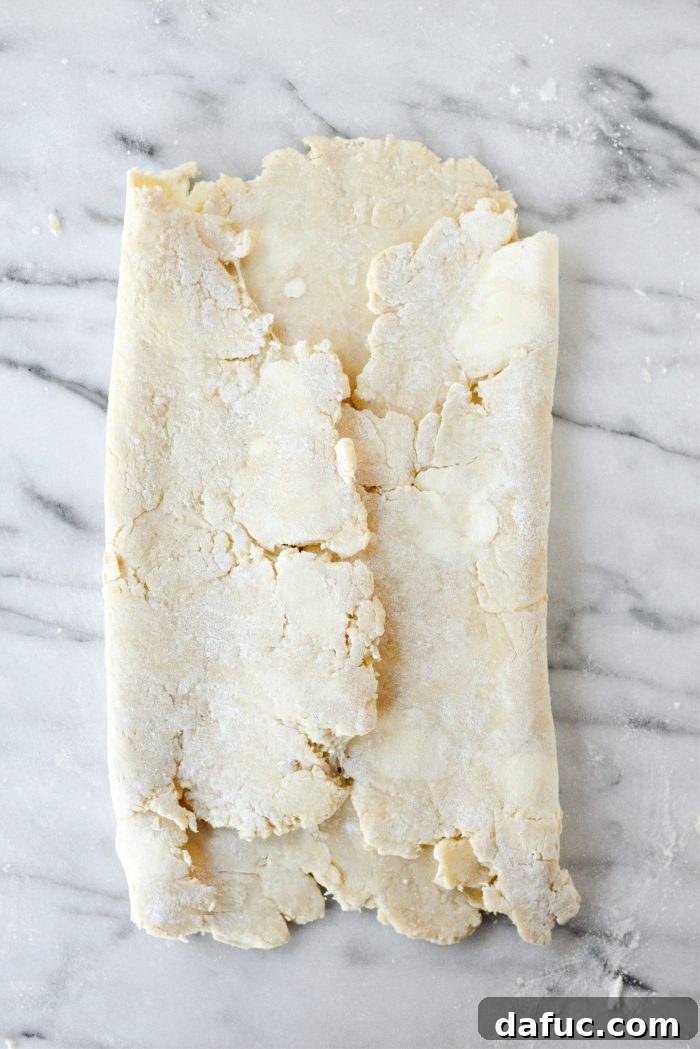
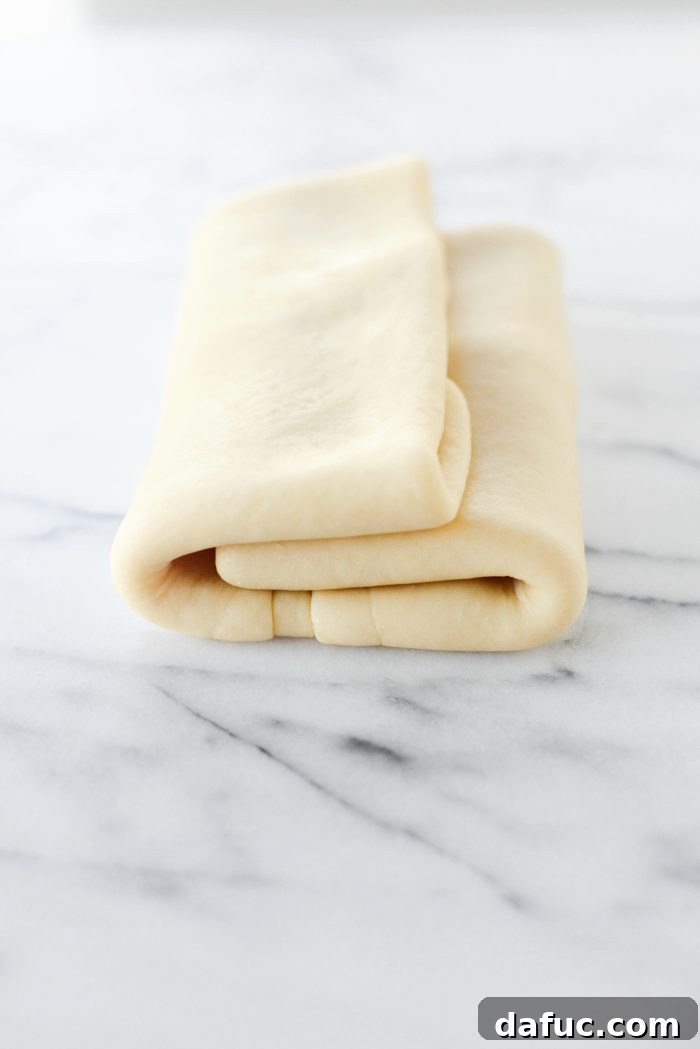
Now, fold the shorter sides of the rectangle inward, meeting them in the middle like a letter. Press gently to seal. Then, roll it out slightly to lengthen the dough a bit, maintaining its rectangular form.
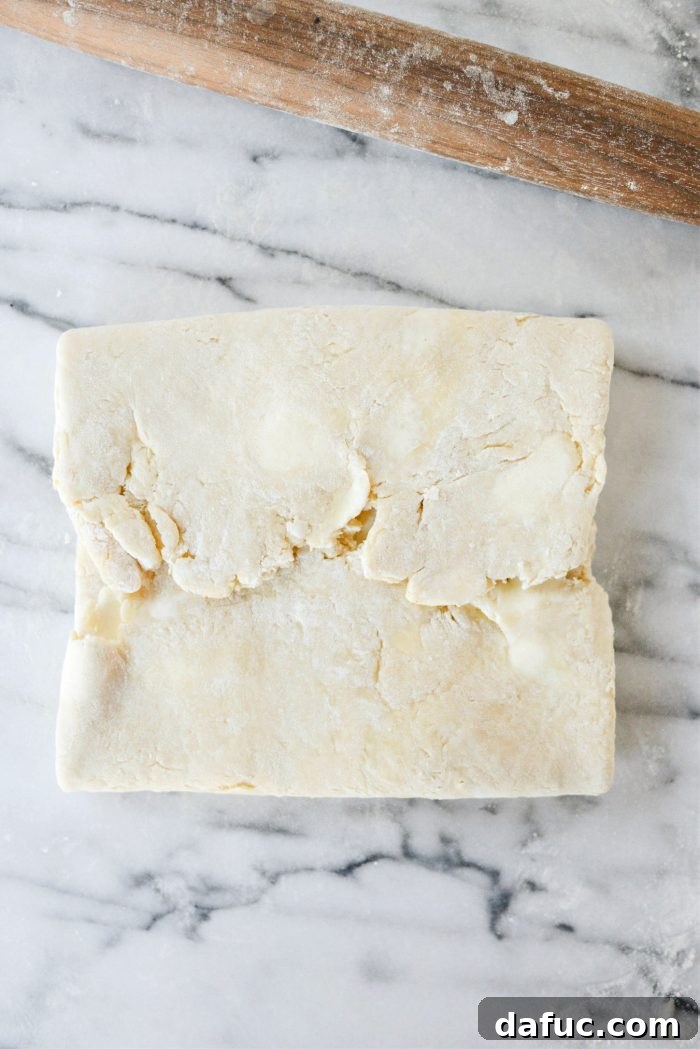
Next, take the new shorter sides (which were the longer sides previously) and fold them into the middle so their edges touch. This is a crucial folding technique that helps create the multiple layers within the dough.
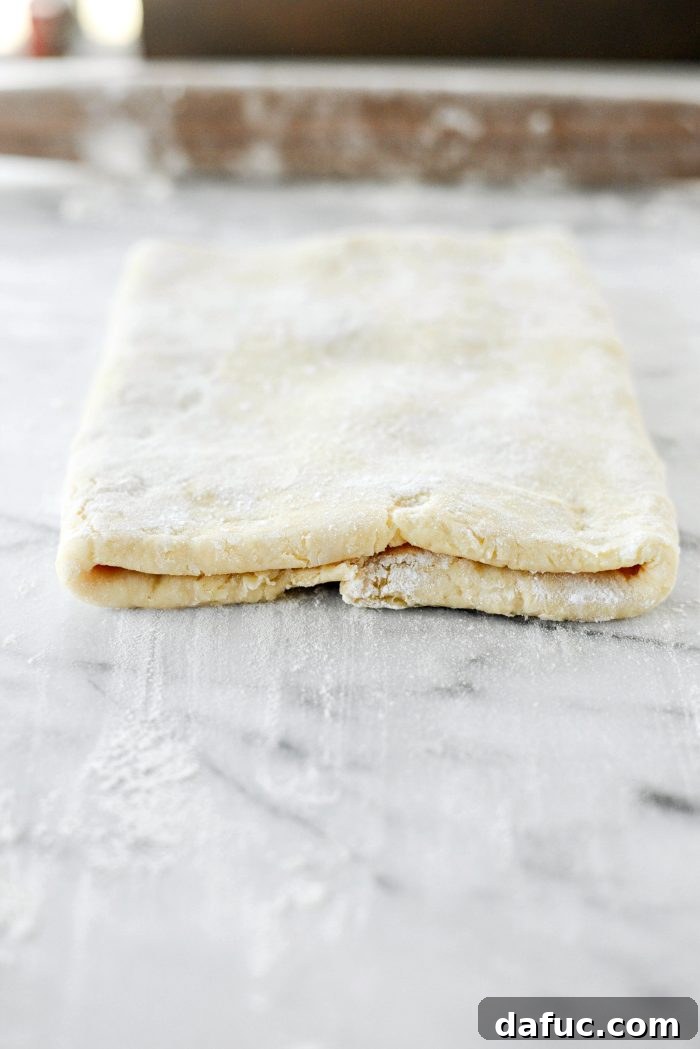
Flip the dough over so that the seam side is now facing down. This helps maintain the structure of the folds. Repeat this entire rolling and folding process (rolling into a rectangle, folding shorter sides in, lengthening, folding new shorter sides in, flipping) a total of 3 to 4 more times. This repetitive folding is what creates the beautiful, distinct layers characteristic of flaky pastries. Each fold doubles the layers of butter and dough.
Pro Tip: If at any point during this rolling and folding stage the butter starts to become soft, sticky, or tries to ooze out of the dough, immediately stop. Wrap the dough tightly in plastic wrap and pop it back into the freezer for 15 minutes or so to re-chill the butter. This patience ensures maximum flakiness.
6. The Final Chill and Dough Relaxation
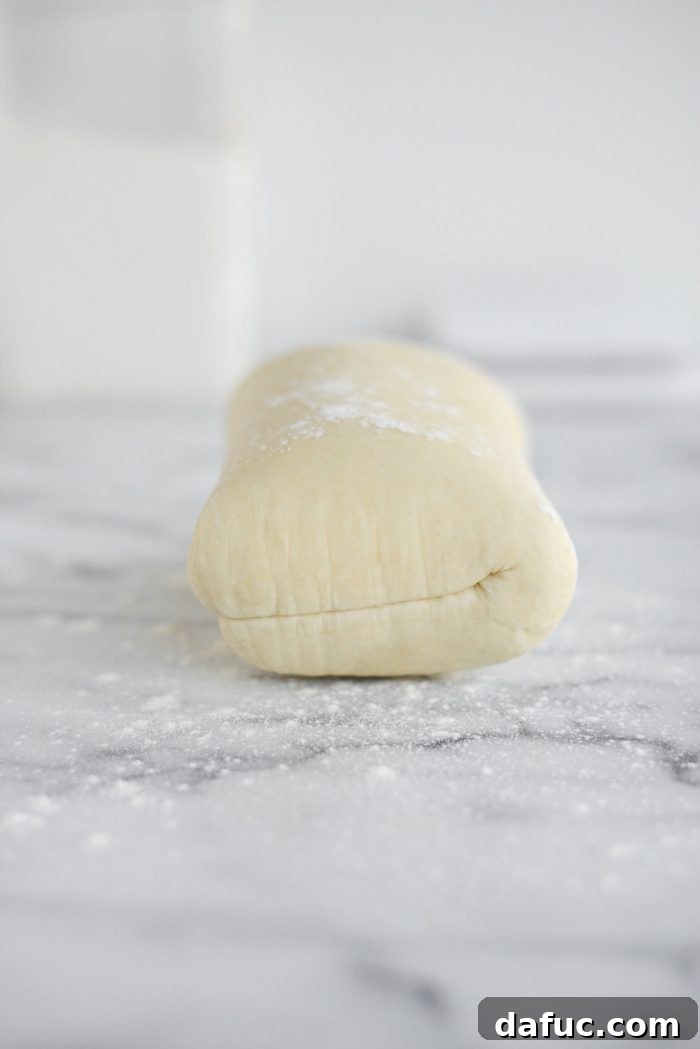
Once you’ve completed all the rolling and folding steps, wrap the dough tightly in plastic wrap once more. Refrigerate it for a minimum of 4 hours, or ideally, overnight. Allowing the dough to chill overnight is highly recommended as it gives the gluten a chance to relax, making the dough much easier to roll out and shape the following day, and contributes to a better texture.
7. Shaping the Croissants
After the dough has thoroughly chilled and relaxed, remove it from the refrigerator. Lightly flour your work surface once more.
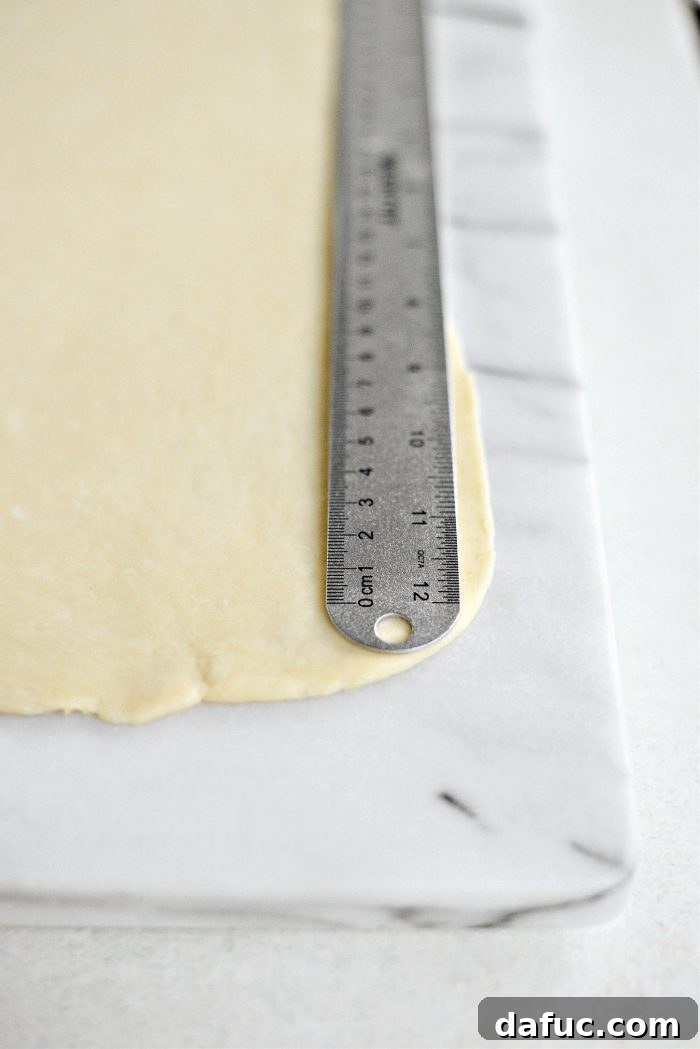
Roll the dough out evenly into a precise 10 x 16-inch rectangle. Take your time to achieve these dimensions, as it will help create consistently sized croissants.
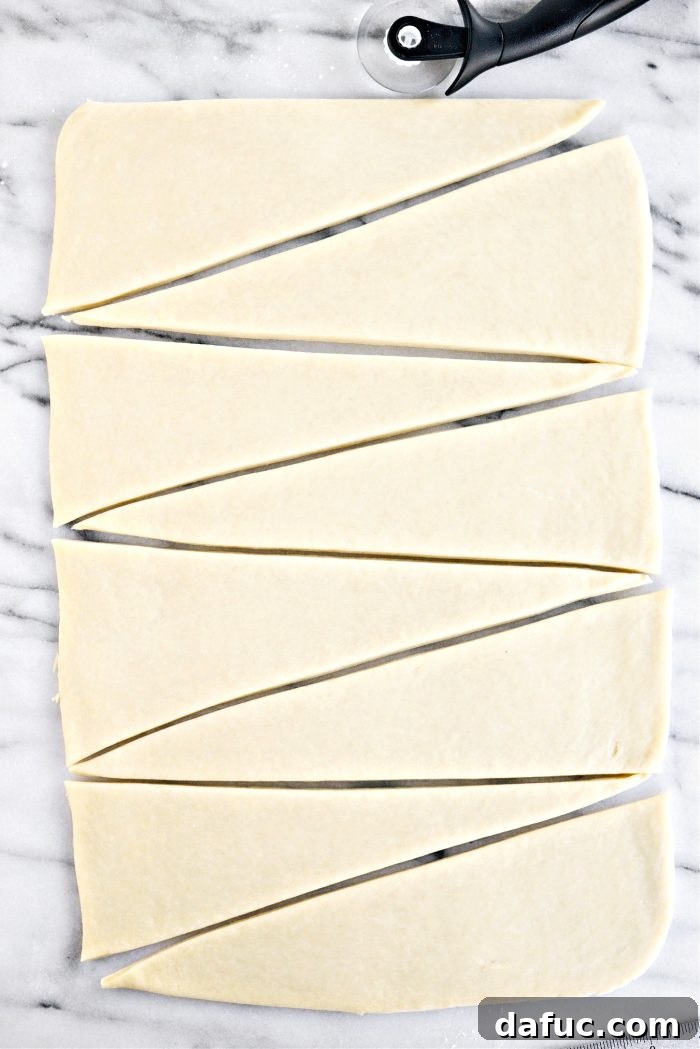
Trim any rough or uneven edges from your rectangle to create clean lines. Then, carefully cut the rectangle into 8 triangles. A ruler can be helpful here for precision, but don’t obsess over perfection.
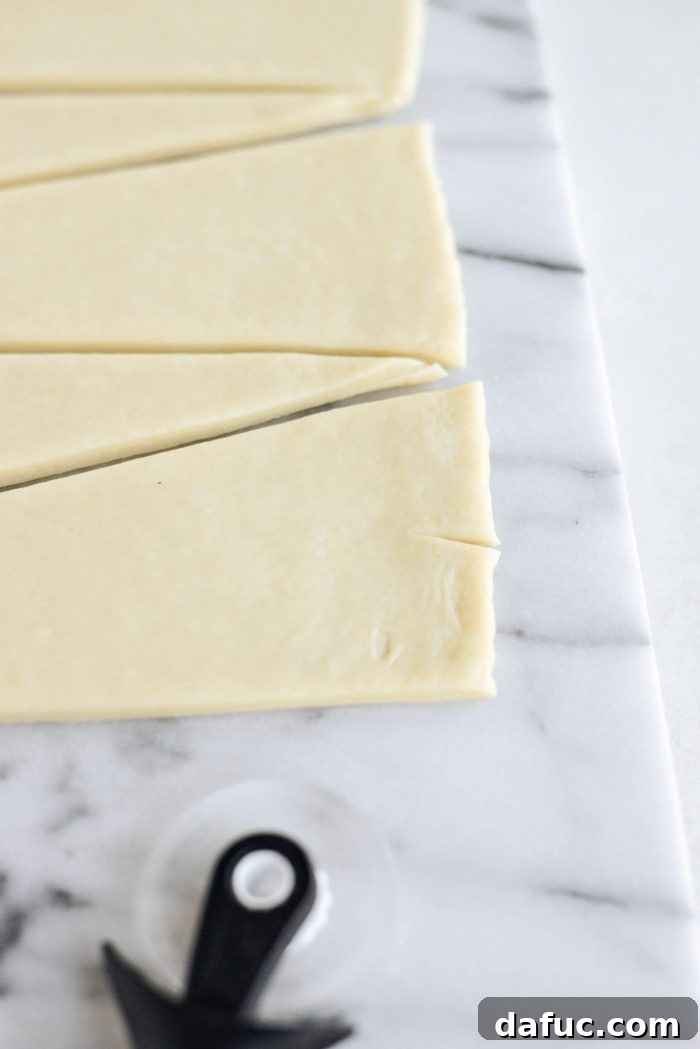
At the wide base of each triangle, make a small, shallow score or incision. This small cut helps the croissant to roll up more neatly and achieve that classic crescent shape.
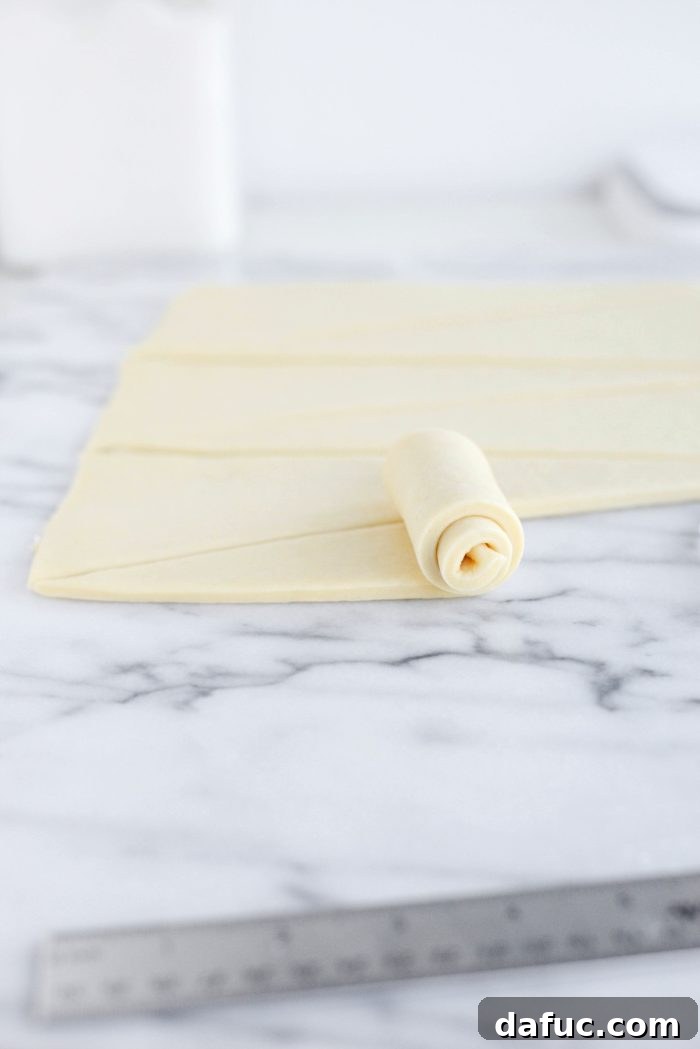
Starting from the wide, notched end of the triangle, gently but firmly roll the dough towards the pointed end. Try to keep the roll relatively tight but not so tight that you compress the layers. Aim for a slightly loose roll that allows for expansion during proofing and baking.
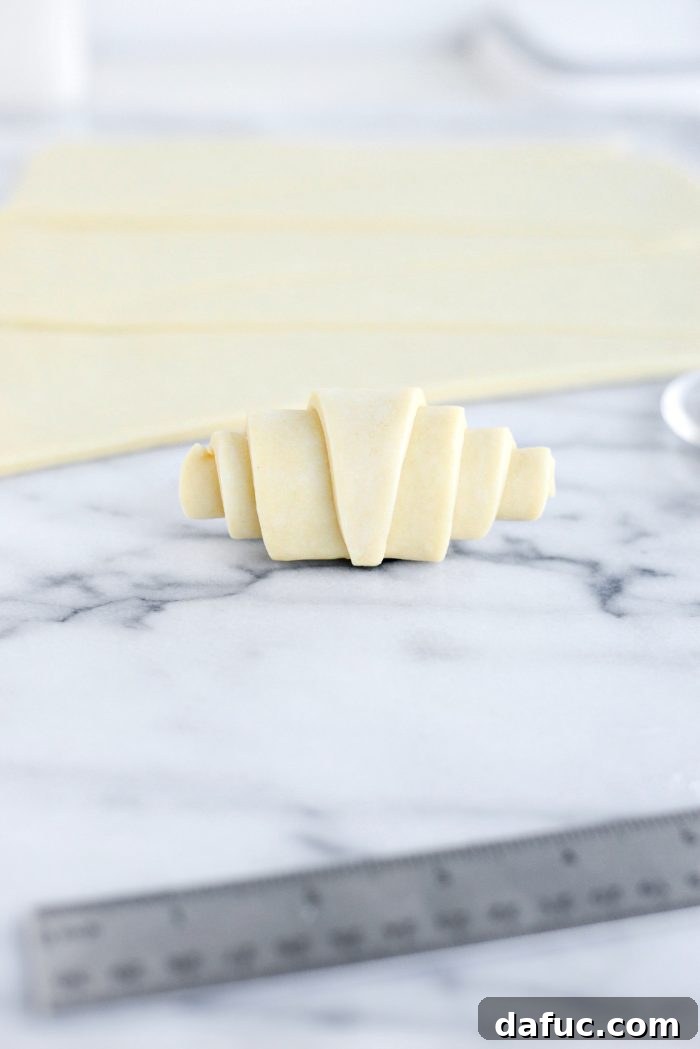
Repeat this rolling process with all the remaining triangles, carefully shaping them into their familiar crescent forms.
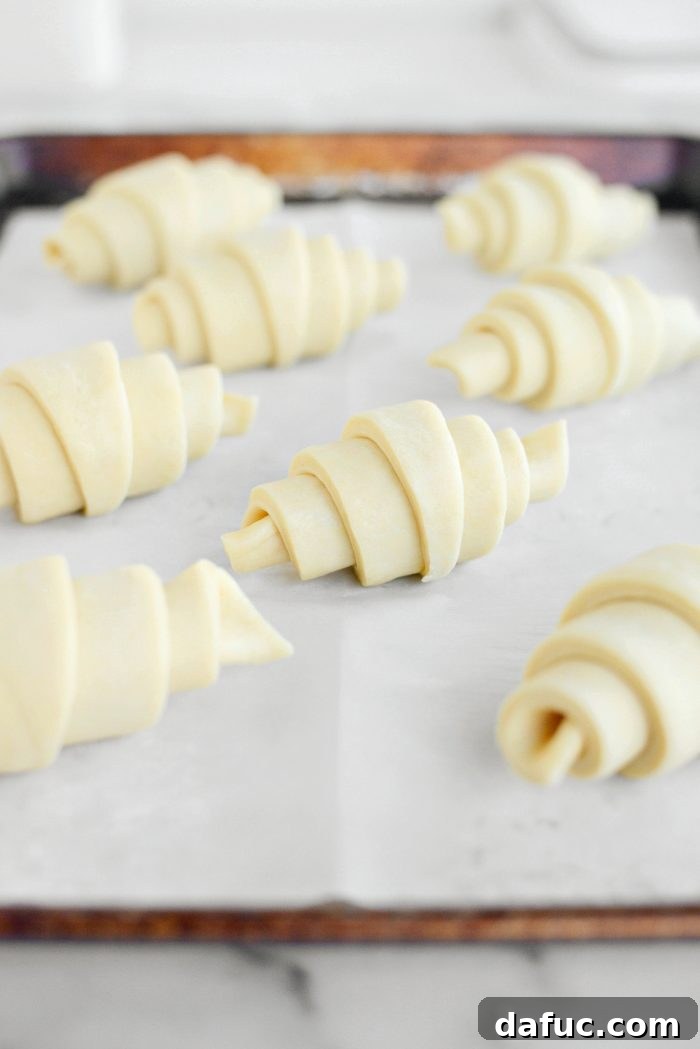
Line a rimmed metal baking sheet with parchment paper. Place the rolled croissants on the sheet, ensuring the pointed tip is tucked underneath to prevent it from unraveling during baking. Space them a few inches apart to allow for expansion during proofing and baking.
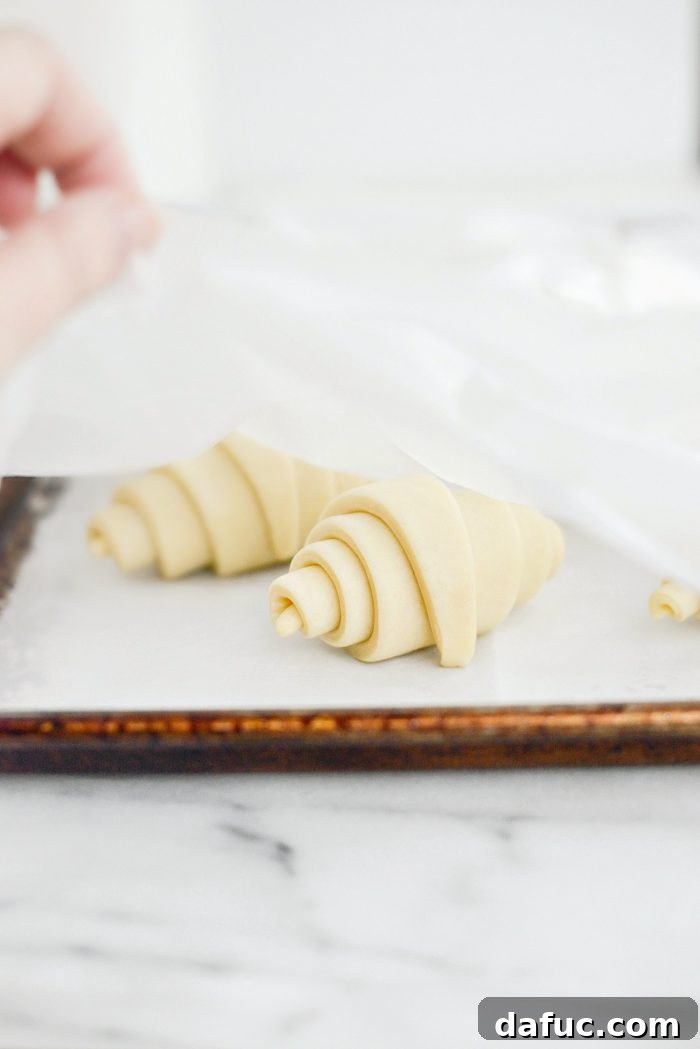
8. The Crucial Rise (Proofing)
Loosely cover the baking sheet with plastic wrap. Now comes the waiting game: let the croissants rise in a warm, draft-free place for 2 to 3 hours. This proofing time is crucial for the yeast to activate, creating air pockets and giving the croissants their light, airy texture. They should visibly puff up and feel delicate. Patience is truly a virtue here – a good rise means a superior final product.
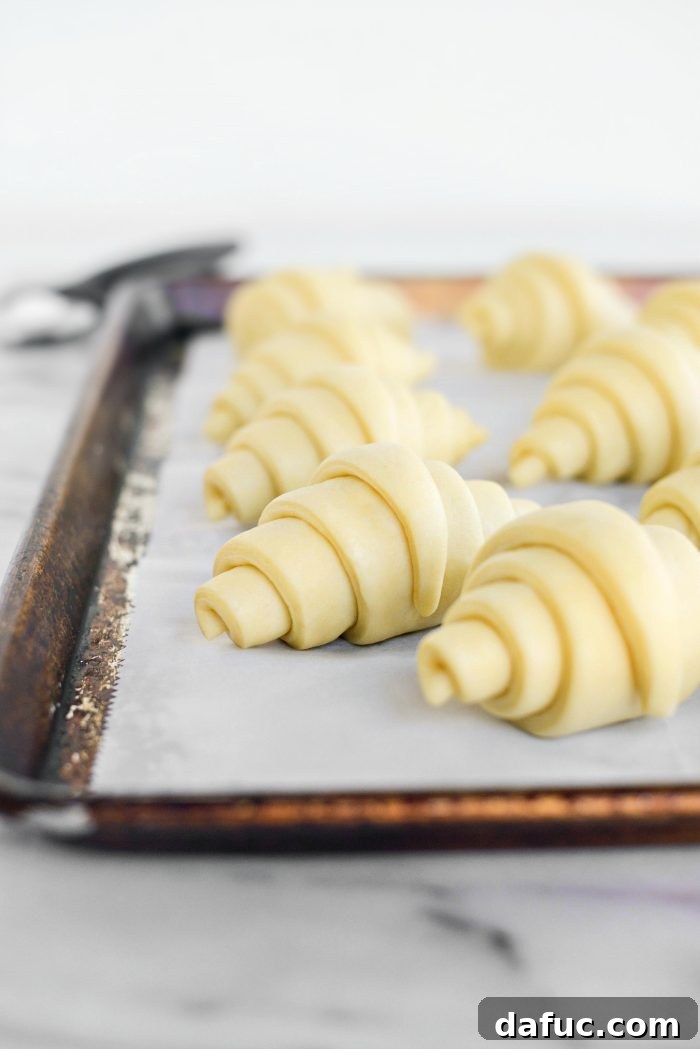
I know! I promised “easy”… not necessarily “quick.” The hands-on time is minimal, but the chilling and rising demand patience, which is truly rewarded in the final result. While the croissants are rising, you can go about your day.
Once the croissants have adequately risen, preheat your oven to 425℉ (220℃). Make sure it’s fully preheated before baking.
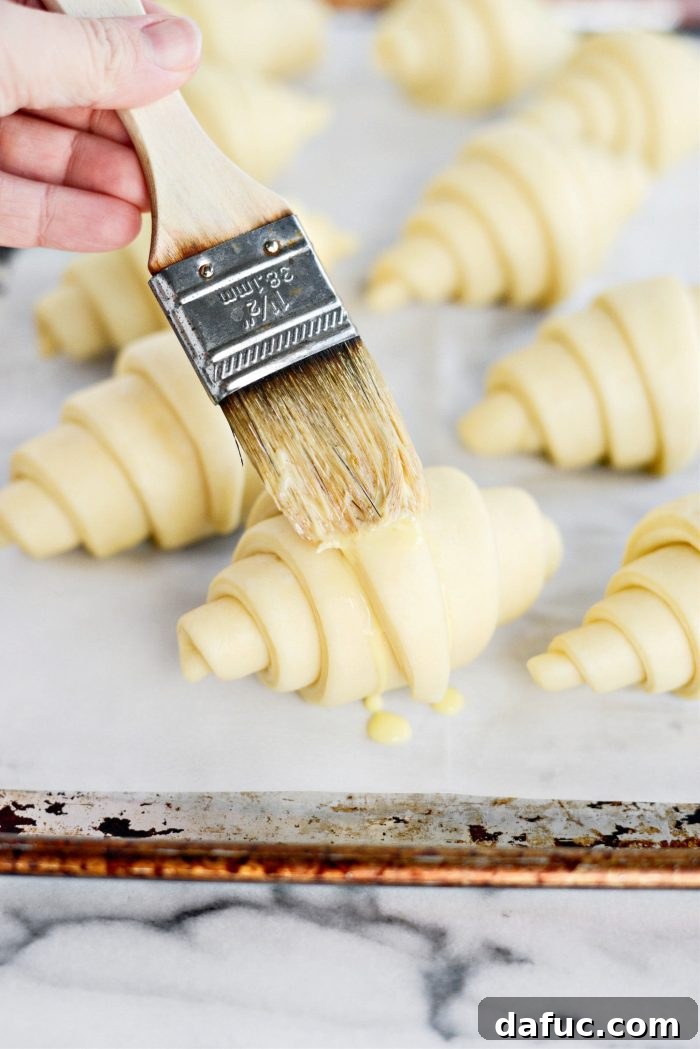
9. The Golden Finish (Egg Wash)
Just before baking, prepare an egg wash. Whisk one egg yolk with 1 tablespoon of whole milk or heavy cream until well combined. Using a pastry brush, gently coat the tops and sides of each risen croissant with this egg wash. This step gives them that beautiful, glossy, deep golden-brown crust.
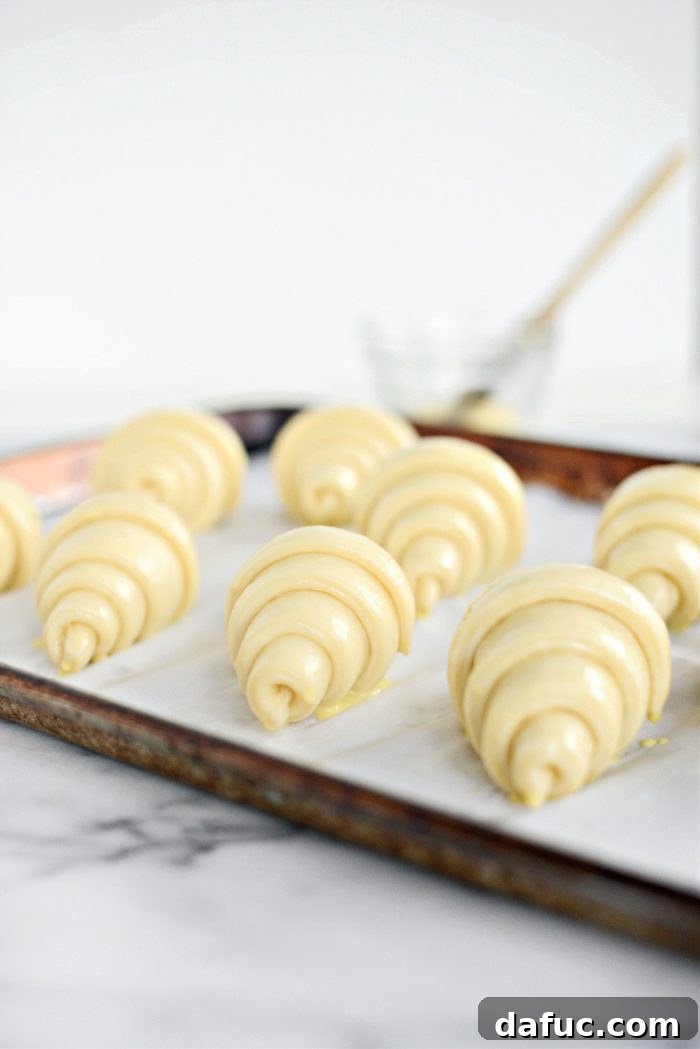
10. Baking to Perfection
Place the baking sheet with your egg-washed croissants into the preheated oven. Bake at 425℉ (220℃) for the initial 10 minutes. This high initial heat helps to create a burst of steam from the butter, encouraging the layers to separate and puff up quickly. After 10 minutes, *without opening the oven door unnecessarily*, reduce the temperature to 375°F (190℃) and continue to bake for another 4 to 6 minutes. During this second stage, rotate the pan halfway through to ensure even baking and browning. Keep a close eye on them to prevent burning, as ovens can vary. The croissants are done when their crust is a rich, deep golden brown and they sound hollow when tapped.
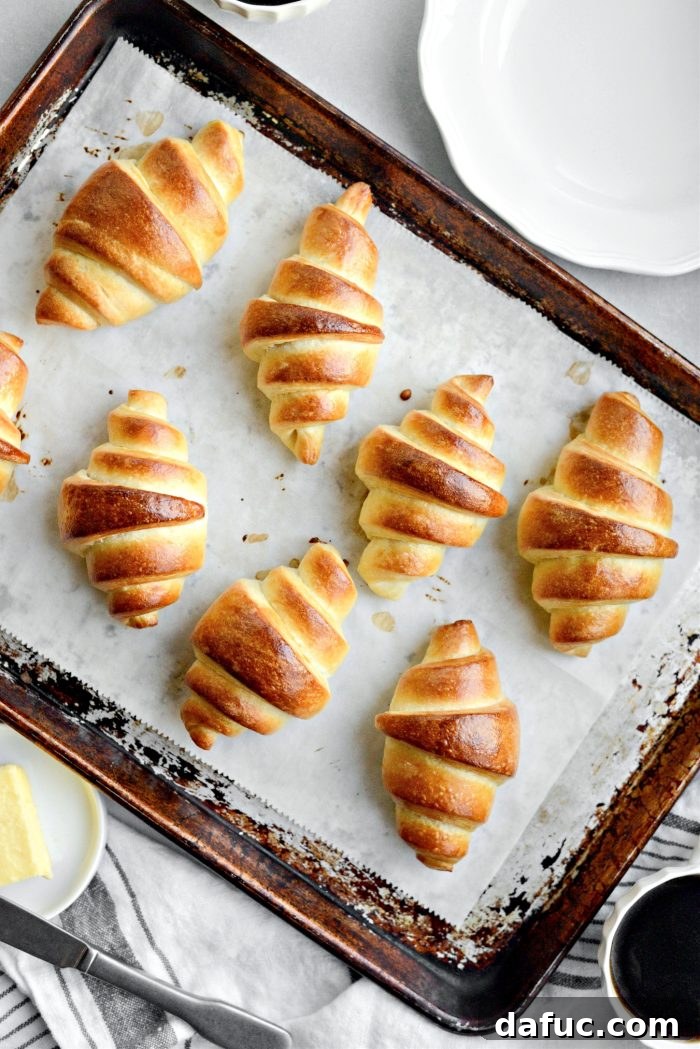
Oh, the glorious sight of a tray of perfectly baked, deep golden-brown croissants! The aroma alone is enough to transport you straight to a Parisian bakery. They are best enjoyed warm, fresh from the oven, when their flakiness and buttery flavor are at their peak.
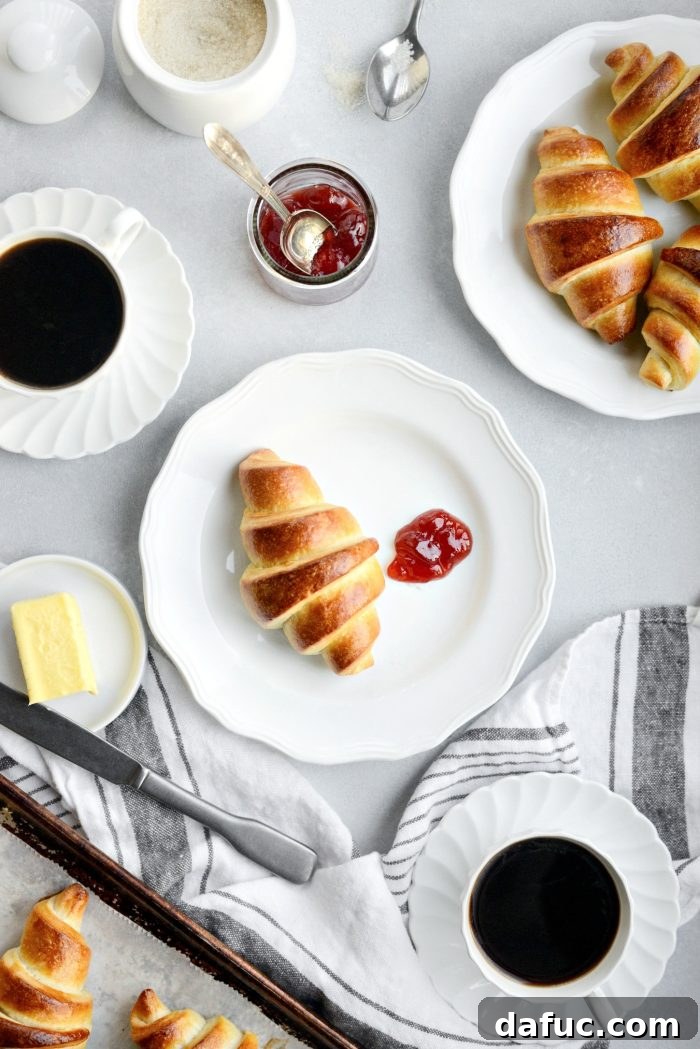
While the thought of making traditional croissants with all their intricate butter folds and turns still entices me, for now, my life perfectly accommodates these easy homemade croissants. They deliver all the satisfaction and deliciousness without the excessive fuss, making them a regular, cherished treat in my home.

Troubleshooting Common Croissant Issues
- Croissants Not Flaky: This is almost always due to the butter becoming too warm and integrating fully into the dough instead of remaining in distinct pockets. Ensure all ingredients, especially the butter and proofed milk, are very cold. Don’t overmix the dough, and chill it frequently if it warms up during rolling and folding.
- Dough Too Sticky or Hard to Roll: If sticky, add a tiny bit more flour to your surface and rolling pin. If too hard, let it sit at room temperature for just a couple of minutes to soften slightly, but not too much.
- Uneven Browning: Ovens often have hot spots. Rotating the baking pan halfway through the second baking stage helps ensure an even, beautiful golden color.
Storage and Make-Ahead Tips
- Freshly Baked: Croissants are best enjoyed the day they are baked. Store any leftovers in an airtight container at room temperature for up to 2 days. Reheat briefly in a toaster oven for best results.
- Unbaked Dough: You can prepare the dough up to the point of shaping (after the overnight chill). Wrap it tightly and store it in the refrigerator for up to 2 days, or freeze it for up to a month. If frozen, thaw in the refrigerator overnight before rolling and shaping.
- Unbaked Shaped Croissants: Once shaped, you can place them on a baking sheet and freeze until solid. Then transfer them to a freezer-safe bag. When ready to bake, place them on a parchment-lined sheet and allow them to thaw and proof at room temperature for 4-6 hours (or overnight in the fridge) before baking as directed.
Enjoy Your Homemade Croissants! There’s immense satisfaction in baking these delightful pastries from scratch. If you give this easy homemade croissants recipe a try, don’t hesitate to share your creations! Snap a photo and tag me on Twitter or Instagram!


Print Recipe
Pin Recipe
Yield: 8 croissants
Easy Homemade Croissants
These non-traditional yet easy homemade croissants are just as delicious and surpass any croissant that you would unroll from a can and bake. If you can make biscuits and roll out pie dough, then you definitely can make these beauties. Buttery and flaky and beautifully golden brown — I’ve never met anyone who doesn’t love croissants.
Prep Time: 20 mins
Cook Time: 12 mins
Additional Time: 3 hrs 28 mins
Total Time: 4 hrs
Ingredients
- 1/2 cup milk
- 3 tablespoons sugar
- 2 teaspoons active dry yeast
- 1½ cups bread flour, plus more for rolling
- 3/4 teaspoon kosher salt
- 14 tablespoons cold unsalted butter
- 1 tablespoon heavy cream, or whole milk
- 1 beaten egg yolk
Instructions
- Heat the milk until warm (105-115°F / 40-46°C). Remove from heat, stir in sugar until dissolved, then add active dry yeast. Set aside to proof and cool completely to room temperature.
- Meanwhile, combine bread flour and kosher salt in a large bowl. Add the ice-cold butter (sliced or cubed) to the flour mixture. Use a pastry blender to cut the butter into the flour until it resembles large pea-sized pieces.
- Pour the cooled yeast/milk mixture into the flour and butter mixture. Stir gently until a shaggy dough forms. Avoid overmixing. Wrap the dough tightly in plastic wrap and freeze for 30 to 40 minutes.
- On a lightly floured surface, with a floured rolling pin, roll the chilled dough into a large rectangle. Fold the shorter sides towards the middle until they meet, then gently roll to lengthen slightly. Fold the (new) shorter sides towards the middle, then flip the dough seam-side down. Repeat this rolling and folding process 3 to 4 more times total, dusting your surface and rolling pin as needed. If the butter softens and sticks, wrap the dough and chill in the freezer for 15 minutes before continuing. After the final fold, wrap the dough tightly in plastic wrap and refrigerate for 4 hours or, preferably, overnight to relax.
- Once the dough has chilled overnight, roll it out on a lightly floured surface into a 10×16 inch rectangle. Trim any rough edges. Cut the rectangle into 8 triangles. Make a small incision at the base (wide end) of each triangle.
- Starting at the wide end, loosely roll each triangle towards its narrow point to form a croissant shape. Place the rolled croissants on a parchment-lined baking sheet, tucking the tip underneath to secure. Ensure they are spaced a few inches apart. Loosely cover with plastic wrap and let rise in a warm, draft-free place for 2 to 3 hours, until visibly puffed.
- Preheat oven to 425℉ (220℃).
- Prepare the egg wash by whisking the beaten egg yolk with 1 tablespoon of whole milk or heavy cream. Gently brush the tops and sides of the risen croissants with the egg wash.
- Bake at 425℉ (220℃) for 10 minutes. Then, reduce the oven temperature to 375°F (190℃) and continue to bake for another 4 to 6 minutes, rotating the pan halfway through for even browning. Bake until the croissants are a rich, deep golden brown.
Notes
Nutrition Disclaimer: All information presented on this site is intended for informational purposes only. I am not a certified nutritionist, and any nutritional information shared on SimplyScratch.com should only be used as a general guideline.
This recipe adapted from Supergolden Bakes
Serving: 1g, Calories: 311kcal, Carbohydrates: 24g, Protein: 5g, Fat: 22g, Saturated Fat: 14g, Polyunsaturated Fat: 1g, Monounsaturated Fat: 6g, Trans Fat: 1g, Cholesterol: 77mg, Sodium: 20mg, Potassium: 87mg, Fiber: 1g, Sugar: 5g, Vitamin A: 695IU, Vitamin C: 1mg, Calcium: 32mg, Iron: 1mg
Author: Laurie McNamara
Course: Breads & Baked Goods
Cuisine: American, French