
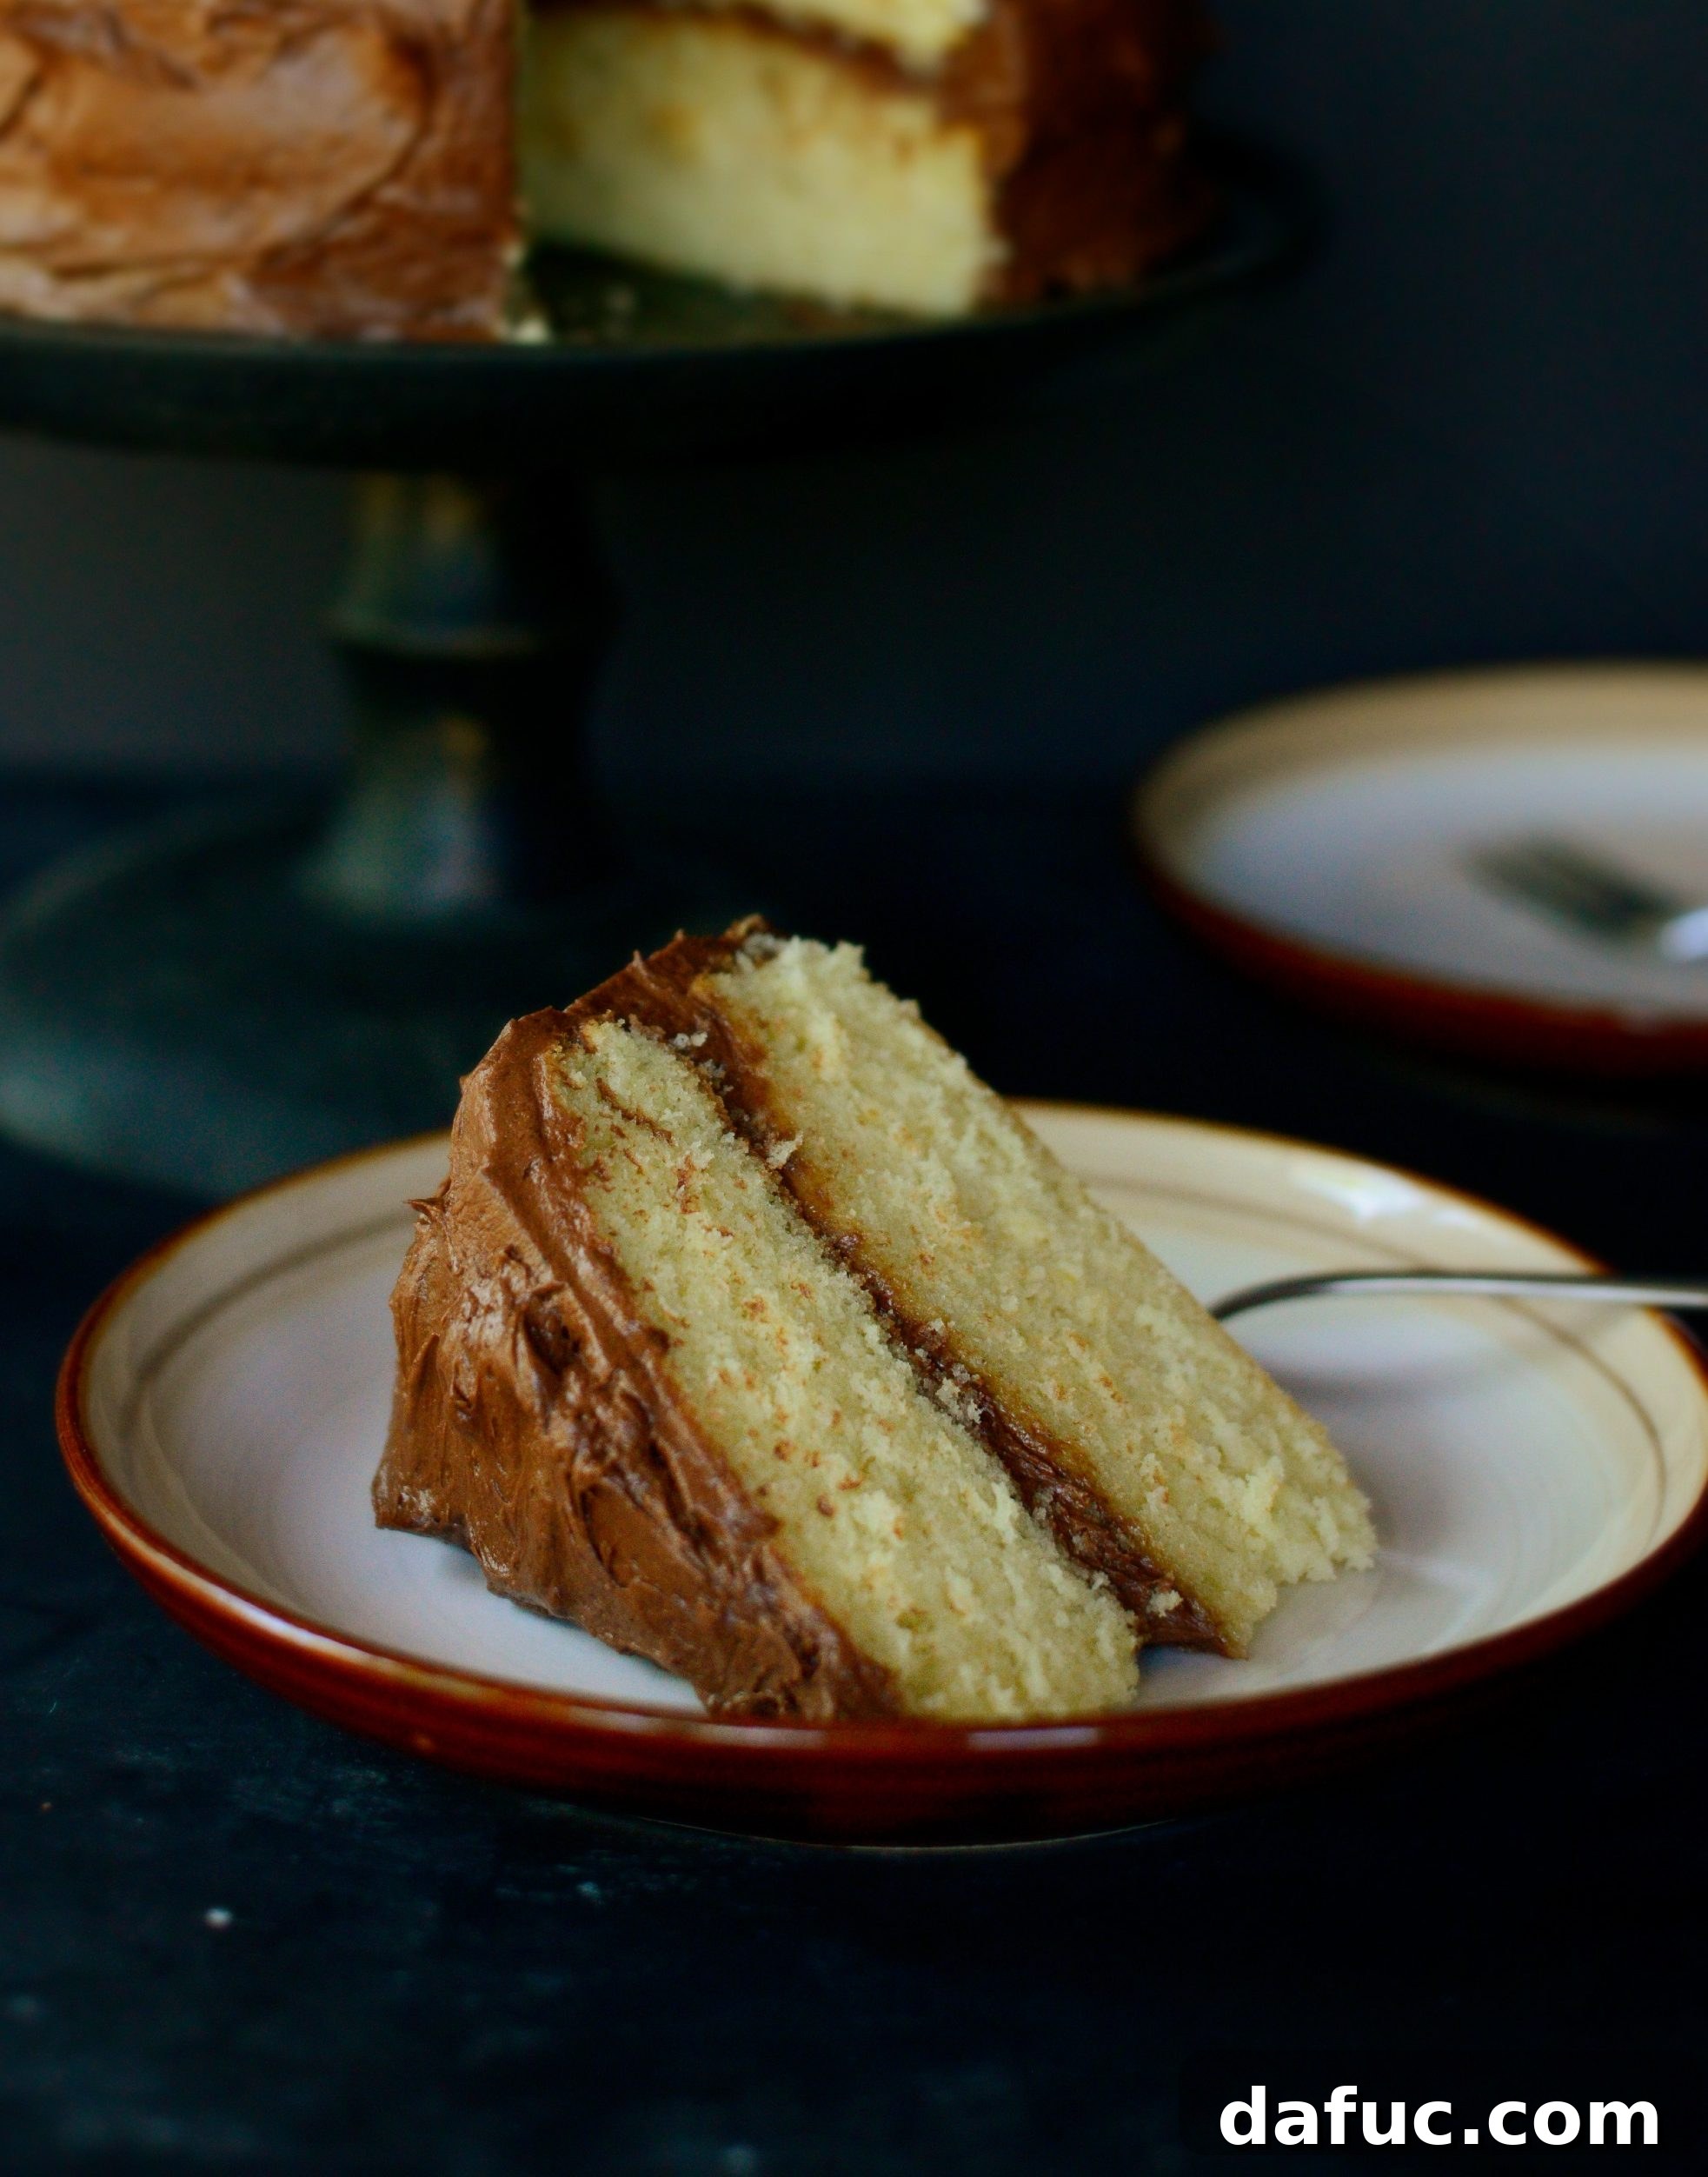
There’s something truly special about a classic homemade yellow cake. Perfectly moist, wonderfully fluffy, and brimming with a comforting flavor, it’s the ideal dessert for any celebration – big or small. This particular recipe for a buttery yellow cake, paired with a luscious whipped chocolate frosting, is a timeless combination that will surely become a family favorite. It’s the kind of cake that evokes fond memories and creates new ones, whether for a birthday bash or simply to brighten an ordinary day.
The Quintessential Pairing: Yellow Cake and Chocolate Frosting
Some culinary duos are simply meant to be. Strawberries and cream, peanut butter and jelly, and without a doubt, a rich yellow cake harmoniously embraced by decadent chocolate frosting. This iconic pairing is more than just a dessert; it’s a comforting classic that brings smiles and a touch of sweetness to any occasion. The light, airy crumb of a perfect yellow cake acts as the ideal canvas for a fluffy, intensely chocolatey frosting, creating a symphony of textures and flavors that’s hard to resist.
A Sweet Celebration: Our New Boat Adventure
While baking elaborate cakes isn’t an everyday occurrence for me, some moments truly call for a grand celebration. Today is one such occasion, marked by an exciting new addition to our family life. For the past three years, we’ve enjoyed the serene beauty of living on a canal with direct access to our lake, yet we’ve longed for a proper boat to fully embrace the water. My husband Pat has a fishing boat, but it comfortably seats only two, leaving our kids, family, and friends sidelined during those beautiful summer days. We’ve watched with a mix of wistfulness and good-natured envy as neighbors glided by on their pontoons, laughter echoing across the water, drinks in hand, and smiles all around. We knew we couldn’t endure another summer without joining them.
So, this year, we made it happen! Our new pontoon boat was delivered just this morning, bringing with it the promise of countless sunny days and memorable outings. Although the initial launch was a brisk affair, with a chilly 47-degree start to the day, our short maiden voyage was still incredibly sweet. I have high hopes for many warm, sunny days ahead, filled with adventures, relaxation, and cherished moments on the water. This new chapter deserved a celebration, and what better way to mark such a joyful milestone than with a homemade cake?
New boat equals celebration, and celebration equals cake! It’s the perfect treat to share with loved ones as we embark on this exciting new adventure.
Crafting Perfection: Why Homemade Yellow Cake Reigns Supreme
You might wonder why I’m presenting this recipe as a homemade yellow cake, rather than simply using a box mix. The truth is, while box mixes offer convenience, nothing truly compares to the rich flavor, moist texture, and incredible satisfaction of a cake baked entirely from scratch. A homemade yellow cake offers a depth of buttery vanilla flavor and a tender crumb that simply can’t be replicated by a pre-packaged mix. It’s a labor of love, yes, but one that rewards you with an unparalleled taste experience.
To ensure clarity and avoid overwhelming you with an excessively long post (and potentially “30 bazillion photos” as I once joked!), I’ve decided to break down these delicious recipes into easily digestible segments. Today, we’re focusing on this incredibly moist and utterly scrumptious homemade yellow cake, complemented by a truly to-die-for whipped chocolate frosting. Stay tuned, because in the coming weeks, another delightful cake recipe will be heading your way. Two cakes in two weeks – can you handle this level of deliciousness?
Baking Your Dream Homemade Yellow Cake
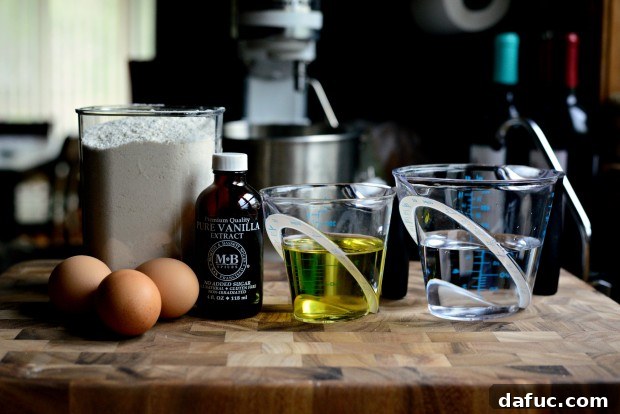
This homemade yellow cake recipe is surprisingly straightforward, yielding results that taste anything but simple. To begin, you’ll need a base of a homemade yellow cake mix (which can be prepared in advance for ultimate convenience), along with water, oil, eggs, and pure vanilla extract. Each ingredient plays a crucial role in achieving the perfect texture and flavor, so make sure to use fresh, high-quality components.
Start by adding your homemade yellow cake mix into the spacious bowl of your stand mixer. This ensures all dry ingredients are ready for a smooth integration with the wet components.
With the mixer set to a low speed, gently pour in one cup of water. Mixing on low initially helps to prevent flour from flying out of the bowl and ensures a gradual incorporation, leading to a smoother batter.
Next, introduce 2/3 cup of grapeseed oil. Grapeseed oil is a fantastic choice for baking due to its neutral flavor and high smoke point, ensuring your cake remains light and moist without any unwanted aftertastes.
Continue to mix on low speed until the water and oil are fully combined with the dry ingredients. This step ensures a homogenous base before adding the eggs. Then, incorporate the eggs one at a time, mixing thoroughly after each addition. This allows each egg to be fully integrated, contributing to the cake’s structure and richness.
Using a rubber spatula, scrape down the sides and bottom of the mixing bowl. This crucial step ensures that all ingredients are evenly distributed, preventing pockets of unmixed batter or dry ingredients that could affect the cake’s texture.
Measure and add two teaspoons of pure vanilla extract. Vanilla is a cornerstone of yellow cake flavor, enhancing its sweetness and providing a warm, aromatic note. Don’t skimp on good quality vanilla here!
Mix on low speed until the vanilla is fully combined and the batter appears smooth. Be diligent not to overmix at this stage; overmixing can develop the gluten in the flour too much, resulting in a tougher, less tender cake.
Prepare two 9-inch round cake pans by generously buttering them, lining the bottoms with parchment paper, and then lightly dusting with flour. Tap out any excess flour. This triple threat of preparation ensures your cakes won’t stick, allowing for easy removal and beautifully intact layers.
Divide the luscious batter evenly between the two prepared pans, aiming for approximately 2-1/2 cups of batter per pan. Even distribution is key for baking layers that are uniform in height and cook at the same rate.
Gently tap the filled pans on your countertop a few times. This simple action helps release any trapped air bubbles, ensuring a dense, even crumb rather than large air pockets in your baked cake. Bake them in a preheated 350°F (175°C) oven for 25 to 30 minutes, or until a wooden toothpick inserted into the center of each cake comes out clean. This indicates they are fully cooked through.
Once baked, allow the cakes to cool in their pans for about 10 minutes. This cooling period is crucial; it allows the cakes to set and firm up slightly, making them less fragile and easier to handle without breaking.
After the initial cooling, run a thin knife carefully along the edge of each cake. This helps to loosen any bits that might still be clinging to the pan, ensuring a clean release.
With your hand placed gently on top of the cake, carefully flip the pan upside down to release the cake onto a wire rack. The buttered and floured pan, along with the parchment, should make this process effortless.
Carefully peel back the parchment paper from the bottom of each cake layer. This reveals the beautifully baked, golden-yellow base of your delicious creation.
And there you have it – perfectly baked, ready-to-cool cake layers!
Place the cake layers on a wire rack and allow them to cool completely. This step is non-negotiable! Attempting to frost a warm cake will result in melted, messy frosting and a very frustrating experience. Patience here pays off in a beautifully frosted finished product.
Creating the Dreamy Whipped Chocolate Frosting
Now for the star companion: this dreamy whipped chocolate frosting. It’s light, airy, and intensely chocolatey – even I, who isn’t the biggest frosting enthusiast, absolutely adore it.
To make the frosting, begin by placing 1/2 cup (one stick) of softened unsalted butter into the bowl of your stand mixer. Make sure the butter is truly softened, not melted, as this will significantly impact the frosting’s final texture.
Mix the butter on medium speed for 2 to 3 minutes, or until it becomes light, pale, and creamy. This creaming process incorporates air, which is essential for achieving a truly whipped and fluffy frosting.
While the butter is creaming, sift together 2-1/2 cups of powdered sugar. Sifting is vital for frosting, as it removes any lumps and ensures a smooth, velvety texture without grainy bits.
Also, sift one cup of unsweetened cocoa powder. Just like with powdered sugar, cocoa powder can be clumpy, and sifting guarantees an even chocolate distribution and a silky-smooth frosting.
Combine the sifted powdered sugar and cocoa powder in a large bowl.
In a separate small bowl or measuring cup, combine 3 tablespoons of half-and-half (heavy cream or whole milk can be used as alternatives if half-and-half isn’t available), 2-1/2 tablespoons of buttermilk, and 1 teaspoon of pure vanilla extract. The buttermilk adds a slight tang that perfectly balances the sweetness of the frosting.
With the mixer still on low, gradually add a few large spoonfuls of the sifted sugar and cocoa mixture to the creamed butter.
Alternate adding the dry mixture with the liquid vanilla mixture. This gradual addition helps prevent a dusty mess and ensures all ingredients are smoothly incorporated without separating.
Continue mixing on low speed until all ingredients are just combined. At this point, the frosting will likely be thick and somewhat stiff.
Once just combined, it’s time to whip it to perfection.
Increase the mixer speed to high and whip the frosting for 4 to 5 minutes until it transforms into a light, airy, and incredibly fluffy texture. This step is what makes it “whipped” and gives it that melt-in-your-mouth quality.
Just like this – a fluffy peak, almost like a sweet, delicious cloud!
Scrape the perfected frosting into a bowl, and you’re now ready for the most satisfying part: frosting your beautiful cake!
Assembling Your Masterpiece: Frosting the Cake
With both your perfectly cooled cake layers and fluffy whipped chocolate frosting ready, it’s time to assemble your impressive dessert.
Place the first cake layer onto your cake stand. For a cleaner frosting experience, I like to tuck a few strips of parchment paper under the edges of the cake. This protects the cake stand from frosting drips and can be easily removed once you’re done. Drop a generous amount of frosting – I call it a “glob” (totally a technical term!) – onto the center of the first layer.
Using an offset spatula, gently spread the frosting from the center outwards to the edges. Aim for an even layer, letting a little bit of frosting peek out from the sides, which gives a lovely homemade aesthetic.
This slight overhang of frosting between the layers is precisely what you want – a delicious visual cue of the rich filling within!
Carefully place the second cake layer directly on top of the frosted first layer. Align it as perfectly as possible for a neat, professional-looking cake.
Dollop the remaining whipped chocolate frosting generously onto the top of the second cake layer. This is where you get to truly showcase that magnificent frosting!
Using your offset spatula, spread the frosting outwards from the center of the top, then gently work it down around the sides of the cake. Smooth it out for a polished finish, or leave it with a rustic swirl – either way, it will be absolutely delicious.
And just like that, you have a beautifully frosted, show-stopping cake!
The Perfect Bite: Taste and Texture
This light and fluffy homemade yellow cake, with its delicate, pale yellow hue, gets its natural color solely from the egg yolks – no artificial food coloring needed. I appreciate the authentic, au natural charm of this cake, knowing that its beauty comes from wholesome ingredients. Each bite reveals a tender crumb that melts in your mouth, carrying that unmistakable, comforting flavor of a true classic.
And let’s talk about that perfectly perfect chocolate frosting. As someone who isn’t usually the biggest fan of frosting, I can confidently say this recipe is a game-changer. It’s truly “legit.” Its whipped, airy texture and deep chocolate flavor are absolutely captivating. I like it. I like it a lot.
There’s nothing quite like indulging in a slice of genuinely delicious homemade yellow cake, especially when crowned with such an exquisite chocolate frosting. It’s a moment of pure culinary bliss.
Share Your Creations!
Enjoy every heavenly bite of this Homemade Yellow Cake with Whipped Chocolate Frosting! If you decide to bake this delightful recipe, I’d absolutely love to see your creations. Snap a photo and tag me on Twitter or Instagram! Your baking successes inspire me.
My cookbook Simply Scratch: 120 Wholesome Homemade Recipes Made Easy is now available! CLICK HERE for details and THANK YOU in advance for your support!
Print Recipe
Pin Recipe
Leave a Review »
14
servings
Homemade Yellow Cake with Whipped Chocolate Frosting
30 minutes
30 minutes
5 hours
6 hours
Ingredients
FOR THE YELLOW CAKE:
-
1
recipe
homemade yellow cake mix
-
1
cup
water -
2/3
cup
grapeseed oil -
3
large
eggs -
2
teaspoons
pure vanilla extract
FOR THE FROSTING:
-
1/2
cup
softened unsalted butter -
2½
cups
powdered sugar -
1/2
cup
unsweetened cocoa powder -
3
tablespoons
half & half,
see notes -
2½
tablespoons
buttermilk -
1
teaspoon
pure vanilla extract
Equipment
-
Wilton Performance Pans 9-Inch Round Cake Set (Set of 2)
Instructions
FOR THE CAKE:
-
Preheat your oven to 350°F (175°C). Generously grease two 9-inch cake pans with butter and dust with flour, tapping out any excess flour.
-
In the bowl of your stand mixer, add the homemade cake mix. With the mixer on low speed, pour in the water and oil, mixing until fully incorporated. Add one egg at a time, mixing well after each egg addition. Scrape down the sides and bottom of the bowl with a spatula before adding in the vanilla extract, then mix on low until just combined. Be careful not to overmix.
-
Divide the batter evenly between the two pans (approximately 2-1/2 cups per cake pan). Gently tap the pans on the counter to release any air bubbles, then slide them into your preheated oven. Bake for 25 to 30 minutes, or until a wooden toothpick inserted into the center of each cake comes out clean.
-
Allow the cakes to cool in their pans for 10 minutes. Then, run a knife along the edge of each cake to loosen it. Place your hand on the top of each cake before slowly flipping the pans upside down to remove the cakes. Carefully peel back the parchment paper from the bottom of each cake, then gently flip the cakes right side up and place them on a wire rack to cool completely before frosting.
FOR THE FROSTING:
-
In the bowl of your stand mixer, fitted with the whisk attachment, add the softened butter and mix on medium speed until creamy (about 2 minutes).
-
In the meantime, sift together the powdered sugar and unsweetened cocoa powder into a large bowl. Sifting is important for a smooth, lump-free frosting.
-
In a small bowl, combine the half & half, buttermilk, and pure vanilla extract.
-
With the mixer on low speed, add a few large spoonfuls of the sifted cocoa mixture, alternating with small additions of the liquid mixture. Mix until just combined. Once all ingredients are incorporated, increase the speed to high and mix for 4 to 5 minutes, or until the frosting is light, fluffy, and perfectly whipped.
-
To frost, place the first cooled cake layer onto a cake stand. Scoop about 1/3 of the frosting onto the center of the cake. Using an offset spatula, spread the frosting evenly from the center to the edge, allowing a small amount to slightly overhang. Carefully place the second cake layer on top of the frosted first layer. Top with the remaining frosting, spreading it from the center outwards and down around the sides of the cake until fully covered.
Notes
Serving:
1
piece
,
Calories:
457
kcal
,
Carbohydrates:
62
g
,
Protein:
5
g
,
Fat:
22
g
,
Saturated Fat:
8
g
,
Polyunsaturated Fat:
8
g
,
Monounsaturated Fat:
5
g
,
Trans Fat:
1
g
,
Cholesterol:
67
mg
,
Sodium:
311
mg
,
Potassium:
97
mg
,
Fiber:
2
g
,
Sugar:
43
g
,
Vitamin A:
377
IU
,
Vitamin C:
1
mg
,
Calcium:
91
mg
,
Iron:
1
mg
Laurie McNamara
Desserts & Sweet Treats
American
[This post contains affiliate links.]