
How to Brown Butter: Your Ultimate Guide to Unlocking Nutty Flavor
Are you ready to elevate your cooking and baking with a simple, yet transformative ingredient? Brown butter, also known as beurre noisette, is a culinary secret that adds an incredible depth of nutty, toasted flavor to virtually any dish. It’s remarkably easy to make, turning ordinary butter into a golden elixir that can enhance everything from delicate pastries to hearty savory meals. If you’ve never experienced the magic of brown butter, prepare to be amazed. This comprehensive guide will walk you through every step, ensuring you achieve perfect, fragrant brown butter every time.
What is Brown Butter, and Why is it So Magical?
At its heart, brown butter is simply butter that has been gently cooked past its melting point, allowing the milk solids within to toast and caramelize. Regular butter is an emulsion of fat, water, and milk solids. When heated slowly, the water evaporates, and the milk solids begin to cook. This process triggers the Maillard reaction – a complex chemical reaction responsible for the browning and delicious flavor development in many foods, from seared steaks to roasted coffee beans. In butter, this reaction transforms the bland milk solids into tiny, intensely flavorful golden-brown flecks that infuse the entire butterfat with a rich, nutty aroma and taste.
The result is a deeply aromatic, golden-amber liquid with small, toasted bits at the bottom. This transformation introduces a level of complexity that plain butter simply can’t offer. It adds a warmth, a richness, and a subtle sweetness that makes it an indispensable ingredient in both sweet and savory applications. Once you taste brown butter, you’ll understand why it’s a staple in professional kitchens and beloved by home cooks alike.
The Versatility of Brown Butter in Your Kitchen
One of the most appealing aspects of brown butter is its incredible versatility. It’s not just for baking; its unique flavor profile makes it suitable for a vast array of dishes. Imagine the warm, comforting notes it adds to your morning pancakes or waffles. Think of how it can transform a simple cookie recipe into something extraordinary, lending a sophisticated depth that will have everyone asking for your secret ingredient. Brown butter is also fantastic in savory contexts. Drizzle it over roasted vegetables, use it as a base for pasta sauces, or whisk it into mashed potatoes for an unforgettable side dish. The possibilities are truly endless, and once you master this simple technique, your culinary world will expand in delicious ways.
Essential Equipment for Browning Butter
Making brown butter requires minimal equipment, most of which you likely already have in your kitchen. Here’s what you’ll need for a seamless process:
- A Light-Colored Skillet or Saucepan: This is crucial! A light-colored bottom (stainless steel is ideal) allows you to easily observe the color changes of the milk solids as they brown. Dark-colored pans can obscure the browning process, making it difficult to judge when the butter is perfectly toasted, increasing the risk of burning.
- Whisk or Heatproof Spatula: For continuous stirring, which ensures even browning and prevents burning.
- Heatproof Bowl: To transfer the browned butter immediately after it’s ready, stopping the cooking process.
- Butter: Of course! We’ll discuss types in the recipe card.
Step-by-Step Guide: How to Brown Butter Perfectly
Don’t be intimidated by the process; browning butter is surprisingly simple. With a watchful eye and a few key tips, you’ll be creating this flavorful ingredient in no time. Follow these steps for consistently perfect results.
1. Prepare Your Butter and Pan
Start with your desired amount of butter. While you can brown any quantity, it’s often easier to start with at least 1/2 stick (4 tablespoons) to prevent it from browning too quickly. Cut the butter into even-sized pieces to ensure it melts uniformly. Place the butter into your chosen light-colored skillet or saucepan. Using a light-colored pan, such as stainless steel, is key because it allows you to clearly see the milk solids changing color, helping you avoid burning them.
2. Melt the Butter Over Medium Heat
Place the skillet over medium heat. Allow the butter to melt completely. Initially, it will become a clear, golden liquid. As it melts, you’ll notice it starting to bubble and foam. This is the water content in the butter evaporating. It’s important to keep the heat at a medium setting; too high, and the butter will brown too quickly and unevenly, risking burning before you can react. Too low, and the process will take an unnecessarily long time.
3. Stir Continuously and Observe
Once the butter is fully melted and begins to foam, start stirring frequently with your whisk or spatula. Stirring helps to evenly distribute the milk solids and prevents them from sticking to the bottom of the pan and burning. As the water continues to cook off, the foaming will subside slightly, and you’ll see tiny specks forming at the bottom of the pan. These are the milk solids, and they are about to undergo their beautiful transformation.
4. Watch for Color Change and Aroma
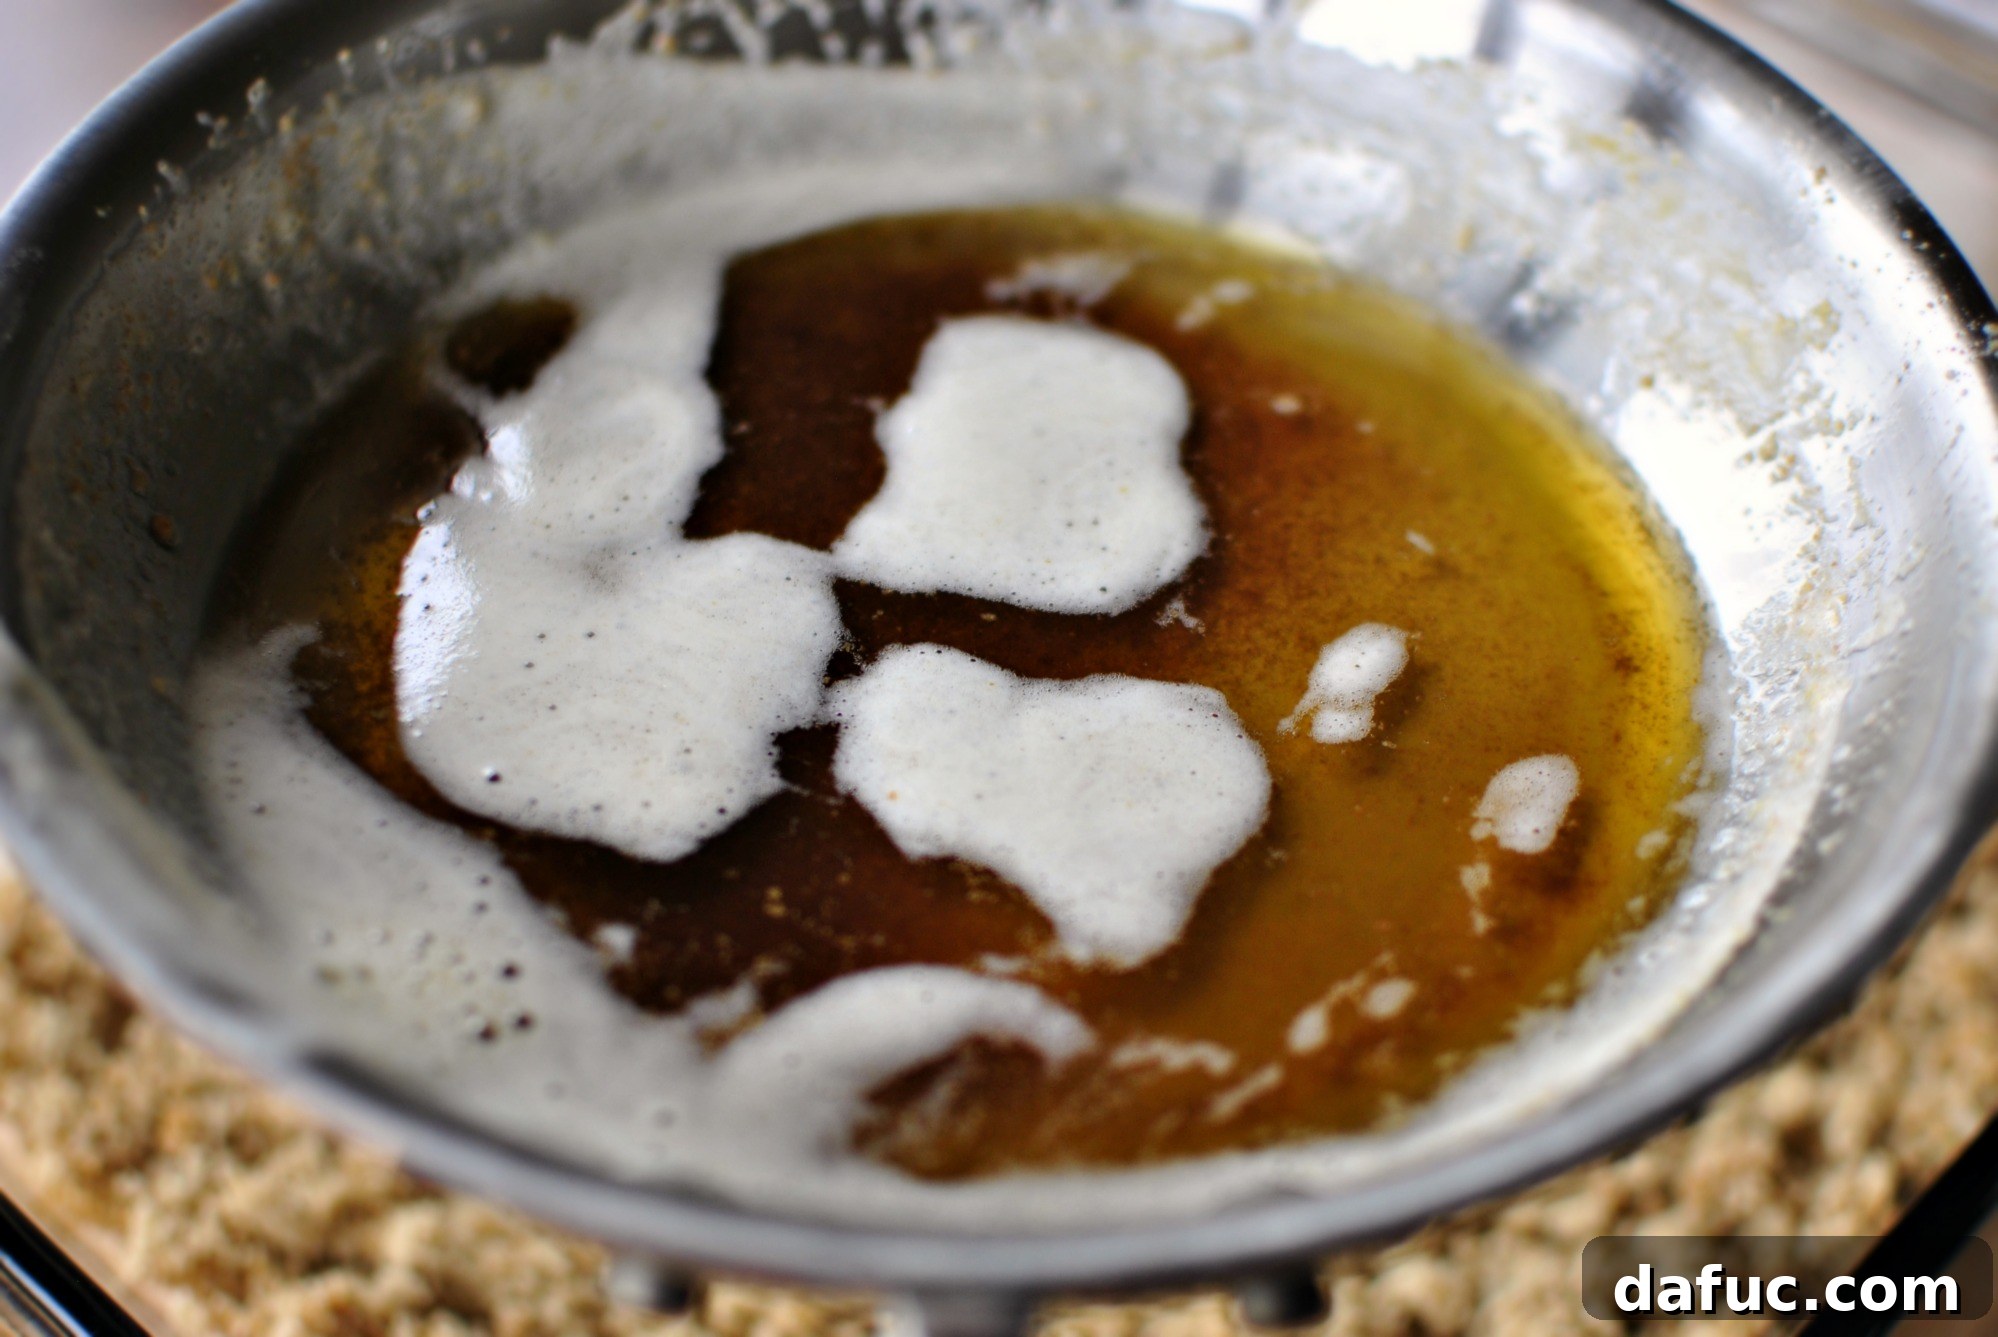
As you continue to stir, the butter will transition from yellow to a light golden, then to a beautiful amber color. Crucially, the milk solids at the bottom of the pan will turn a deep golden-brown. This is the moment you’re looking for! Along with the visual cues, your kitchen will fill with an unmistakably rich, nutty, almost caramel-like aroma. This heavenly smell is your signal that the Maillard reaction is in full swing and your brown butter is developing its signature flavor.
5. Remove from Heat Immediately
The moment those milk solids turn a deep amber or golden-brown, and you detect that irresistible nutty aroma, remove the skillet from the heat immediately. Butter can go from perfectly browned to burned in a matter of seconds. The residual heat in the pan will continue to cook the butter, so quickly transfer it to a separate heatproof bowl to stop the cooking process. Be sure to scrape all the delicious browned bits from the bottom of the pan into your bowl; these are packed with flavor!
Tips for Perfect Brown Butter Every Time
Even though it’s simple, a few expert tips can ensure your brown butter always turns out perfectly:
- Don’t Walk Away: Browning butter requires your full attention. It’s a quick process, and unattended butter can easily burn. Stay by the stove and keep an eye on it.
- Use a Light-Colored Pan: As mentioned, a light-colored bottom makes it easier to monitor the color change of the milk solids. This is perhaps the most important tip to prevent burning.
- Cut Butter Evenly: Smaller, evenly sized pieces of butter will melt at the same rate, promoting more consistent browning.
- Stir Constantly: Stirring prevents the milk solids from settling and burning on the bottom of the pan, ensuring they toast evenly.
- Trust Your Senses: The color change is important, but don’t forget the aroma! When it smells nutty and delicious, it’s ready.
- Have a Heatproof Bowl Ready: Be prepared to transfer the butter immediately. This prevents carryover cooking and ensures your brown butter doesn’t turn bitter.
- For Clarified Butter First (Optional): If you want to avoid the foam and focus purely on the browning of milk solids, you can clarify your butter first (separate the milk solids from the fat) and then brown the separated milk solids. However, for most uses, browning whole butter is perfectly fine and adds extra flavor dimensions.
Common Mistakes to Avoid
While browning butter is straightforward, a few pitfalls can lead to less-than-perfect results:
- Burning: The most common mistake. This happens when the milk solids are cooked too long, resulting in a bitter, acrid taste. It’s better to under-brown slightly than to burn.
- Not Stirring: Allowing milk solids to sit untouched on the bottom of the pan can cause them to burn quickly, leading to an unevenly flavored butter.
- Using a Dark Pan: This makes it very hard to see the subtle color changes, significantly increasing the risk of burning.
- High Heat: Rushing the process with high heat can lead to rapid evaporation of water and uneven browning, often resulting in burned spots before the rest of the butter is ready. Medium heat is your friend.
Delicious Ways to Use Your Freshly Browned Butter
Now that you’ve mastered the art of browning butter, it’s time to unleash its incredible flavor in your favorite recipes. The possibilities are truly boundless, adding a gourmet touch to both everyday meals and special occasions.
- Baking Marvels:
- Cookies: Brown butter is a game-changer for chocolate chip cookies, sugar cookies, and shortbread. It adds a caramel-like, nutty depth that plain butter can’t match. Try these Brown Butter and Peanut Butter Cookies for a truly decadent treat.
- Cakes & Muffins: Infuse your cakes, cupcakes, and muffins with its rich flavor. It pairs beautifully with apple, pear, pumpkin, and spice flavors. Don’t miss this Gingered Pear Brown Butter Upside Down Cake.
- Pancakes & Waffles: Whisk brown butter into your pancake or waffle batter for an unbelievably rich breakfast experience. These Brown Butter Pumpkin Pancakes are a must-try!
- Frostings & Glazes: Replace regular butter with browned butter in your buttercream or glazes for an added layer of sophistication.
- Savory Enhancements:
- Pasta Dishes: Brown butter with a hint of fresh sage makes an exquisite sauce for ravioli, gnocchi, or simple pasta. Explore recipes like Roasted Butternut Squash, Sausage, and Orecchiette Pasta in a Brown Butter Sage Sauce.
- Roasted Vegetables: Drizzle warm brown butter over roasted asparagus, broccoli, carrots, or squash for an incredible nutty finish. This Roasted Acorn Squash with Brown Butter Crispy Sage is a perfect example.
- Seafood: A classic pairing! Brown butter complements delicate white fish, scallops, or shrimp beautifully. Add a squeeze of lemon and a sprinkle of fresh herbs.
- Mashed Potatoes & Grains: Stir it into creamy mashed potatoes, polenta, or even rice pilaf for an extra dimension of flavor.
- Popcorn: Elevate your movie night popcorn by drizzling it with warm brown butter instead of plain melted butter.
Storing Brown Butter
Once cooled, brown butter can be stored in an airtight container in the refrigerator for up to two weeks, or even frozen for several months. It will solidify when chilled, similar to regular butter. You can gently reheat it when needed, or use it solidified in recipes that call for room-temperature butter or cold butter (just allow it to come to temperature, or grate it for baking).
Enjoy this culinary marvel! We’d love to see your brown butter creations. Snap a photo and tag us on Twitter or Instagram!
Print Recipe
Pin Recipe
Leave a Review »
Brown Butter
Ingredients
- 1 stick unsalted butter
Instructions
-
Add butter to a stainless or nonstick skillet. Using a light-colored pan is ideal as it’s easier to tell when the butter is browning.
-
Heat over medium, stirring often. It will melt, then bubble and foam as the water evaporates. Keep stirring.
-
Observe the milk solids at the bottom of the pan. Once they turn a deep golden brown and you smell a nutty aroma, remove the skillet from the heat immediately. Transfer to a heatproof bowl.