
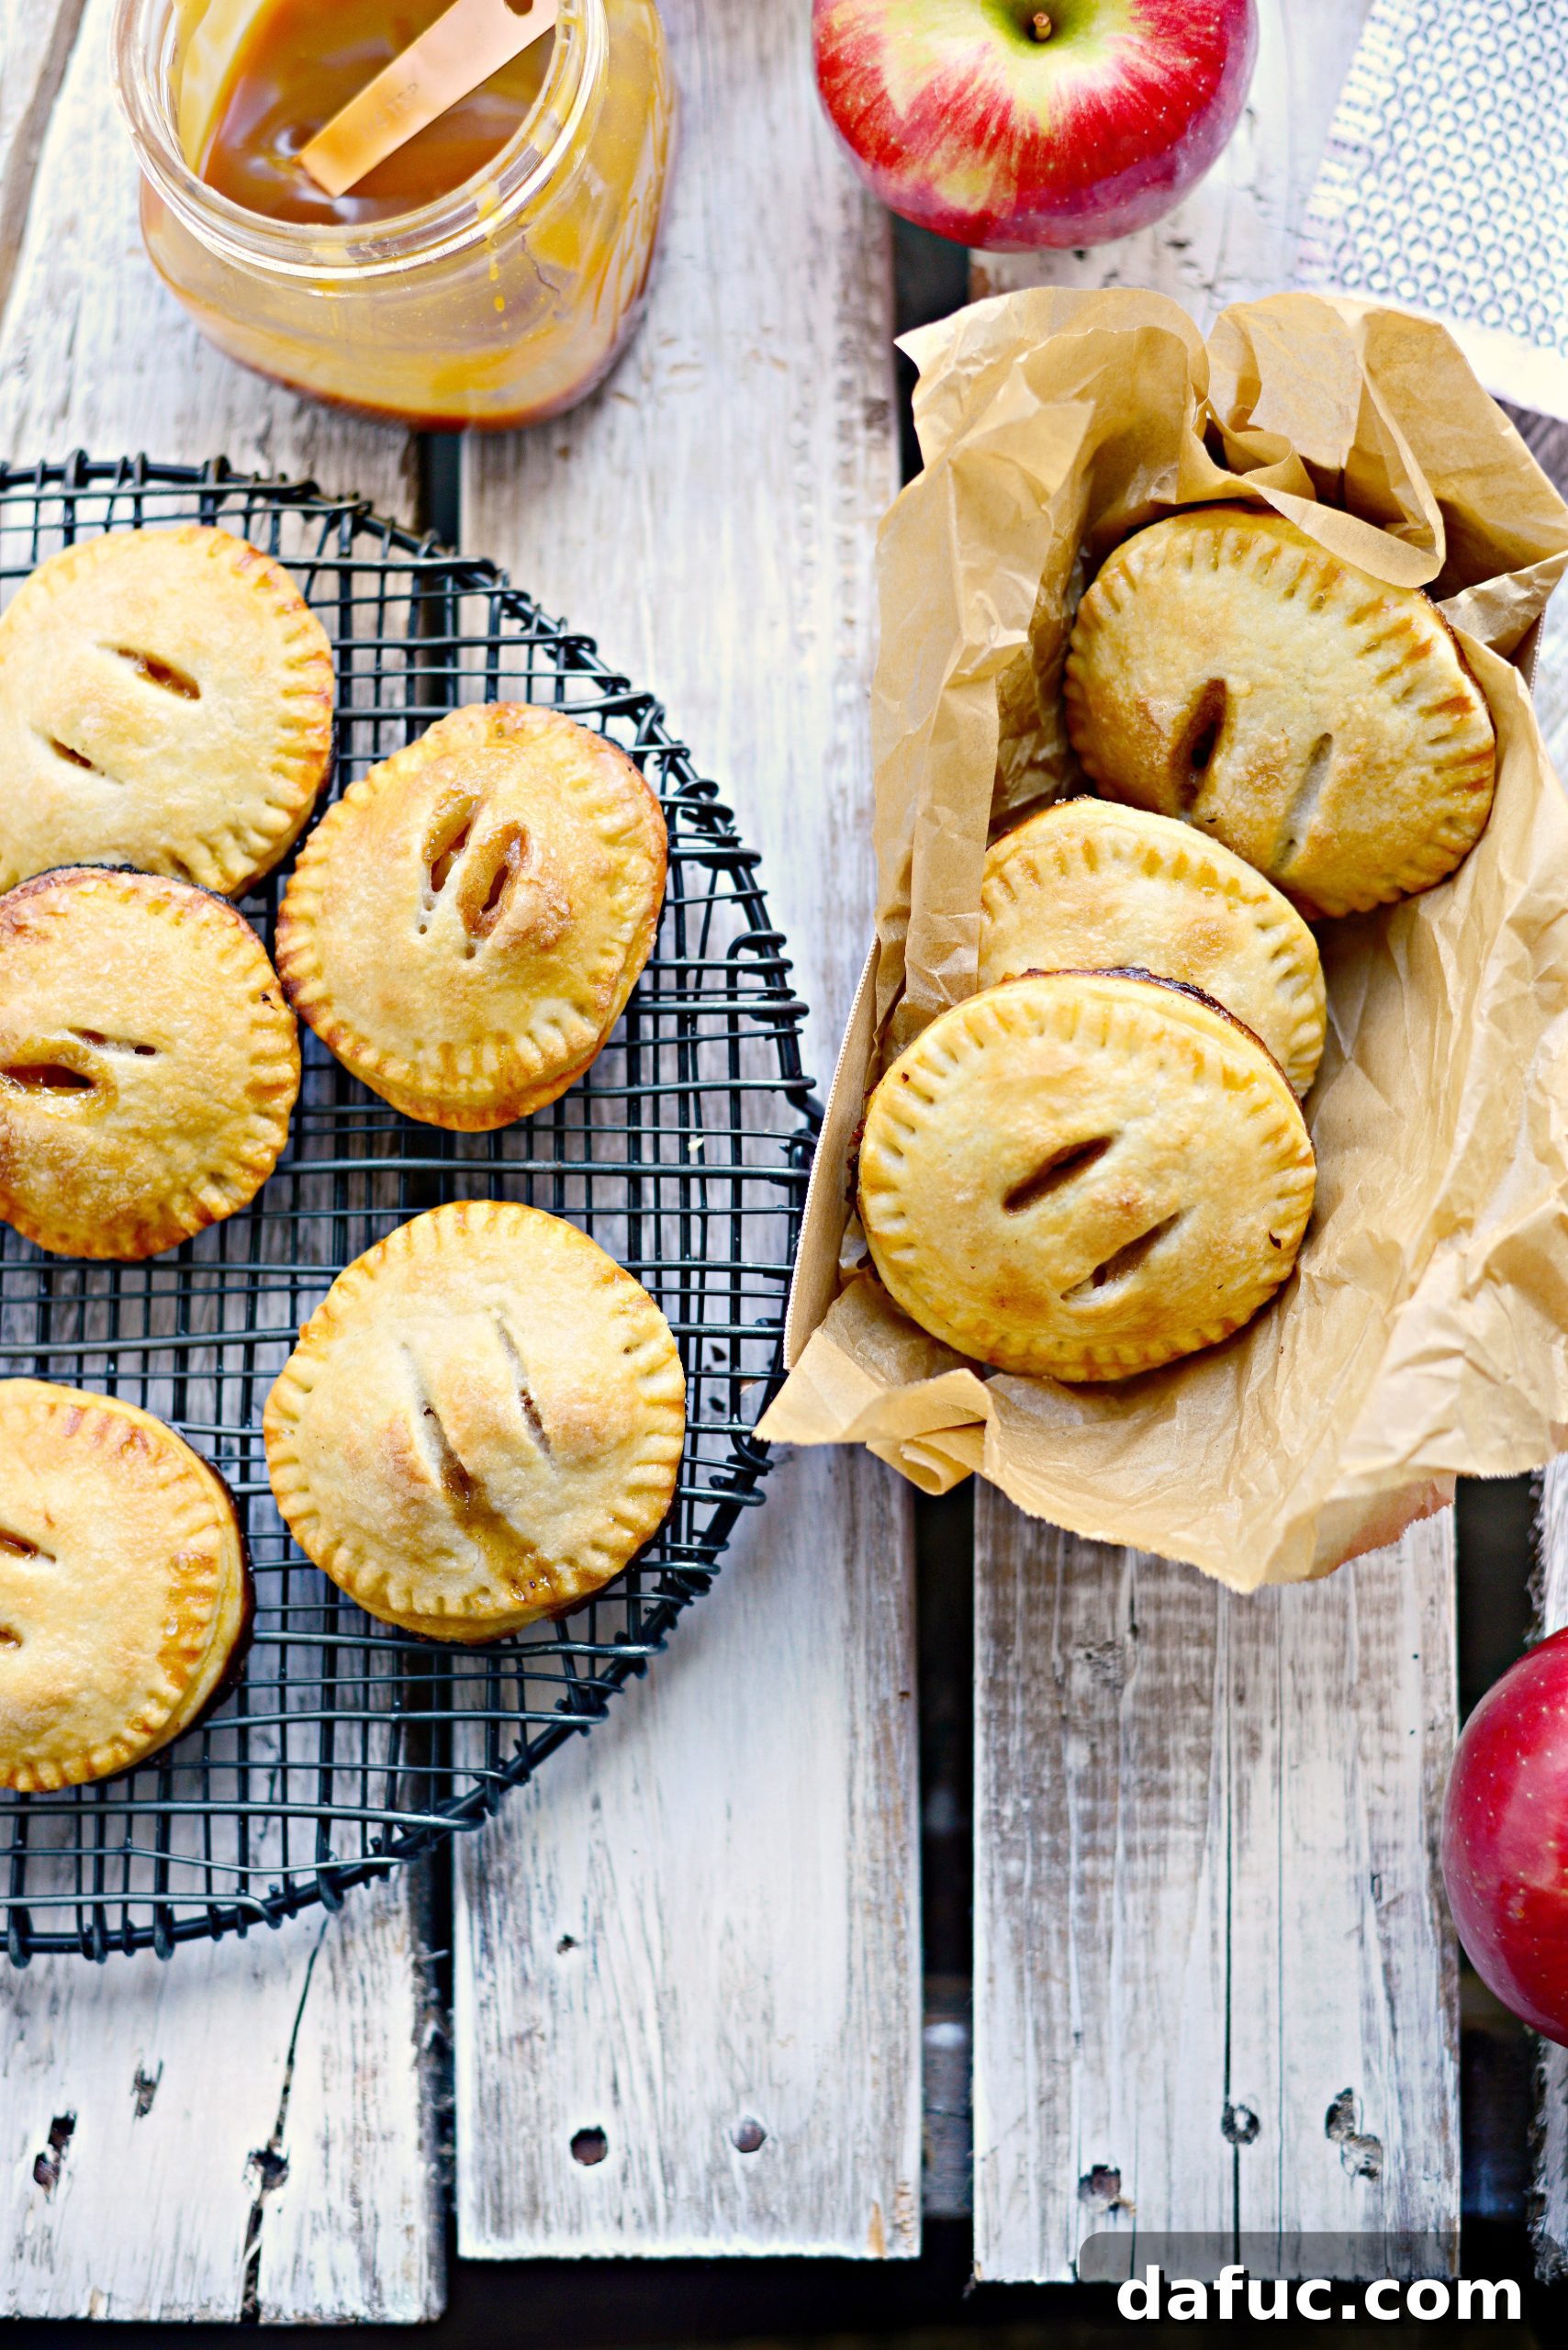
Delicious Caramel Apple Hand Pies: A Nostalgic Homemade Treat
Apple hand pies hold a deeply special place in my heart – these delightful, portable treats perfectly embody comfort and joy. There’s an undeniable magic in a personal-sized pie that requires no fork, just your eager fingers. They are miniature pockets of happiness, ideal for on-the-go snacking or a cozy moment at home, offering all the flaky, fruit-filled goodness of a traditional pie without the fuss.
A Journey Through Memory: The Origin of My Hand Pie Love
My profound fondness for hand pies stems from cherished childhood memories, particularly our visits to the local bread outlet store. For a young kid, this place was pure enchantment. First, because it constantly smelled of warm, fresh bread – a truly intoxicating aroma that greeted you at the door and hinted at a treasure trove of baked goods within. Second, and perhaps most importantly, they stocked these absolutely amazing Hostess mini hand pies. Now, if you knew anything about my childhood, you’d understand that my mom rarely bought such processed treats. Heck, I didn’t even taste my first Twinkie until sometime in my late twenties, and during my pre-teen years, my biggest sugary indulgence was grape Kool-Aid during summer visits to my cousins.
But every once in a while, my mom would surprise us. She’d treat us to one of these Hostess pies, and it was a moment of pure heaven. Without fail, I’d choose the apple flavor every single time. I’d eat it ever so slowly, meticulously making each gooey, flaky, and distinctively store-bought bite last as long as humanly possible. Those treasured moments instilled in me a deep appreciation for the simple pleasure of a personal pie, a memory I now lovingly recreate and elevate with these homemade caramel apple hand pies. They are more than just a dessert; they’re a delicious callback to those sweet, simple days, infused with the added warmth and richness that only homemade goodness can provide.
Why Caramel Apple Hand Pies? The Perfect Portable Treat
These adorable hand pies not only transport me straight back to those nostalgic childhood days but also bring with them the comforting flavors of fall, elevated with a touch of homemade caramel and a perfectly flaky crust. While they might demand a tiny bit more tender loving care and time than simply slicing into a traditional, larger pie, the reward is immeasurable. The sheer delight of watching these golden treasures emerge, bubbling and fragrant, from the oven, and then experiencing that first sweet, tangy, and tender bite, makes every moment spent in the kitchen utterly worthwhile and fulfilling.
Beyond the sentimentality, hand pies are incredibly versatile and practical for modern life. They offer all the deliciousness and warmth of a traditional apple pie but in a perfectly portioned, mess-free, and delightfully portable format. Imagine the convenience and joy of packing them in lunchboxes for a delightful midday treat, bringing them to picnics or potlucks, or simply enjoying one with a steaming cup of coffee or tea without the fuss of slicing, serving, and plates. They are an impressive yet approachable dessert that feels incredibly personal and thoughtful, making them perfect for sharing with loved ones or savoring all to yourself whenever a craving strikes.
Choosing Your Apples: The Foundation of Flavor
For this particular recipe, I must confess my unwavering loyalty to Honeycrisp apples – a choice that might surprise some, given their premium price, but one I wholeheartedly stand by for their exceptional qualities. Their superb balance of sweetness and tartness, combined with a firm, crisp flesh that remarkably holds its structure beautifully even after baking, makes them an ideal candidate for pies, crisps, and even as a simple, satisfying snack paired with almond butter. However, rest assured, you won’t need to break the bank for a mountain of them for this recipe; just two small-to-medium Honeycrisps will yield the perfect amount of filling required.
Of course, if Honeycrisp isn’t your preference or is simply not readily available in your area, fear not! There are many other fantastic apple varieties that will perform wonderfully. Granny Smith apples, for instance, offer a lovely tart counterpoint that balances sweetness beautifully. Golden Delicious apples bring a classic, mellow sweetness, while Fuji apples provide a delightful crisp texture and juicy interior. The most crucial aspect is to choose an apple variety that will soften tenderly during baking but will not turn into an unappetizing mush, ensuring that satisfying and pleasant bite in every single hand pie. Remember, for hand pies, finely dicing the apples is absolutely crucial. This ensures they cook thoroughly and evenly within the shorter baking time of a small pastry, preventing any undesirable crunchy bits where there should be tender, yielding fruit.
Crafting the Perfect Filling: Sweet, Spicy, and Just Right
First things first: the essential apple preparation. Begin by meticulously peeling, carefully coring, precisely slicing, and finally dicing your chosen apples into small, roughly pea-sized pieces. This precise and uniform dicing is utterly crucial for the success of your hand pies; for the apples to cook thoroughly and become delightfully tender within the relatively short baking time these small pastries demand, they absolutely need to be cut into consistently small pieces. Any larger chunks risk remaining too firm, which would lead to an inconsistent and less enjoyable texture in your finished pie.
You’ll need approximately a heaping cup, or about 1½ to 2 cups, of these finely diced apples.
Transfer the diced apples to a medium-sized mixing bowl. To this, add 2 teaspoons of fresh lemon juice. This essential ingredient serves multiple purposes: it not only adds a bright, zesty note that complements the apples beautifully and prevents the filling from tasting overly sweet, but it also helps prevent the apples from browning too quickly, maintaining their vibrant and appealing appearance. If you find yourself in a pinch and only have lime juice on hand, that will work perfectly fine too, offering a slightly different but equally pleasant citrusy kick.
Next, gently sprinkle in 3 tablespoons of granulated sugar. This amount is carefully measured to sweeten the apples just enough without overpowering their natural, fresh flavor, creating a harmonious and balanced profile that is truly irresistible.
Now, add 1 tablespoon of unbleached all-purpose flour. This is a vital ingredient for the filling’s texture; it acts as an excellent thickening agent, ensuring that the natural apple juices released during baking transform into a luscious, gooey filling rather than a watery, runny mess. It helps achieve that perfect, comforting consistency we all adore in a good apple pie.
Next, introduce 1/2 teaspoon of your favorite homemade apple pie spice. This exquisite blend of warm, aromatic spices like cinnamon, nutmeg, and cloves is truly the soul of any apple dessert, imparting that comforting, deep, and aromatic depth of flavor that makes apple pie so universally beloved and synonymous with warmth and home. If you don’t have a homemade blend, a good quality store-bought one will work just fine.
And finally, a small but significant pinch of kosher salt. Never underestimate the subtle yet powerful impact of salt in sweet baking; it doesn’t make things salty but rather serves to elevate and enhance all the other flavors, bringing out the true essence of the apples and spices, thereby creating a more complex, well-rounded, and utterly satisfying taste experience.
Once all the ingredients are in the bowl, toss and stir them thoroughly and gently until the diced apples are evenly coated with the sugar, flour, and spices. This ensures every bite will be bursting with flavor. Then, set this fragrant and enticing mixture aside for a moment, allowing the flavors to meld and the apples to begin releasing some of their natural juices while you prepare the delicate pie dough.
The Art of the Pie Crust: Flaky Perfection
Before you even begin rolling out the dough, take a moment to prepare your essential egg wash and the sparkling sugar topping. Crack one large egg into a small bowl, add precisely one tablespoon of water, and beat them together vigorously with a fork until they are perfectly combined and smooth. This concoction is your “egg wash” – a magical mixture that will give your baked hand pies a stunning, glossy, golden sheen and act as an effective sealant for the edges. Next, grab another shallow dish and pour in a little ultra-fine sugar (often called caster sugar). Regular granulated sugar or turbinado sugar (for a coarser, sparkling finish) also works wonderfully; the choice depends entirely on the texture and sparkle you prefer for your finished pies. Set these two crucial dishes aside, as they will be indispensable for the final, beautiful touches just before baking.
Now, it’s time to focus on the star of the show: the pie dough. Whether you’re using your cherished, tried-and-true homemade pie dough recipe or opting for the convenience of a high-quality store-bought variety, ensure it is thoroughly chilled. Chilled dough is far easier to work with, prevents sticking, and contributes significantly to a crisp, tender, and flaky texture in the finished product. On a lightly floured surface, carefully roll out the dough into a large, even rectangle, aiming for a consistent thickness of about 1/8 of an inch. While precision is certainly a virtue, don’t stress too much; eyeballing it generally works just fine! Using a 3-inch biscuit or cookie cutter, meticulously stamp out an even number of dough rounds. From a standard batch of dough, you should expect to get around 14 to 16 rounds on your initial pass. Gather any leftover dough scraps, gently form them into a cohesive ball (avoid overworking the dough), wrap them snugly in plastic wrap, and place them back in the fridge to chill again before re-rolling for additional pies.
Assembling Your Hand Pies: A Simple Pleasure
Once your beautifully cut dough rounds are ready, carefully place half of them onto a large baking sheet that has been meticulously lined with parchment paper or a silicone baking mat. This crucial step ensures easy cleanup later and, more importantly, prevents your precious hand pies from sticking to the pan during baking, allowing for perfect removal.
Now for the delicious heart of the pie: the filling! Spoon a generous, heaping tablespoon of your prepared apple mixture directly onto the absolute center of each dough round. It’s important to be mindful here; try to leave any excess liquid that may have accumulated from the apples in the bowl, as too much moisture can potentially make your pie crusts soggy and less flaky. Precision here helps achieve the perfect, well-balanced apple-to-crust ratio, ensuring every bite is a delight.
Next, for that irresistible caramel apple twist, drizzle a quarter to half a teaspoon of your delectable homemade caramel sauce directly over the spiced apples. It’s absolutely essential that the caramel is cold or at least at room temperature, not warm, as warm caramel will be too thin and could easily seep out during baking, creating a sticky and potentially messy situation. This sweet, rich addition perfectly complements the spiced apples, creating that signature caramel apple flavor we all know and adore.
Using a clean pastry brush, lightly and evenly brush the very edges of each dough round with your prepared egg wash. This acts as a delicious, edible glue, playing a crucial role in ensuring the top and bottom crusts adhere firmly and securely together. This adherence is key to preventing any unsightly leaks of the precious filling during the baking process, keeping all that goodness locked inside.
Very gently, take the remaining pie dough rounds and stretch them just a smidgen – a slight stretch helps them better cover the mound of filling without tearing. Then, carefully drape them over the apple and caramel filling, aligning the edges as best as you possibly can with the bottom rounds. Work with a delicate touch to maintain the integrity of the dough.
To seal the pies securely and add a beautiful, classic decorative touch, take the tines of a fork and use them to firmly crimp the edges all around each hand pie. This creates a charming, rustic pattern while simultaneously ensuring that the filling remains perfectly encapsulated within the flaky crust, ready for its transformation in the oven.
Once the edges are beautifully crimped, take your pastry brush and generously brush the tops and sides of each hand pie with a bit more of that glorious egg wash. This extra coat will contribute significantly to that irresistible golden-brown color and slightly crisp, inviting texture, making your pies look just as incredibly good as they taste when they emerge from the oven.
Baking to Golden Perfection
Now for the final, crucial preparations before baking your delectable hand pies. Take a sharp knife and carefully make two small slits on the top of each hand pie. These aren’t merely for aesthetics; they serve a vital functional purpose as essential steam vents, allowing excess moisture and steam to escape from the filling during the baking process. This crucial step prevents the pies from bursting open unattractively and, more importantly, ensures that the apple filling cooks evenly and becomes wonderfully tender without making the surrounding crust soggy. After creating these vents, generously sprinkle a good amount of your chosen sugar (whether ultra-fine, regular granulated, or turbinado for extra sparkle) over the tops of each pie. This adds a delightful crunch, extra sweetness, and a beautiful caramelized finish to the crust.
Carefully slide your baking sheet, laden with these soon-to-be golden delights, into your preheated 425°F (220°C) oven. Bake the hand pies for approximately 15 to 17 minutes, or until they achieve a truly beautiful, deep golden-brown hue. Remember to rotate the baking pan halfway through the baking time to ensure even browning across all the pies. You’ll know they’re perfectly baked when the crust is visibly flaky and golden, and you can see the delicious caramel apple filling bubbling gently through the small air slits – a clear and satisfying sign of tender apples and rich, warm caramel inside, signaling they’re ready to be devoured.
Like so, perfectly baked and glistening with sugar – an inviting sight that promises pure deliciousness.
Serving and Savoring: A Moment of Bliss
Once baked to golden perfection, immediately transfer these steamy pockets of apple caramel bliss to a wire rack. While the temptation to dive in instantly is incredibly strong (and honestly, who could blame you when they smell this good?), allowing them to cool just a smidge is absolutely crucial. This brief cooling period is vital; it helps the molten caramel and apple filling to set slightly, preventing any potential burns to your tongue and ensuring the filling maintains its perfect, gooey, and cohesive texture when you finally take that first glorious bite. Because let’s face it, I certainly won’t be waiting long to sink my teeth into these flaky, gooey, and wonderfully apple-y pies! They are simply irresistible when enjoyed warm, allowing the flavors to truly sing.
Beyond being an incredible standalone treat, these hand pies are also fantastically practical for packing. Their sturdy, portable, and self-contained nature makes them ideal for tucking into cute containers, perfect for school lunches, office snacks, or even as a delightful and easy-to-manage addition to a picnic basket. They represent a thoughtful, homemade alternative to store-bought sweets, guaranteed to bring a genuine smile and a moment of pure enjoyment to anyone who is lucky enough to receive one.
Creative Variations & Tips for Perfect Hand Pies
While this caramel apple hand pie recipe is undoubtedly a tried-and-true classic, a comforting favorite that never disappoints, don’t hesitate for a moment to unleash your inner pastry chef and explore your culinary creativity! The inherent beauty and widespread appeal of hand pies truly lies in their incredible versatility. Consider swapping out the apples for other seasonal fruits to create delightful variations; ripe peaches, sweet cherries, or a vibrant mixed berry medley can all lead to wonderfully different yet equally delicious flavor profiles. For an authentic autumn twist beyond apples, a warm and inviting pumpkin spice filling can be incredibly comforting, or for the holiday season, a tangy cranberry filling would be a festive and welcome change. You can also experiment endlessly with different toppings – a simple lemon glaze drizzled post-baking, a dusting of aromatic cinnamon sugar, or even a sprinkle of finely chopped pecans added before baking can significantly elevate the texture and visual appeal of your hand pies. To add another layer of complex flavor, try incorporating a hint of fresh orange zest into your apple filling or a tiny dash of bourbon for a more sophisticated, adult-friendly touch. For those who enjoy a little extra crunch, a tablespoon of chopped walnuts or almonds mixed into the apple filling before sealing can add a delightful textural contrast that enhances every bite.
If you’re planning to make these for a larger gathering or simply wish to prepare some delightful treats ahead of time, you’ll be pleased to know that hand pies freeze beautifully. Once assembled but crucially before baking, arrange them in a single layer on a baking sheet and freeze until they are completely solid. Then, transfer them to a freezer-safe bag or airtight container, where they will keep perfectly for up to 3 months. When you’re ready to enjoy them, simply pop the frozen pies directly into a preheated oven (there’s no need to thaw!), adding a few extra minutes to the baking time until they are beautifully golden, flaky, and the filling is visibly bubbling through the vents. This makes them an incredibly convenient and delicious homemade treat that you can have always at your fingertips, ready to impress or simply to satisfy a sweet craving at a moment’s notice.

Print Recipe
Pin Recipe
Leave a Review »
Caramel Apple Hand Pies
Ingredients
Filling:
- 1½ to 2 cups peeled and diced small apples, golden delicious, granny smith, fuji, or honeycrisp
- 2 teaspoons lemon juice (or lime juice)
- 3 tablespoons granulated sugar
- 1 tablespoon unbleached all-purpose flour
- 1/2 teaspoon apple pie spice (homemade or store-bought blend)
- 1 pinch kosher salt
- 1 homemade pie crust (or 2 store-bought pie crusts)
- Caramel Sauce (cold or room temperature)
- 1 large egg , beaten with 1 tablespoon water for egg wash
- 2-3 tablespoons ultra-fine sugar (or regular granulated/turbinado sugar for sprinkling)
Instructions
-
Preheat your oven to 425°F (220°C). Line two large baking sheets with parchment paper or a silicone baking mat to prevent sticking.
-
In a medium bowl, combine the finely diced apples, lemon juice, granulated sugar, all-purpose flour, apple pie spice, and a pinch of kosher salt. Toss gently until the apples are evenly coated with the mixture. Set the bowl aside.
-
On a lightly floured surface, roll out the pie dough into a large rectangle, aiming for a consistent thickness of about 1/8 of an inch. Using a 3-inch biscuit or cookie cutter, stamp out an even amount of dough rounds (typically yielding 14 to 16 rounds). Gather any extra dough scraps into a ball, wrap them securely in plastic wrap, and place back into the fridge to chill thoroughly.
-
Place half of the prepared dough rounds on one of the lined baking sheets. Spoon a generous, heaping tablespoon of the apple filling onto the center of each dough round, being careful to leave any excess liquid in the bowl. Drizzle 1/4 to 1/2 teaspoon of cold or room temperature homemade caramel sauce directly over the apples on each round.
-
In a small bowl, whisk together the large egg and 1 tablespoon of water to create your egg wash. Lightly brush the edges of the dough rounds on the baking sheet with this egg wash. Gently stretch the remaining dough rounds slightly and drape them carefully over the apple and caramel filling, aligning the edges with the bottom rounds as neatly as possible.
-
Use a fork to firmly crimp the edges of each hand pie all around, sealing them completely and creating a decorative pattern. Brush the entire tops and sides of each pie with more egg wash. Using a sharp knife, make two small slits on the top of each pie to create essential steam vents, then generously sprinkle with your chosen sugar for a sweet, crunchy topping.
-
Bake the pies for 15 to 17 minutes in the preheated oven. Remember to rotate the pan halfway through the baking time to ensure even golden-brown results. The pies are done when the crust is flaky and golden, and the filling is visibly bubbling through the vents.
-
Once baked, carefully transfer the hot hand pies to a wire rack to cool slightly before serving. This allows the filling to set. Repeat the rolling and baking process with any remaining chilled dough and apple filling to make additional pies (you should be able to make up to 6 or 8 more).