
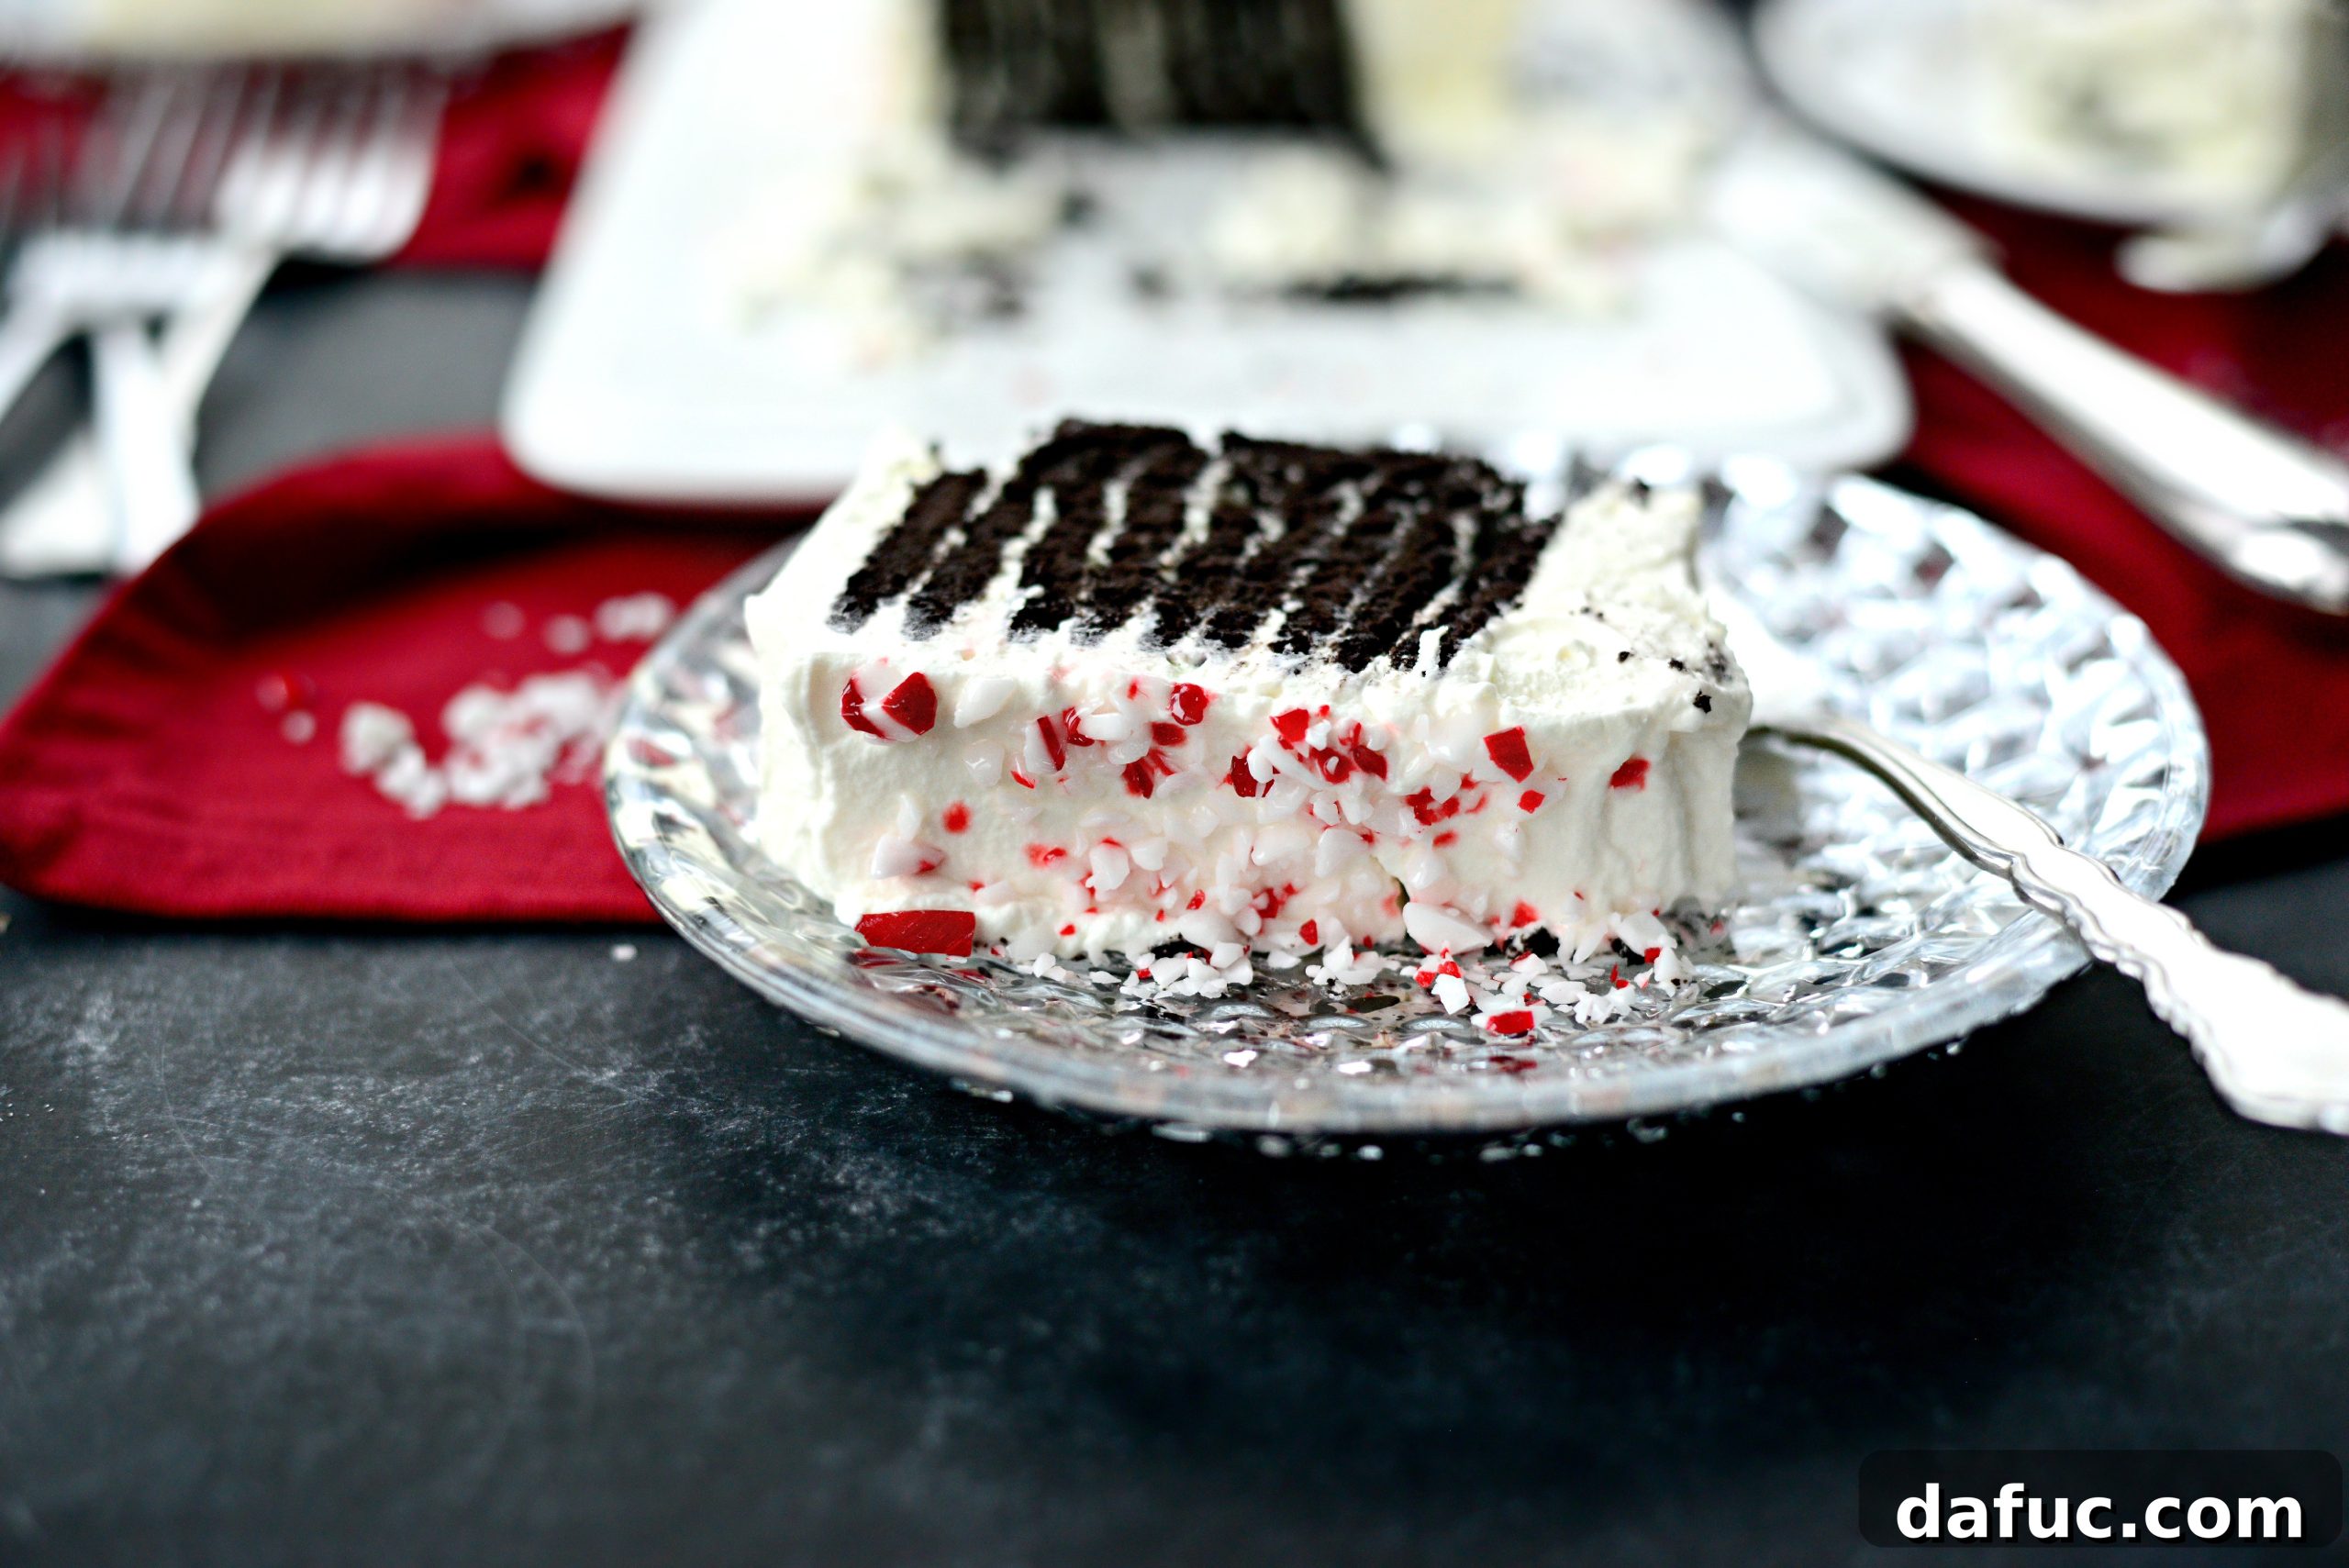
Welcome to the world of effortless elegance with our Peppermint Icebox Cake! This stunning dessert is a true holiday marvel, combining rich chocolate cookies with layers of light, airy peppermint whipped cream. It’s then lined up, frosted, and chilled to perfection, creating a festive treat that looks impressive but is incredibly simple to make. Perfect for busy holiday seasons or any time you crave a touch of minty chocolate bliss, this no-bake wonder promises a decadent experience with minimal fuss. Prepare to delight your taste buds and impress your guests with this beautifully layered, refreshingly cool cake.
Indulge in a Chocolatey, Minty Dream
There’s something truly irresistible about the combination of chocolate and peppermint, especially during the colder months. This Peppermint Icebox Cake takes that beloved flavor duo and elevates it into a dessert that’s not just delicious, but also visually stunning. Imagine a deliciously sweet, intensely chocolatey indulgence, generously covered with billowy peppermint whipped cream and adorned with festive candy pieces. It’s a sensory delight that will have everyone reaching for an extra-thick slice.
While I often gravitate towards classic mint chocolate chip ice cream or a simple chocolate and vanilla twist with sprinkles, this icebox cake is a revelation. It effortlessly converts even the most hesitant mint-chocolate skeptics (yes, like me!) into ardent fans. My husband, a self-proclaimed cookies and cream enthusiast, was absolutely smitten, and frankly, my entire family devoured this cake within two days. The secret? Its perfect balance of textures and flavors: the soft, yielding chocolate wafers that absorb the creamy goodness, the cool, refreshing peppermint, and the delightful crunch of candy pieces. This is more than just a dessert; it’s a holiday experience waiting to happen, a testament to how simple ingredients can create extraordinary magic.
The Ultimate Holiday Dessert: A Sweet Surprise for Santa
When the holidays roll around, finding a dessert that is both crowd-pleasing and easy to prepare can be a challenge. Look no further! This Peppermint Icebox Cake is the ideal candidate for your festive spread. It’s the kind of show-stopping sweet that beckons attention without demanding hours in the kitchen. Imagine surprising Santa with a slice of this delectable cake instead of the usual cookies and milk – a thoughtful upgrade, don’t you think? Its vibrant colors and refreshing peppermint flavor make it inherently festive, perfectly complementing the joyful atmosphere of the season. Whether it’s for a family gathering, a festive party, or a cozy night in, this cake guarantees smiles and satisfied cravings, making it a new holiday tradition in the making.
The Art of the No-Bake Icebox Cake: Simplicity Meets Perfection
The beauty of an icebox cake lies in its inherent simplicity. It’s a no-bake marvel, a dessert that relies on the magic of chilling rather than oven heat. This is precisely why it’s a favorite among home bakers and dessert lovers alike – minimal effort, maximum deliciousness. While some may debate the authenticity of a “homemade” dessert if store-bought components are used, I firmly believe that the spirit of an icebox cake embraces convenience. In this case, opting for ready-made chocolate wafers is not just acceptable; it’s practically encouraged! It allows us to focus our creative energy on crafting the star of the show: the exquisite homemade peppermint whipped cream. This delightful cream is what transforms simple cookies into a cohesive, melt-in-your-mouth cake. So, yes, making the whipped cream absolutely counts towards the “homemade” charm of this incredibly easy and delicious dessert!
Crafting Your Peppermint Icebox Cake: A Step-by-Step Guide
Creating this Peppermint Icebox Cake is a delightful process that requires very little technical skill, making it perfect for novice bakers and seasoned dessert enthusiasts alike. The key is in the layering and the patience of chilling, allowing the flavors to meld beautifully and the cookies to soften into a cake-like texture. Here’s how you can assemble this festive masterpiece:
Step 1: Prepare Your Peppermint Whipped Cream
The heart of this icebox cake is its luscious peppermint whipped cream. Ensure your cream is well-chilled before whipping to achieve maximum volume and stability. Once whipped to soft peaks, gently fold in a touch of peppermint extract – start with a small amount and taste as you go to get your desired level of mintiness. You can find my detailed recipe for homemade peppermint whipped cream here.
Step 2: Assemble the Cookie Stacks
Lay out your chocolate wafer cookies. For each cookie, add a generous teaspoon-sized dollop of the homemade peppermint whipped cream onto its underneath side. This small but crucial step ensures that each layer is infused with flavor and helps the cookies adhere to one another. Carefully take another cookie and stack it on top, gently pressing it down to spread the cream. Continue this process, building stacks of 8 to 10 cookies each. Aim for consistency in your stacks for an even final cake structure. For a standard loaf-shaped cake, creating four such stacks works best.
Spread the whipped cream evenly between layers.
Stack them up carefully, forming tall towers of deliciousness.
A gentle touch is key here! Chocolate wafers can be delicate, so apply just enough pressure to spread the cream without breaking the cookies. If a few happen to break, don’t worry – they’ll still be delicious when assembled!
Step 3: Arrange and Frost the Cake
Once you have your four stacks of cookies, carefully arrange them lengthwise, side-by-side, on a serving platter or a sturdy freezer-safe plate. This forms the base of your icebox cake. Now, take the remaining peppermint whipped cream and generously spread it over the entire cake, covering the top and sides as evenly as possible. An offset spatula works wonders for achieving a smooth, professional-looking finish.
Spread the whipped cream to coat the top and sides of the cake, ensuring every inch is covered in that minty goodness.
And just like that, the assembly is complete!
Step 4: The Chill Factor
This is where the magic truly happens. Carefully slide your assembled cake into the freezer. It needs a minimum of 2 hours to firm up. For best results, and to allow the cookies to fully soften and the flavors to deepen, I recommend freezing it overnight. After the initial 2 hours, you can drape plastic wrap loosely over the top to protect it from freezer burn. Patience is a virtue here, but the wait is absolutely worth it for that perfect icebox cake texture.
Step 5: Garnish and Serve
Right before you’re ready to serve this delightful cake, it’s time for the final touch. Sprinkle generously with crushed peppermint candies. This not only adds a beautiful festive flair but also provides a wonderful textural crunch that contrasts beautifully with the soft cake. Be sure to add them just before slicing, as the moisture from the whipped cream can cause the candies to melt over time. For slicing, a serrated knife (like a bread knife) works perfectly, cutting straight down through the chilled layers. While you could let it sit on the counter for 30-40 minutes for a slightly softer slice, my family and I prefer it straight from the freezer for a firmer, almost ice cream-like consistency. Whichever way you choose, it’s bound to be a hit!
The layers of cookies, softened by the peppermint whipped cream, become wonderfully tender, while the crushed peppermint candies add a fantastic, refreshing crunch. This delightful contrast of textures and flavors makes it not just a cake, but an experience. It’s incredibly pretty and festive, making it a perfect centerpiece for any holiday table. And the best part? It’s SO incredibly easy to make! Serve it alongside a steamy cup of hot cocoa or a warm beverage, and you’ve got the ultimate winter treat – pure perfection in every bite.
Tips for Success and Variations
- Cookie Choice: While chocolate wafer cookies are classic, feel free to experiment with other thin, crisp cookies like gingerbread thins for a different holiday twist, or even a different flavor of chocolate cookie.
- Peppermint Intensity: Adjust the amount of peppermint extract in your whipped cream to suit your preference. Start small and add more if you desire a stronger mint flavor.
- Make Ahead: This cake is an ideal make-ahead dessert! Assemble it completely (without the final candy sprinkle) and freeze it for up to a week. Just add the crushed candies right before serving.
- Serving Temperature: For a firmer, more ice cream-like slice, serve straight from the freezer. For a softer, creamier texture, let it sit at room temperature for 30-40 minutes before slicing.
- Garnish Options: Beyond crushed peppermints, consider adding chocolate shavings, a drizzle of chocolate sauce, or a few fresh mint leaves for an elegant touch.
- Individual Servings: For a fun party option, you can create individual mini icebox cakes by stacking cookies in small ramekins or glasses.
Seriously, I wasn’t kidding about those extra thick slices. It’s truly the only way to fully appreciate every layer of this magnificent dessert!
Enjoy! And if you give this Peppermint Icebox Cake recipe a try, let me know! Snap a photo and tag me on Twitter or Instagram!
Print Recipe
Pin Recipe
Leave a Review »
Peppermint Icebox Cake
Ingredients
- 9 ounces chocolate wafer cookies, (about 40 cookies)
- 1 recipe peppermint whipped cream
- 3 tablespoons crushed peppermint candy pieces
Instructions
-
Dollop a heaping teaspoon of the whipped cream in the center on the backside of a cookie, repeat with the next cookie and stack until you have the 4 stacks of 10.
-
Lay each stack lengthwise, side-by-side onto a platter and frost with the remaining whipped cream.
-
Slide the cake into the freezer for 2 hours. Drape with plastic wrap and continue to freeze until set.
-
Right before serving, sprinkle with crushed candy pieces, slice and serve.
-
For a softer slice of cake, pull it out and let it sit on the counter for 30-40 minutes before slicing.